DIY Bathroom Transformation: Custom Linen Cabinet Design
Share
With a willingness to get creative and a bit of patience, I've transformed my own bathroom into a serene retreat by designing a stunning custom linen cabinet that's as functional as it is beautiful. I started by meticulously planning every detail, ensuring my design was both aesthetically pleasing and functional. Next, I built the cabinet using IKEA components, carefully measuring and securing each piece. To enhance its form and function, I added custom fronts, drawers, and shelves, balancing design elements for a cohesive look. Now, I'm thrilled to share my process with you, and I'm sure you'll find plenty of inspiration to create your own breathtaking bathroom oasis.
Key Takeaways
• Utilize IKEA's kitchen planner to design a custom linen cabinet that fits your bathroom's unique dimensions and style.
• Combine IKEA components with custom cabinetry to create a one-of-a-kind design that enhances storage and functionality.
• Allocate a budget of approximately $2,000 for the project and select materials that balance quality, functionality, and aesthetics.
• Carefully select design elements, such as decorative hardware and high-gloss paint, to create a cohesive and stylish look.
• Double-check measurements and secure a snug fit to ensure a professional-looking installation that exceeds expectations.
Planning and Preparation Essentials
As I began my DIY bathroom transformation, I quickly realized that meticulous planning and preparation were essential to avoiding costly mistakes and ensuring a seamless execution.
I utilized IKEA's kitchen planner to design my custom linen cabinet, carefully considering the layout to maximize storage and aesthetics.
Supply ordering was a vital step, as I needed to make sure I had all the necessary materials before starting the project.
I also made a mental note of installation tips, such as measuring the ceiling height and building a sturdy frame.
Additionally, I recognized the importance of teamwork dynamics during installation, knowing that an extra pair of hands would make the process smoother and more efficient.
Building the Custom Cabinet
I rolled up my sleeves and began constructing the IKEA frame, carefully following the instructions to guarantee a sturdy base for my custom linen cabinet. This was the foundation of my DIY project, and I wanted to get it right.
As I assembled the pieces, I made sure to double-check my measurements and secure a snug fit.
Here are the key steps I took to build my custom cabinet:
-
Assembled the IKEA frame according to the manufacturer's instructions
-
Attached the cabinet to the wall securely to prevent tipping or shifting
-
Added additional support brackets for extra stability
-
Measured and marked the wall for precise attachment points
-
Used a level to make sure the cabinet was perfectly straight.
Enhancing Form and Function
Two essential elements - aesthetics and functionality - came together seamlessly as I added drawers, shelves, and custom fronts to my cabinet, transforming it into a stunning focal point in my bathroom.
The newly designed storage solutions not only provided ample space for linens and toiletries but also elevated the room's overall visual appeal. I carefully selected design elements, such as hardware and trim, to create a cohesive look that blended seamlessly with the surrounding decor.
The result was a beautiful, functional piece that exceeded my expectations. By balancing form and function, I created a space that's both beautiful and practical, making my bathroom renovation a true success.
Project Budget and Materials
With a detailed list of materials and supplies in hand, I allocated a budget of approximately $2,000 to bring my bathroom transformation vision to life. Effective budget management was vital to guarantee I stayed on track and made the most of my investment.
I carefully selected materials that balanced quality, functionality, and aesthetics. Here are some key elements that contributed to my project's success:
- Custom cabinetry with IKEA components
- Durable and water-resistant laminate countertops
- Soft-close drawers and shelves for smooth operation
- High-gloss paint for a sleek finish
- Decorative hardware for a cohesive design
The Finished Bathroom Oasis
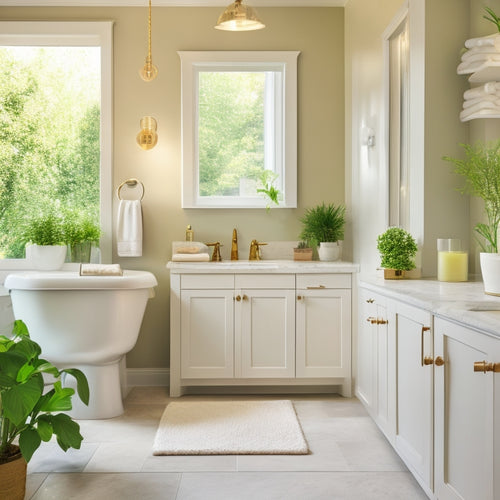
As I stepped into my newly transformed bathroom, the sleek lines and soft-close drawers of my custom cabinetry seemed to whisper a warm welcome, enveloping me in a serene ambiance that was both calming and uplifting. I felt a sense of pride and accomplishment, knowing that I'd created this tranquil oasis myself.
To maintain this peaceful atmosphere, I've implemented some styling tips, such as adding plants and soft lighting to enhance the ambiance. For organizing essentials, I've designated specific areas for toiletries and linens, keeping the countertops clutter-free.
With regular maintenance tips, like wiping down the cabinets and cleaning the mirrors, my bathroom will remain a haven of relaxation.
Frequently Asked Questions
How Do I Handle Unexpected Delays During the Renovation Process?
When unexpected delays hit, I reassess project timelines, activating contingency plans to mitigate stress and stay on track, ensuring a smooth renovation process that's both visually stunning and functional.
What Safety Precautions Should I Take When Working With Power Tools?
When working with power tools, I prioritize safety by selecting proper PPE, like goggles and gloves, and clearing my workspace of clutter and tripping hazards to establish a focused, accident-free work environment.
Can I Customize IKEA Cabinet Designs to Fit My Specific Needs?
'Imagine the perfect cabinet - I can, thanks to IKEA's design freedom! I hacked their plans to fit my needs, reveling in the thrill of customization. Cabinet hacks opened up my dream design, and I'm loving every inch of it!'
How Do I Ensure the Cabinet Is Level and Plumb During Installation?
'When installing my cabinet, I make sure it's level and plumb by using cabinet shimming to adjust the frame and a laser leveling tool to double-check the alignment, guaranteeing a flawless fit and professional finish.'
What Maintenance Is Required to Keep the New Cabinet Looking Its Best?
To keep my new cabinet looking its best, I'll regularly dust surfaces, clean mirrors, and wipe down shelves to prevent water spots, while also controlling humidity levels to prevent warping or damage.
Related Posts
-

Sleek Shower Organizers for Contemporary Homes
Sleek shower organizers are essential for a contemporary home, blending aesthetics with function. By utilizing vertic...
-

Revamp Your Bathroom Cabinets With Easy Organizing
I'm ready to breathe new life into my cluttered bathroom cabinets. First, I'll clear everything out and give them a g...
-

Revamp Your Home With Spring Cleaning Checklist
Spring's arrival presents a prime opportunity to transform your living space, shedding the remnants of winter's hiber...


