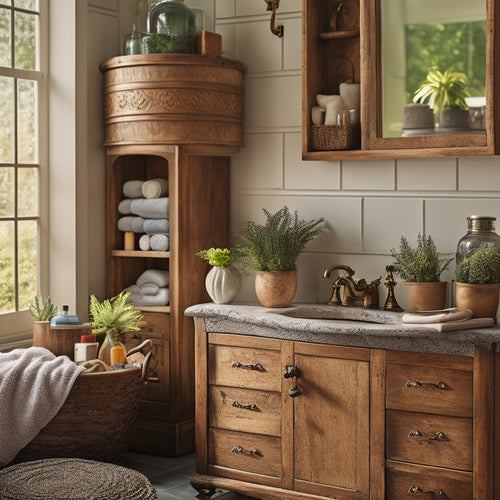
DIY Shelf Upgrade: Transform Your Bathroom Storage
Share
I'm taking the reins on my bathroom storage with a DIY shelf upgrade that will transform the entire space. To get started, I'm gathering necessary materials and tools, including Weathered Gray stain and Cypress Umber Dark Glaze for a distressed look. With a wall marking guide, I'll guarantee accurate installation and achieve a professional finish. Next, I'll build and install the shelves, cutting boards to size and securing them with proper support. Finally, I'll add finishing touches, choosing hardware that complements the wood stain. With these steps, I'll be well on my way to creating a stunning bathroom storage solution that's both functional and beautiful - and there's more to explore.
Key Takeaways
• Prepare materials and tools, including Weathered Gray stain and a high-quality brush, for a professional-looking DIY shelf upgrade.
• Use a wall marking guide to determine ideal shelf placement, ensuring a level and straight installation.
• Apply Cypress Umber Dark Glaze for a distressed look, following tips for a perfect finish.
• Choose hardware options that complement the wood stain, such as rustic metal knobs, for an elegant touch.
• Pay attention to details, including accurate installation and finishing touches, to achieve a polished and professional outcome.
Prepare for the Upgrade
I'm gathering all the necessary materials and tools before diving into the DIY shelf upgrade project, making sure I've everything within arm's reach to avoid last-minute trips to the hardware store.
For a professional finish, I'm opting for wood staining techniques using Weathered Gray stain and a high-quality brush. I'll also apply a Cypress Umber Dark Glaze for a distressed look, following glaze application tips to achieve the perfect effect.
To guarantee accurate installation, I'll use a wall marking guide to determine the ideal shelf placement.
With my materials and tools ready, I'll be well-prepared to tackle the project with confidence, armed with essential installation tips to guarantee a successful outcome.
Build and Install Shelves
Three 3/4x2 boards are cut to serve as wall mounts, while the shelving boards are cut to the desired dimensions to fit the space and hold the intended weight.
I sand and stain the boards using a weathered gray paint technique to achieve a distressed look.
Now, it's time to install the shelves.
Here's how I do it:
-
I mark the wall for shelf placement, ensuring it's level and straight.
-
I screw the drywall anchors into the wall to support the boards.
-
I mount the support boards to the wall, making sure they're secure.
- I place the big shelf boards on top of the support boards, creating a sturdy floating shelf design.
Add Finishing Touches
With the shelves securely in place, I turn my attention to adding the finishing touches to complete the DIY shelf upgrade. Now it's time to add some personality to my new bathroom storage.
I choose hardware options that complement the weathered gray wood stain, opting for rustic metal knobs that add a touch of elegance. To add decorative elements, I consider adding some decorative trim or molding to the shelves, but decide to keep it simple and let the beauty of the wood shine.
Frequently Asked Questions
Can I Use a Different Type of Wood for the Shelves?
'Like a master chef swapping ingredients, I can substitute different woods for the shelves, but I'll need to take into account the unique wood grain and potential color variation to guarantee a harmonious blend that complements my design vision.'
How Do I Clean the Shelves After Installation?
I clean my shelves daily with a damp cloth to prevent dust buildup. For extra protection, I use shelf liners that can be wiped clean, making daily maintenance a breeze and keeping my shelves looking like new.
Will the Drywall Anchors Hold the Weight of Heavy Items?
I select drywall anchors with a load capacity of 50-100 pounds to guarantee they can hold the weight of heavy items, and I opt for anchor types specifically designed for my wall type to secure a strong hold.
Can I Add Decorative Trim to the Shelves for a Unique Look?
Like a canvas awaiting a masterpiece, my shelves are ready for a decorative twist. I can definitely add trim for a unique look, choosing from various Trim Options like molding, corbels, or ornate edges to match my desired Design Styles, such as rustic, modern, or coastal.
Do I Need to Prime the Wood Before Applying the Stain or Glaze?
I usually don't prepare wood before applying stain or glaze, as it can impact the wood's natural texture and stain compatibility; however, during wood preparation, I make sure the wood is clean and dry for best results.
Related Posts
-

Multi-Functional Vintage Bathroom Storage Units
Multi-functional vintage bathroom storage units merge style with function, helping you create an organized and aesthe...
-

Momtrepreneurs: Master Organization for Success
As a busy momtrepreneur, I've learned that mastering organization is the key to unleashing my full potential. To achi...
-

Transform Your Life With Organized Home PLR
By transforming your living space with organized home PLR, you'll awaken a profound shift in mental clarity, energy, ...


