To create an unforgettable experience for your patrons, your bar business plan must include more than just delicious drinks and a welcoming ambiance. This is where bar games come into play, quite literally!
So, let’s dive into the diverse world of bar games, designed to ignite competitive spirit, create lasting memories and foster a sense of community among your patrons. From classic favorites to innovative twists, we’ve curated an extensive collection that is sure to cater to every taste and preference.
Games can remarkably transform the atmosphere of all types of bars, injecting them with energy, excitement and a vibrant social dynamic. By introducing well-curated bar games, you can create an environment that fosters social interaction, friendly competition, and a sense of camaraderie among your patrons.
Bar games act as icebreakers, encouraging strangers to connect and regulars to bond even further. As the laughter and cheers fill the air, the entire bar takes on a livelier and more spirited ambiance, attracting new customers and keeping them coming back for more.
The engaging nature of bar games enhances the customer experience and extends the length of their visits, leading to increased sales, elevated bar profit margin, and a higher rate of customer satisfaction.
Embracing the power of games in your bar can elevate it from just a drinking establishment to a dynamic social hub that leaves a lasting impression on all who walk through your doors.
Incorporating interactive experiences like bar games into your establishment can do wonders for customer engagement, resulting in a host of benefits for both your patrons and your business. Following are a few compelling reasons why embracing bar games can be a game-changer:
Curating the perfect mix of bar games is essential to creating a dynamic and inclusive atmosphere that caters to the diverse preferences and moods of your customers. Recognizing that each patron has unique tastes and desires, offering a wide range of games ensures that everyone finds something they enjoy.
Some customers may be drawn to classic pub games like darts or pool, while others may prefer interactive digital games or tabletop options. By providing a diverse selection, you not only accommodate different interests but also accommodate various levels of competitiveness, physical activity, and group sizes.
Such inclusivity allows you to appeal to a broader audience and ensures that every customer can find a game that matches their mood, creating a welcoming and engaging environment that keeps them coming back for more.
The following 53 exhilarating bar games is sure to delight your patrons and ignite the competitive spirit. From traditional favorites to unique twists on classic games, this diverse collection offers something for everyone. As you learn how to manage a bar, use these games to transform your bar into a hub of excitement and entertainment!
Bar Game Categories | Game Examples |
---|---|
Classic Favorites | Pool, Darts, Shuffleboard, Pac-Man, Pinball |
Interactive Group Games | Beer Pong, Flip Cup, Trivia, Charades, Werewolf, One Night Ultimate Werewolf |
Card and Dice Games | Poker, Blackjack, Liar's Dice, Yahtzee, Farkle, Cribbage |
Strategy Games | Chess, Checkers, Risk, Stratego, Connect Four, Catan, Ticket to Ride |
Table Games | Ping Pong, Air Hockey, Foosball, Skee-Ball |
Outdoor Games | Cornhole, Giant Jenga, Ring Toss, Bocce Ball, Horseshoes |
Arcade Games | Mortal Kombat, Street Fighter II, Dance Dance Revolution, Time Crisis, Golden Tee, Galaga, Donkey Kong |
Drinking Games | Flip Cup, Kings, Quarters, Kings Cup, Roxanne, Power Hour |
Board Games | Chess, Settlers of Catan, Scrabble, Carcassonne, Pandemic, Codenames |
Classic Arcade Games | Pac-Man, Ms. Pac-Man, Space Invaders, Donkey Kong, Galaga, Centipede |
Introducing a nostalgic blast from the past with our collection of retro games that are sure to transport your patrons to the golden era of gaming. These classics bring a touch of nostalgia and entertainment to your bar.
The timeless allure of pinball machines creates an irresistible draw for both seasoned players and novices. With flashing lights, bumpers and flippers, pinball offers a tactile and thrilling experience, adding a touch of vintage charm to your bar.
Considered one of the earliest video games, Pong is a simple yet addictive table tennis simulation. This retro gem sparks friendly competition among players, allowing them to relive the dawn of video gaming while engaging in fast-paced fun.
A true legend in the gaming world, Tetris challenges players to fit falling geometric shapes into a grid. Its addictive gameplay and intuitive mechanics make it a crowd-pleaser, offering hours of entertainment and a sense of accomplishment when lines are cleared.
Transport your patrons back to the arcade era with Frogger, an iconic game where players guide a frog across treacherous roads and rivers. Its challenging gameplay, vibrant graphics and catchy music provide an immersive experience that keeps players hooked.
A classic shoot’em up game, Galaga invites players to defend their spaceship against relentless waves of alien attacks. With its retro pixel art, addictive gameplay and high-score chasing, Galaga delivers an action-packed experience that taps into nostalgia.
This arcade classic has players maneuvering a gun to shoot and destroy a relentless centipede as it descends down the screen. With its fast-paced gameplay and strategic maneuvering, Centipede offers thrilling moments and competitive gameplay for bar-goers.
Join Mario in his iconic battle against Donkey Kong as he climbs ladders and avoids obstacles to save the princess. This legendary platformer game provides a nostalgic trip and a chance for players to test their skills and relish in the triumph of reaching new levels.
Defend Earth from waves of descending aliens in Space Invaders, a pioneering game that revolutionized the industry. With its simple controls and addictive shooting action, this retro gem remains a crowd favorite, bringing back memories of arcades from yesteryears.
Get your strategic thinking caps on as we present a captivating collection of strategy games that will challenge your patrons’ minds while they sip their favorite drinks. These games bring intellect and friendly competition to the forefront of your bar.
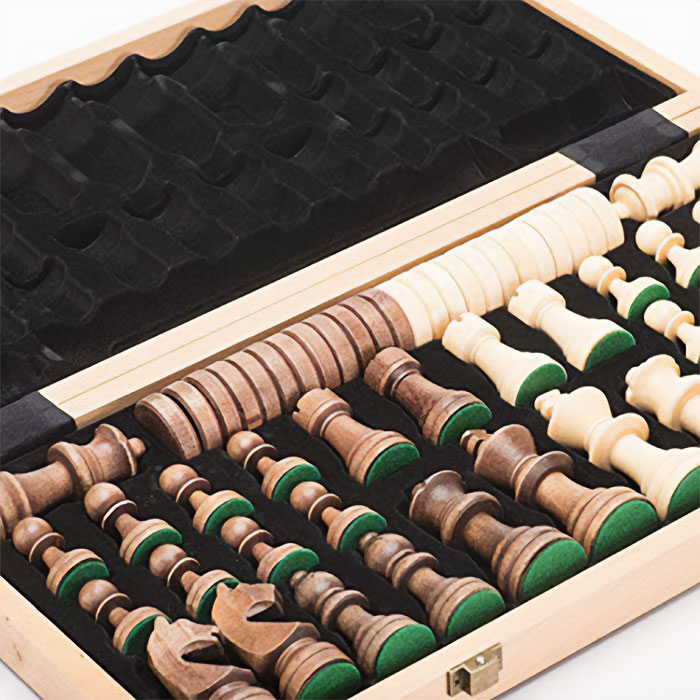
A game of kings, chess requires strategic planning and calculated moves as players aim to outmaneuver their opponents on the checkered battlefield, making it perfect for those seeking a mentally stimulating challenge in a relaxed bar setting.
With its straightforward rules and focus on strategic jumps and captures, checkers offers a classic yet engrossing experience for players of all skill levels, allowing them to engage in tactical battles while enjoying a casual drink.
Transport your patrons to the world of global conquest with Risk, a strategic board game where players compete to dominate territories, negotiate alliances and strategize their way to victory, providing an immersive experience that sparks intense rivalries and epic battles.
In this captivating strategy game, players command an army and strategically position their pieces to outwit and capture their opponent’s flag, making each move a calculated risk that keeps players engrossed in a battle of wits and tactics.
Combining strategic thinking with quick decision-making, Connect Four challenges players to align their colored discs and create a row of four, providing a simple yet engaging game that is perfect for friendly competitions and socializing at the bar.
Settlers of Catan takes players on a strategic journey, where they compete to build settlements, gather resources, and establish dominance on a dynamic island board, offering a blend of resource management, negotiation and strategic planning that keeps players engaged for hours.
With Ticket to Ride, players embark on a cross-country adventure, strategically claiming railway routes and connecting cities, all while competing against fellow players, making it an ideal choice for those seeking a blend of strategy, luck and friendly competition.
Shuffle up and roll the dice as we present a captivating collection of card and dice games that add an extra layer of excitement to your bar experience. These games bring the thrill of chance and strategy to your patrons’ fingertips.
A classic card game of skill and strategy, poker challenges players to outwit their opponents, bluff their way to victory and master the art of reading others, creating a dynamic and engaging atmosphere that keeps players coming back for more.
Test your luck and card-counting skills in this fast-paced casino favorite, as players aim to get as close to 21 without going bust, offering an enticing blend of strategy, probability and anticipation for players seeking an exhilarating gaming experience at the bar.
This dice-based bluffing game has players guessing the number of dice with specific face values hidden in their opponents’ cups, creating a lively and suspenseful atmosphere as players attempt to deceive and outguess each other with each roll.
Roll the dice and aim for specific combinations to score points in this popular dice game, combining luck and strategic decision-making as players strategize on which dice to keep and which to reroll, making it an engaging choice for groups to enjoy at the bar.
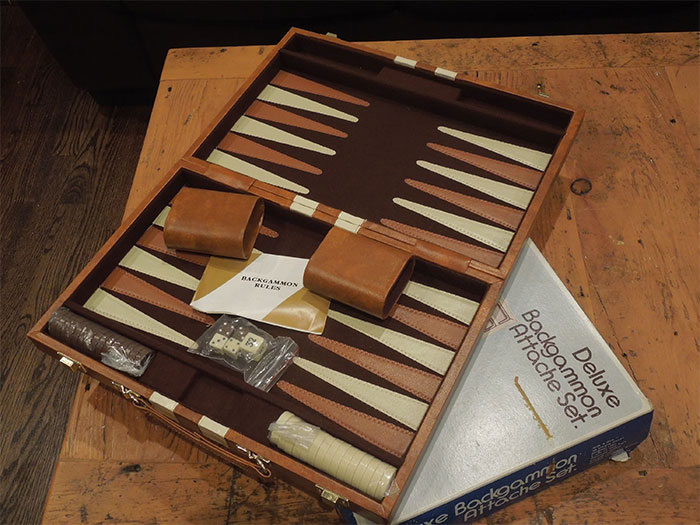
This ancient game of strategy and luck pits players against each other in a race to move their pieces off the board, offering a blend of calculated moves, risk assessment and tactical choices that make it an ideal option for patrons seeking intellectual stimulation.
Combining cards and a unique pegboard scoring system, cribbage challenges players to form combinations and strategically manage their hands, providing a perfect blend of strategy, luck and friendly competition in a relaxed bar setting.
Roll the dice, take risks and decide when to push your luck in Farkle, a dice game that tests players’ nerve and decision-making skills as they try to accumulate points without rolling too many Farkles (failed rolls) along the way.
Gather your friends and team up for a round of exciting team games and group activities that bring laughter, camaraderie, and friendly competition to your bar. These games are perfect for bonding and creating memorable moments.
Test your knowledge across various categories in this classic trivia game that challenges teams to answer questions and collect wedges to win, providing a lively and intellectually stimulating experience that encourages collaboration and friendly rivalries among patrons.
Bring out your best acting skills in this timeless game where players use gestures and pantomime to convey words or phrases, sparking laughter and encouraging teamwork as teams race against the clock to guess the correct answer.
Unleash your inner artist in Pictionary, a fast-paced drawing and guessing game where players attempt to illustrate clues for their team members to guess, fostering communication, creativity and heaps of laughter.
Put your code-breaking and word association skills to the test in Codenames, a team-based word game where spymasters provide one-word clues to guide their teammates in uncovering secret agents while avoiding the opposing team’s spies, creating an atmosphere of suspense and strategic thinking.
Keep the energy high with Catch Phrase, a fast-paced word-guessing game where players try to describe words or phrases to their teammates before the timer runs out, promoting quick thinking, communication and lively interactions among participants.
Embark on an immersive social deduction game where players assume roles of villagers and werewolves, engaging in intense debates and strategic gameplay as they try to uncover the werewolves among them, making it an ideal choice for large groups looking for a thrilling and interactive experience.
Inspired by the popular Ellen DeGeneres game, Heads Up! has players guessing words or phrases based on clues from their teammates while holding a mobile device to their forehead, creating a lively and interactive game that keeps everyone engaged and entertained.
When bar customers play table games, the activity adds a dynamic element to the atmosphere. From classic favorites to exciting newcomers, these games guarantee hours of entertainment and friendly competition.
A fast-paced game that tests players’ reflexes and hand-eye coordination, ping pong brings out the competitive spirit in your patrons, offering an interactive and energetic experience that encourages social interaction and friendly matches.
A staple in bars worldwide, the pool offers a blend of skill, strategy and friendly competition as players aim to sink balls into pockets using a cue stick, creating a laid-back yet engaging atmosphere where players can showcase their prowess.
Unleash the excitement with air hockey, a fast and furious game that has players competing to score goals using handheld mallets while gliding the puck on a cushion of air, providing thrilling matches and an energetic atmosphere that keeps customers entertained.
Combine skill, strategy, and a touch of finesse in table shuffleboard, as players slide weighted pucks along a smooth surface, aiming to score points by landing them in specific scoring areas, fostering friendly competition and a relaxed social atmosphere in your bar.
This tabletop soccer game pits teams against each other as they twist, spin and maneuver rods to control their player figures and score goals, delivering fast-paced action and a sense of camaraderie among players, making it a popular choice for group entertainment.
A quintessential party game, beer pong involves tossing ping pong balls into cups arranged in a triangular formation on a table, combining skill, coordination and friendly competition with a social and celebratory atmosphere that fits perfectly in a bar setting.
Challenge your dexterity and hand-eye coordination in Fork It, a game where players attempt to spear as many plastic forks as possible into a foam block, providing a lighthearted and amusing activity that brings laughter and friendly competition to your bar.
Elevate the fun factor at your bar with a selection of outdoor games that offer a breath of fresh air and exciting entertainment. These games bring a lively atmosphere and friendly competition to your outdoor space.
A classic favorite, cornhole, involves tossing bean bags onto a raised wooden board with a hole, aiming for points and fostering friendly competition and camaraderie among players in an outdoor bar setting.
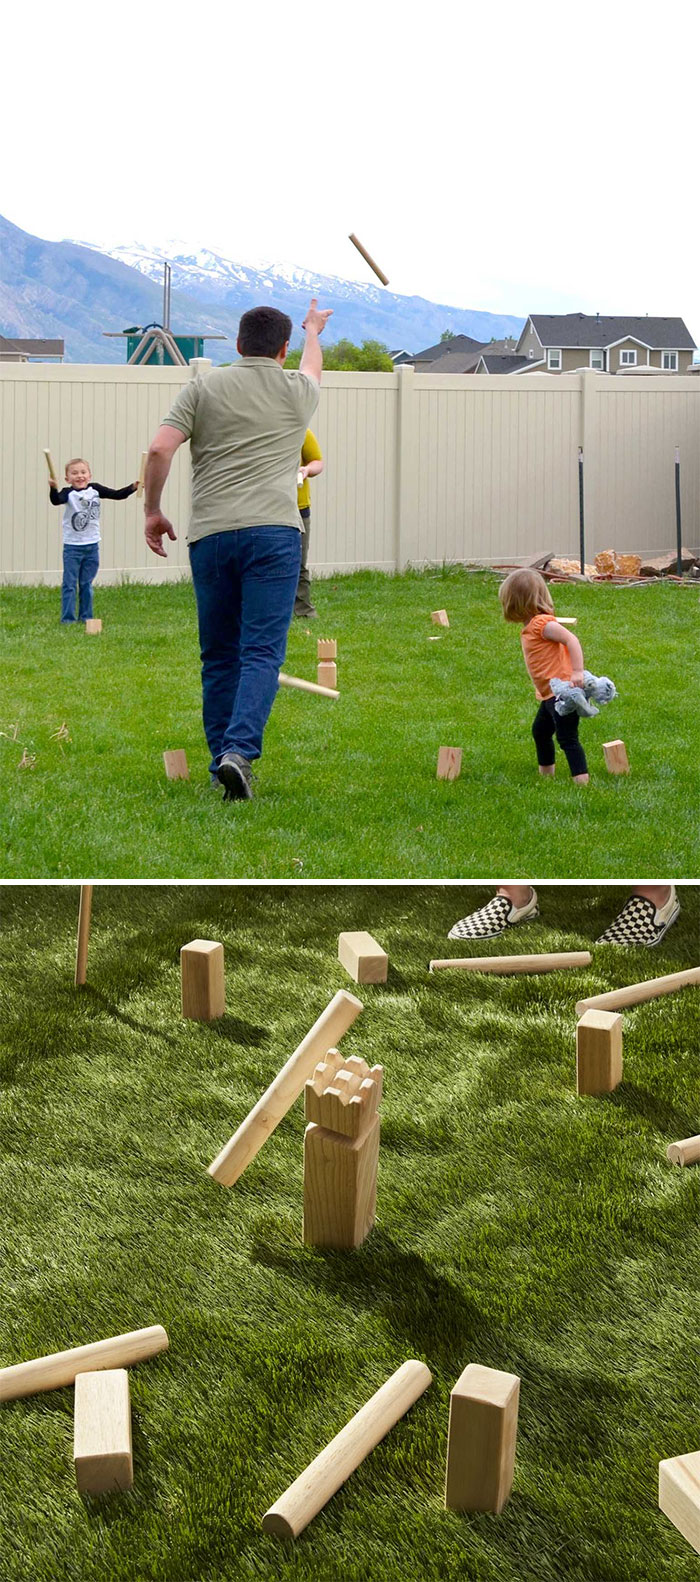
Upsize the fun with giant Jenga, where players take turns removing blocks from a tower and balancing them on top, creating suspenseful moments and laughter as the tower teeters and tumbles.
Test your aim and accuracy in ring toss as players toss rings onto pegs, aiming for a perfect throw and enjoying a game that is both accessible and entertaining for patrons of all ages.
Originating from Italy, bocce ball is a strategic lawn game where players take turns rolling balls to get them as close as possible to a target ball, encouraging friendly competition and strategic thinking in a relaxed outdoor setting
Step up to the horseshoe pits and aim to toss horseshoes around a stake, aiming for a ringer or landing closest to the stake, creating a casual and enjoyable game that brings a touch of nostalgia and friendly competition to your outdoor bar area.
Kan Jam combines elements of frisbee and teamwork as players aim to toss and deflect a frisbee into a goal, fostering an active and engaging experience that encourages outdoor play and camaraderie.
Ladder toss, also known as ladder ball, challenges players to toss bolas (rope with balls) onto a ladder-like structure, aiming for the highest scoring rungs and adding a dose of competitive fun to your outdoor space.
Giant Connect Four takes the classic game to new heights, as players strategically drop oversized discs into a standing frame, aiming to create a line of four in a row, providing interactive and engaging entertainment for groups and individuals alike.
Engage in a leisurely and strategic game of croquet, where players use mallets to navigate balls through a course of hoops and stakes, providing a delightful outdoor experience that combines skill, strategy, and friendly competition in your bar’s outdoor space.
Are your bar patrons ready for a trip down memory lane? These classic arcade games are perfect for playing in bars, bringing a nostalgic and energetic vibe to any drinking establishment.
Guide the iconic Pac-Man through a maze, gobbling up pellets while evading ghosts, in this beloved arcade game that offers timeless fun and addictive gameplay, perfect for patrons seeking a dose of nostalgia and friendly competition.
Join the world’s greatest warriors in Street Fighter II, a legendary fighting game that lets players choose their fighters and engage in one-on-one battles filled with special moves, combos and intense competition, creating an electrifying atmosphere in your bar.
Get your groove on with Dance Dance Revolution, a rhythm-based game that challenges players to step on arrows in sync with the music, providing an interactive and energetic activity that gets patrons moving and creates a lively atmosphere.
Step into the fighting arena of Mortal Kombat, where players engage in intense battles with unique characters, showcasing their skills in martial arts-inspired combat and delivering an electrifying gaming experience that fuels friendly rivalries.
Roll your way to victory in Skee-Ball, a classic arcade game where players roll balls up a ramp to score points by landing them in various holes, offering a blend of skill, precision and friendly competition that adds a carnival-like atmosphere to your bar.
Raise your glasses and add some spirited fun to your bar experience with a collection of popular drinking games that are sure to liven up the atmosphere. These games combine competition, laughter, and a little bit of liquid courage.
Gather your friends and test your coordination as teams compete in drinking their beverage and then flipping the cup upside down by flicking the rim with their fingers, fostering friendly competition and creating an energetic and interactive environment in your bar.
This classic card-based drinking game involves players taking turns drawing cards, each card representing a specific action or rule, providing laughter, camaraderie and a chance for patrons to bond over shared antics and memorable moments.
Perfect for the bar counter, Quarters is a game that requires players to bounce a quarter off the table and into a cup, with successful shots leading to opponents taking drinks, infusing a sense of friendly competition and skillful aiming into the atmosphere.
Enhancing your bar with an effective game strategy can be a game-changer for attracting and delighting customers. However, there are key aspects to consider, from selecting the right games to optimizing your space and implementing creative marketing ideas to promote a thriving gaming atmosphere.
Understanding your customers’ demographics and preferences is crucial in selecting the most suitable games. Are they more inclined towards classic favorites or innovative options? Tailoring your game selection to their interests ensures maximum engagement and enjoyment, fostering a vibrant social atmosphere that keeps them coming back for more.
Efficiently utilizing space in your bar is essential for a seamless gaming experience. Strategically position games in areas that allow easy access and flow, avoiding overcrowding or disrupting other patrons. Balancing the placement of games with seating arrangements and bar service ensures a harmonious bar environment that caters to both gamers and non-gamers.
Once you have an exciting array of games, it’s crucial to promote them effectively. Leverage the power of social media platforms to showcase your games and generate buzz. Consider hosting special gaming events or tournaments to attract enthusiasts and novices alike. Collaborate with local influencers or game enthusiasts who can spread the word and create a sense of anticipation among your target audience. You may even learn how to plan a bar crawl with other local establishments to bring new customers through the door.
A fun game for a bar setting should be engaging, interactive, and promote social interaction among patrons. Games that are easy to learn and offer quick rounds or turns are ideal, allowing everyone to participate.
The game should also have an element of friendly competition and offer opportunities for laughter and camaraderie. Likewise, incorporating games that can be enjoyed while holding a drink adds to the bar experience, creating a lively and entertaining atmosphere.
Additionally, select games that connect to your specific bar themes or appeal to your bar’s target audience. For instance, a bar with a big corporate happy hour clientele may consider the best business board games, while one with a huge variance in customers may learn how to host a trivia night instead.
The best bar games encompass a range of preferences and skill levels. Classic favorites like pool, darts, and shuffleboard are perennially popular.
Other top choices include arcade games like Pac-Man and air hockey, as well as interactive group games such as beer pong, trivia and foosball. Ultimately, the best bar games are those that resonate with your specific clientele, provide a blend of fun and competition and create a memorable experience in your bar.
Board games add an element of strategy, creativity, and social interaction to the bar experience. They provide opportunities for patrons to engage in friendly competition, problem-solving and cooperative play.
Board games also encourage conversations, laughter, and bonding among players, fostering a sense of community and camaraderie. There are also relaxing games that can help patrons unwind. Whether it’s classics like chess or modern favorites like Settlers of Catan, board games offer a unique and enjoyable way for customers to unwind and connect in a bar setting.
Arcade games are experiencing a resurgence in modern bars due to their nostalgic appeal and ability to create an immersive and entertaining atmosphere. Arcade games offer a blend of excitement, skill and competition, attracting a wide range of customers.
These popular games provide an interactive and tactile gaming experience that differs from digital entertainment, promoting social interaction and friendly rivalries. Additionally, the retro charm and timeless gameplay of arcade classics resonate with both older generations and younger enthusiasts, making them a hit in modern bars.
For a small bar, consider incorporating tabletop games like Jenga or Connect Four, which are space-efficient and promote interaction among customers. Another idea is to offer unique card games or dice games with a twist, such as “Shot Roulette” or “Dicey Drinkers,” which combine chance and drinking elements.
You also can introduce social deduction games like, “Werewolf” or “One Night Ultimate Werewolf,” which engage groups in captivating storytelling and deductive reasoning, adding intrigue and excitement to the bar experience.
People play a variety of games at bars, depending on personal preferences and the available offerings. Common games include pool, darts, shuffleboard and arcade classics like Pac-Man and pinball.
Drinking games such as Flip Cup and Beer Pong are also popular for their social and competitive nature. Board games like chess or Settlers of Catan, as well as interactive group games like trivia or charades, are enjoyed by those seeking intellectual stimulation and friendly interaction in a bar setting.
One of the best classic arcade games to play at a bar is undoubtedly Pac-Man. Its timeless gameplay, iconic characters, and addictive nature make it a universally recognized favorite.
Pac-Man offers quick rounds and a simple objective, making it accessible to players of all ages and skill levels. Its retro charm and nostalgic appeal, coupled with the thrill of chasing high scores, create an engaging and enjoyable arcade experience that perfectly complements the vibrant atmosphere of a bar.
This article, "53 Great Bar Games: A Bar Owner’s Guide" was first published on Small Business Trends
]]>For our latest lookbook, we've trawled the Dezeen archive for bedroom interiors that don't sleep on the potential of a good headboard – whether wooden, upholstered or mirrored.
Far from just being a practical furniture piece, headboards can help to highlight the bed as the centre of a room and fulfil the same decorative function as a piece of art.
While plush upholstered versions nod back to the grandeur of beds past, more modern interpretations fitted with integrated shelves and peg boards can also provide practical storage.
Read on for eight examples of bedrooms with headboards that add new meaning to the concept of beauty sleep.
This is the latest in our lookbooks series, which provides visual inspiration from Dezeen's archive. For more inspiration see previous lookbooks featuring bedrooms with regal four-posters, bunk beds for kids and wardrobes disguised as walls.
La Palma house, Australia, by YSG
Australian studio YSG used a painting in the living room of this holiday home in Sydney as a guiding light for the textile selection throughout the entire property.
In the main bedroom, the artwork's striped red border is picked up in the lampshades and bedside tables, while the headboard is upholstered in wildly clashing botanical and zebra prints.
Find out more about La Palma house ›
Sacha apartment, France, by SABO Project
Plywood pegboard walls are a recurring feature throughout this family-friendly duplex in Paris, with an interior designed by local studio SABO Project.
In the primary bedroom, one of these partition walls doubles up as the bedhead while providing adaptable storage via movable slot-in shelves.
"The owners are a young, hard-working couple that is also pretty laid back," the studio's founder Alex Delaunay told Dezeen. "So the idea of utilising a simple and humble material in a way that puts forward good custom design rather than ostentatious luxury was fitting."
Find out more about the Sacha apartment ›
Puro Hotel Kraków, Poland, by Paradowski Studio
Long metal piping cinches in the upholstered bedhead of this guestroom at the Puro Hotel in Kraków to give it a more curvaceous silhouette.
This textile backdrop is framed by natural oak wall panelling, which in turn is layered with integrated lights and graphic artworks in matching wooden frames.
Find out more about Puro Hotel Kraków ›
Hygge Studio, Brazil, by Melina Romano
Brazilian designer Melina Romano used the same rust-red fabric to upholster the bed frame and the panelled header of this bed, which extends out to one side to envelop a long nightstand.
The warm, muted colour was chosen to blend in with the creamy brick walls and terracotta-tiled floors of this São Paulo apartment, creating an interior that Romano describes as both "modern and bucolic".
Find out more about Hygge Studio ›
ER Residence, UK, by Studio Hallett Ike
Instead of relying on artificial colours or patterns, visual interest in this bedroom-cum-study is delivered via the naturally swirly graining of the Douglas fir wood that acts as the headboard.
The same wood was also used to form four integrated nightstands and a window seat that looks out over the garden of the Victorian terrace house in north London.
Find out more about ER Residence ›
Hotel Les Deux Gares, France, by Luke Edward Hall
British designer Luke Edward Hall strived for an "anti-modern" aesthetic when converting an abandoned five-storey building in Paris's 10th arrondissement into the Hotel Les Deux Gares.
Each of the guest rooms features a candy-striped headboard with swooping corners – contrasted against sky blue, violet or olive green walls – as well as dainty reading lamps personalised by Hall with doodles of martini glasses and the Eiffel Tower.
Find out more about Hotel Les Deux Gares ›
Central Park Road Residence, Australia, by Studio Four
The largely open-plan layout of this Melbourne home is interrupted by only a few partitions, helping to form a handful of enclosed living spaces.
A wall of floor-to-ceiling cupboards conceals the kitchen while another full-height storage volume with an open bookshelf doubles up as a headboard in the bedroom.
Find out more about Central Park Road Residence ›
Reig-i-Bonet apartment, Spain, by Arquitectura-G
A mirrored wall provides a voyeuristic backdrop and functions as a headboard in this apartment, renovated by Spanish studio Arquitectura-G for a young couple in Barcelona.
The bed itself sits on a platform covered in pale grey carpet, helping to blend it with the surrounding floors and a sunken lounge nearby.
"The flat was conceived as a unique space distributed on different platforms that meet the needs of a young couple," the studio said.
Find out more about Reig-i-Bonet apartment ›
This is the latest in our lookbooks series, which provides visual inspiration from Dezeen's archive. For more inspiration see previous lookbooks featuring bedrooms with regal four-posters, bunk beds for kids and wardrobes disguised as walls.
The post Eight bedrooms defined by statement headboards appeared first on Dezeen.
]]>I’ll be honest, I haven’t seen that many frogs in my lifetime. Of the animal kind of course, heh heh. It turns out they are some pretty cool creatures!
I feel like frogs tend to hide most of the time, which makes sense due to pretty much everything else being a predator. Or maybe they are just hiding from me. Which would also make sense.
Though I just want to inspect them, not cause any harm. I find tiny amphibians fascinating! My niece studied them in school, and as a result we decided to do some frog perler beads.
She shared some interesting facts with me during our crafting. Things you might not know.
For example, there are over 5,000 species of frogs on every continent except Antarctica. The smallest frog is from Papua New Guinea and is .3 inches (7.7 mm), which the largest is 12 inches (over 30 cm).
The thought of a foot-long frog hopping at me made me gag a little bit, to be honest.
Not that a foot-long frog would do anything to me. They eat bugs! Did you know that when a frog blinks, the eyeballs help push the food down its throat?
But that isn’t their only feat. Some species can regenerate lost limbs, which makes them interesting to study. Also some species of frogs leap up to 20 times their own body length. This would be equivalent to an average human jumping nearly 30 meters (or 100 feet)!
The final fact I learned about frogs is that they don’t just breath through their lungs. They breathe through their skin. This is known as cutaneous respiration. Their skin needs to stay wet to facilitate this, which is why many frogs live in or near water.
See – I told you they were cool!
Whether you love animals, or are doing a homeschool unit on amphibians, or you just want to try some new patterns – you’re going to love these frog perler beads.
Perler beads are recommended for ages six and up, so this is a very fun craft to try with your elementary age kids. All children seem to love perler beads (also known as hama beads, fuse beads, or melty beads). But don’t be shy – adults love them too!
Before we get into the frog perler bead patterns, I want to review a few basics of using fuse beads to make sure you get the best results. If you don’t want the tips, scroll down to the bottom to get the patterns and tutorial.
Remember that the overall goal is to melt the beads together on both sides while still leaving the holes open. Here’s how you achieve success (with a rainbow as an example).
Place ironing paper or parchment paper over the beads on the pegboard. Be gentle so you don’t disturb the beads underneath.
Heat your iron to the medium setting (no steam). In a circular motion, begin to iron the project. Don’t press down too hard with the iron. Keep the iron moving in small circles, without stopping, until melted.
When ironed properly, the beads will still have an open center. Check and make sure your edges are melted. Let the design cool on the pegboard.
Note: BE CAREFUL about lifting up the paper while you’re ironing! If you want to check, carefully peel back paper around the edge of your design and see if all the beads are melted.
If you lift the paper up quickly and there are a lot of unmelted beads, they will easily fall off or go flying and you may be forced to start over. Sometimes the edges need more time so when you check, just check the edges and peel paper back slowly.
Another Note: some beads melt faster than others (clear melts faster than white, for example). So some holes might be larger than others. It’s okay! That’s part of the look of the project.
Remove the bead design from the pegboard. Flip it over to the non-melted side and repeat the fusing process.
Let cool completely and remove the paper again (which is reusable). Some people pull the paper off after they iron the first side, but I just wait until the end and peel off both pieces. It’s up to you!
Now that you’ve had a refresher on how to melt the beads, you can get the patterns! Keep on reading.
Make sure to check out these notes:
Army of Amphibians
Get 13 patterns for tiny frogs! These are great for jewelry, keychains, magnets and more.
Tiny Toad
This pattern uses 80 dark spruce, 133 kiwi lime, 1 white, and 26 sherbert beads.
Frog Head
This pattern uses 104 kiwi lime, 6 white, 16 black, 18 blush, 2 dark green, and 71 yellow beads.
Medium Frog
This pattern uses 97 dark green, 20 clear, and 2 black beads.
Mario Frog
This pattern uses 102 black and 112 dark green beads.
Sitting Kawaii Frog
This pattern uses 120 black, 192 bright green, 2 white, and 4 flamingo beads.
Sticky Fingers
This pattern uses 30 bright green, 117 pastel green, 4 light brown, and 2 black beads.
Cute Frog with Big Eyes
This pattern uses 300 pastel green, 16 white, 20 black, 8 light pink, and 126 cream beads.
Small Frog with a Crown
This pattern uses 14 gold, 58 teal, 164 pastel green, 18 black, 4 white, 12 flamingo, and 72 bright green beads.
Frog with Bow Tie and Frog with a Balloon
These patterns use 94 black, 75 magenta, 26 flamingo, 235 bright green, 5 white, 6 brown, 60 pastel green, 3 dark green, 1 tan, and 1 cheddar beads.
Super Mario Frog Suit
This pattern uses 124 black, 113 bright green, 10 white, and 36 peach beads. Get more Super Mario perler beads.
Frogs with Crowns
The frog on the left uses 54 clear, 49 kiwi lime, 4 black, 11 red, 11 gold, and 53 white beads. The frog on the right uses 53 white, 10 black, 19 slime, 8 pastel yellow, 9 yellow, 29 dark green, and 54 bright green beads.
Kermit the Frog
This pattern uses 191 black, 23 white, 183 kiwi lime, 30 red, 10 pink, and 90 sherbert beads.
Frog in a Spring Scene
This pattern uses 47 yellow, 11 cheddar, 257 robin’s egg, 47 white, 44 dark green, 70 sour apple, 5 pastel lavender, 4 light lavender, 7 black, 8 salmon, 18 red, 8 bright green, and 54 pastel green beads. Get more mushroom perler beads.
Frog with a Flower on a Lilypad
This pattern uses 413 lagoon, 14 white, 1 yellow, 97 shamrock, 152 black, 195 kiwi lime, 14 bright green, and 42 kiwi lime beads.
Cute Kawaii Frog
This pattern uses 118 fern, 346 kiwi lime, 25 black, 4 flamingo, and 273 white beads.
Cute and Easy Frog
This pattern uses 72 bright green, 2 white, 125 kiwi lime, 30 slime, 4 white, 26 cream, 8 honey, 6 brown, 10 pastel blue, and 4 blueberry creme beads.
Frog in a Pool Floatie
This pattern uses 62 dark green, 142 bright green, 12 black, 44 sour apple, 35 turquoise, 68 sky, 19 magenta, and 60 pink beads.
Sitting Around
This pattern uses 142 shamrock, 21 pastel yellow, 6 black, 198 kiwi lime, and 121 white beads.
Big Eyed Frog
This pattern uses 120 black, 138 white, 85 shamrock, 288 kiwi lime, 32 dark blue, 68 magenta, and 6 red beads.
Hopping Frog
This pattern uses 83 bright green, 12 black, 138 pastel green, 13 dark green, 45 mint, and 13 white beads.
Frog with Pink Cheeks
This pattern uses 170 evergreen, 376 bright green, 33 sherbert, 2 white, 41 sage, 4 flamingo, 25 pink, 67 fern, and 88 sour apple beads.
Frog in a Wizard Hat
This pattern uses 152 black, 98 purple, 50 cream, 110 light green, 8 blush, and 34 parrot green beads.
Neon Frog
This pattern uses 477 kiwi lime, 112 yellow, 49 plum, and 19 fuchsia beads.
Tree Frog
This pattern uses 275 black, 210 shamrock, 211 bright green, 4 red, 5 cherry, 44 orange, 2 white, 35 kiwi lime, 24 fawn, 25 sand, 23 light brown, 10 periwinkle, 9 blueberry creme, 45 pastel yellow, and 8 yellow beads.
Gnome Frog
This pattern uses 534 robin’s egg, 106 red, 24 cherry, 8 pastel yellow, 21 white, 22 forest, 15 sour apple, 68 bright green, 4 black, 15 sherbert, 29 tan, and 14 light brown beads. Check out our fairy and gnome perler beads.
If you’ve enjoyed these frog perler beads, let me know in the comments! I’d also love for you to check out these other posts:
The post Frog Perler Beads (35+ Free Patterns!) appeared first on DIY Candy.
]]>I will never, ever forget when I saw my first panda. I was 12, and it was at the National Zoo in Washington, DC, back in the late 1980s. Yes, the pandas were Ling Ling and Hsing Hsing. And for some of you that’s a blast from the past!
Those pandas first came to the zoo in 1972, and a huge deal was regularly made on television about their attempts to breed. Unfortunately they were never able to, but other giant pandas have since that time at the zoo.
And they’ve brought YEARS of joy to tourists such as myself. I couldn’t get enough of watching them on my visit. They’re just so happy and playful.
Learn more about the history of giant pandas at the National Zoo. It’s really cool!
I’ve love pandas for all these years, so I’m excited to finally share these panda perler beads for you to make. We’ve shared cats, dogs, dinosaurs, and more – it was finally time to share some pandas!
You’ll get over 20 patterns for all sizes and skill levels. And they’re all cute! Just like a panda bear should be.
Perler beads are recommended for ages six and up, so this is a very fun craft to try with your elementary age kids. All children seem to love perler beads (also known as hama beads, fuse beads, or melty beads). But don’t be shy – adults love them too!
Before we get into the panda hama beads, I want to review a few basics of using fuse beads to make sure you get the best results. If you don’t want the tips, scroll down to the bottom to get the patterns and tutorial.
Remember that the overall goal is to melt the beads together on both sides while still leaving the holes open. Here’s how you achieve success (with a rainbow as an example).
Place ironing paper or parchment paper over the beads on the pegboard. Be gentle so you don’t disturb the beads underneath.
Heat your iron to the medium setting (no steam). In a circular motion, begin to iron the project. Don’t press down too hard with the iron. Move the iron continuously, and in small circles.
When ironed properly, the beads will still have an open center. Check and make sure your edges are melted. Let the design cool on the pegboard.
Note: BE CAREFUL about lifting up the paper while you’re ironing! If you want to check, carefully peel back paper around the edge of your design and see if all the beads are melted.
If you lift the paper up quickly and there are a lot of unmelted beads, they will easily fall off or go flying and you may be forced to start over. Sometimes the edges need more time so when you check, just check the edges and peel paper back slowly.
Another Note: some beads melt faster than others (clear melts faster than white, for example). So some holes might be larger than others. It’s okay! That’s part of the look of the project.
Remove the bead design from the pegboard. Flip it over to the non-melted side and repeat the fusing process.
Let cool completely and remove the paper again (which is reusable). Some people pull the paper off after they iron the first side, but I just wait until the end and peel off both pieces. It’s up to you!
Now that you’ve had a refresher on how to melt the beads, you can get the patterns! Keep on reading.
Mini Pandas
Small Panda Head
This pattern uses 109 black and 124 white beads.
Ready to Eat
This pattern uses 148 black, 179 white, and 43 shamrock beads.
Kawaii Panda
This pattern uses 200 black, 172 white, and 18 pink beads.
Four Poses
These patterns use 136 – 166 black beads and 164 – 197 white beads.
Holding a Heart
This pattern uses 136 black, 151 white, 8 blush, and 25 hot coral beads.
Medium Panda Head
This pattern uses 133 black and 215 white beads.
Smiling Panda Head
This pattern uses 155 black, 160 white, and 19 salmon beads.
Tare Panda
This pattern uses 121 black, 1 dark gray, 61 gray, 66 light gray, and 93 white beads.
Mini Head and Panda
Both of these patterns use small hexagon pegboards.
Holding a Pink Heart
This pattern uses 208 black, 164 white, 20 pink, and 46 light pink beads.
Blue Kawaii Panda
This pattern uses 119 black, 45 turquoise, 140 white, and 14 flamingo beads.
Blushing Cheeks
This pattern uses 190 black, 206 white, and 6 pink beads.
Heart in a Heart
This pattern uses 177 salmon, 129 black, 106 white, 14 flamingo, and 13 hot coral beads.
Eating Bamboo
This pattern uses 263 black, 255 white, 8 dark blue, 5 red, 10 kiwi lime, 4 gingerbread, and 20 dark gray beads.
World Wildlife
This pattern uses 678 black and 418 white beads.
Large Panda
This pattern uses 250 black, 114 gray, 121 dark gray, 427 white, and 2 flamingo beads.
Umbrella with Ears
This pattern uses 231 black, 300 white, and 71 blush beads.
Did you enjoy these panda perler beads? Let me know in the comments! I’d love for you to check out these other posts:
The post Panda Perler Beads (20+ Free Patterns) appeared first on DIY Candy.
]]>RELATED: DIY Garage Storage Shelves to Maximize Space
Keeping your garage organized requires proper planning on how to best use your space and maximize storage.
Our garage is one of the least used areas in the house, but it is also the easiest dumping place where everything is put in when not being used.
Organizing all the cluttered items accumulated in the garage may seem impossible to handle, but it can be done.
So, I am sharing with you some of these garage organization ideas to get all of the clutter under control. With a little planning and organizing, you can get a well-organized garage in no time.
Looking for a mudroom space? Why not turn your garage entry into one? A small space next to the entryway is the perfect spot to hang umbrellas, hats, coats, and backpacks. It's also a brilliant idea to put in a shoe cubby or storage bins to put all your shoes away.
With some bungee cords, you can create a ready-access cage where you can store all your sports balls quickly against the wall and kids can easily grab one at the bottom without unloading all the ones on top.
Make use of your overhead spaces to store your seasonal or frequently used stuff to keep them out of the way. It’s ideal to put a label or use stackable clear plastic bins to know what’s inside and keep them dust-free.
Give your lawn and gardening tools their place, out of the way, yet easy-to-access spot with these simple and inexpensive PVC organizers. Grab a PVC pipe and cut them into holders for your rakes, shovels, and tools.
This screwdriver rack will keep your tools in their place. This is such an easy and inexpensive project to make. You may use pieces of scrap wood and drill a few holes in it. Then, cut some brackets for mounting, and you now have a neat and sturdy tool organizer.
Storing all your garden tools can be tough – they are long and short, or heavy and light. And, this garden tool rack is a perfect solution to the problem in no time at all. Using a couple of planks from a pallet, your garden tools will be organized without spending a fortune.
Forget those times when you had your tape dispensers lying on your desk. It's time to make your own wooden tape dispenser for your garage. This is a brilliant idea to keep track of your tapes.
Have problems with some Razor scooters lying all over the place? Then it's time to allocate a scooter parking area!
Decide on how many scooter stalls you want, get the stall measurements right and cut your boards to length. Attach the boards square and straight to keep everything in place. This wooden scooter stand is very easy to use and fairly sturdy.
Keep your entire workshop clean and organized with this cordless drill storage. This will also serve as a charging station that will keep all your cordless tools in just one place, ready to be used and fully charged.
RELATED: Garage Shelving Ideas For Ultimate Garage Organization
Stay organized in a simple and practical style with this DIY magnetic strip. Mount a magnetic strip directly to a wall near your workbench area to keep your tools on visual display and at the ready.
This is not only useful in the garage, but also in the kitchen as a knife rack, or as an elegant organizer for your jewelry, makeup, and other beauty products.
Keep your workbench area organized by hanging tools on a pegboard. It's one of the brilliant ideas to keep all your supplies close at hand and you won't have to struggle to pull them from your drawers. Adding pegboards to your garage provides so many space and storage opportunities.
This DIY hanging tire storage rack is so simple, yet very practical tire rack. It can be built with little to no carpentry experience. It's solid off-the-floor storage usually made from scrap wood. You will surely love your extra garage floor space.
Yes, we can!
We'd love to see your works-in-progress. Tag us on IG: https://t.co/xdEXvOo6Nk pic.twitter.com/FULhb6yVLB
— DIY Projects (@DIYProjectsCom) October 29, 2016
Your wall studs are the perfect way to keep all your things organized. Grab a couple of boards and attach them to the exposed studs and make different shelvings to hold a few stuff. Skip a space between your studs and add some hooks to hang your rakes, shovels, and other taller tools.
Collapsible workbenches are easy to make and require minimal supplies. Just fold it up after using it and you instantly have extra space. No need to move a workbench around the garage anymore!
Hanging jars under the shelves is the best storage solution for your garage. Just drill the lids under the shelves and screw your mason jars in. An easy and simple way to store your nails, screws, and bolt. Plus, it's a perfect opportunity to upcycle mason jars.
Putting labels is perhaps the most important part of an organization. You will easily know what's inside every container, tub, and bin without knocking down everything inside.
Label the containers with taped-on labels or dry erase markers for easy re-labeling. Your garage is so much better organized when everything has its own place and labels to go with it.
Use an empty wall space in your garage to hang a shoe organizer and place your spray paint cans in the pouches. This spray paint organizer allows you to see the color you need and grab it without unloading every other can on the drawer or shelf.
Looking for more garage organization ideas? Watch this video from Ana White and learn how to build garage shelving:
Isn't it great to have everything at hand without the boats being in between? I love it! Everything should have its designated post, so everyone in the house will know what item goes where. I'm definitely loving a much better-organized garage space! I'm sure you will like it, too!
Do you find these garage organization ideas helpful? What is your favorite way to keep your garage organized? Let us know in the comments below!
Need some laundry room organization ideas? Then, check out these DIY Organization Ideas for Your Laundry Room!
You Might Also Like:
Stay connected with us on Facebook, Twitter, Pinterest, and Instagram!
Feature image via Houzz
]]>I’m a total dog lover, and if you’re here, you probably are too. Maybe you always had dogs growing up, or maybe you waited until you were an adult to love a mutt of your very own.
I love telling the story of how I fell in love with pugs. I grew up with dogs, but never owned a pug before. And I never wanted one, until 1999.
I lived in the Ravenna neighborhood of Seattle, and I walked to work at the University of Washington every single day, through Ravenna Park. I took the same route.
And each day, I walked down a residential street into the park, and a girl who lived on that street owned a red Honda, just like my black Honda. The difference is that her Honda always had a pug in it.
Because she had one, and she took him everywhere!
True to pug form, her dog was sassy, funny, and just plain ugly/cute. It was then that I knew I wanted pugs, maybe for the rest of my life. In 2002 I got my first pug Roxie. Now I have a male pug named Otto!
And I’m sure you can imagine why I love my dog, because it’s the same reasons you love yours. I love the companionship, the emotional connection, and the purpose having a dog can give you. They truly are remarkable animals!
We’ve done a lot of animal perler beads around here, including cats, frogs, dinosaurs, spiders, birds, butterflies, pandas, penguins, turtles . . . the list goes on!
I’m really excited to share these dog perler beads, because I know you’re going to love them. If you love canines, large or small, you’re going to find patterns you want to make on this list.
There are all sizes and types of patterns!
Perler beads are recommended for ages six and up, so this is a very fun craft to try with your elementary age kids. All children seem to love perler beads (also known as hama beads, fuse beads, or melty beads). But don’t be shy – adults love them too.
Before we get into the dog perler beads, I want to review a few basics of using fuse beads to make sure you get the best results. If you don’t want the tips, scroll down to the bottom to get the patterns and tutorial.
Remember that the overall goal is to melt the beads together on both sides while still leaving the holes open. Here’s how you achieve success (with a rainbow as an example).
Place ironing paper or parchment paper over the beads on the pegboard. Be gentle so you don’t disturb the beads underneath.
Heat your iron to the medium setting (no steam). In a circular motion, begin to iron the project. Don’t press down too hard with the iron. Use small circles and keep the iron moving at all times.
When ironed properly, the beads will still have an open center. Check and make sure your edges are melted. Let the design cool on the pegboard.
Note: BE CAREFUL about lifting up the paper while you’re ironing! If you want to check, carefully peel back paper around the edge of your design and see if all the beads are melted.
If you lift the paper up quickly and there are a lot of unmelted beads, they will easily fall off or go flying and you may be forced to start over. Sometimes the edges need more time so when you check, just check the edges and peel paper back slowly.
Another Note: some beads melt faster than others (clear melts faster than white, for example). So some holes might be larger than others. It’s okay! That’s part of the look of the project.
Remove the bead design from the pegboard. Flip it over to the non-melted side and repeat the fusing process.
Let cool completely and remove the paper again (which is reusable). Some people pull the paper off after they iron the first side, but I just wait until the end and peel off both pieces. It’s up to you!
Now that you’ve had a refresher on how to melt the beads, you can get the patterns! Keep on reading.
Give a Dog a Bone
Man’s Best Friend
Four Pups and a Paw
Two Sitting Pups and Two Heads
Furever Friends
Four Paws and a Bowl
Love is a Wet Nose
Dog Heads One
There are patterns for a husky, yellow lab, beagle, and chihuahua.
Dog Heads Two
There are patterns for a French bulldog, schnauzer, pug, and bull terrier.
Brown Dog with Red Collar
This pattern uses 98 black, 147 toasted marshmallow, 48 rust, 1 white, and 12 red beads.
Black Lab
This pattern uses 263 black and 9 shamrock beads.
Tiny Pug
This pattern uses 199 black, 141 sand, 22 brown, 8 white, and 4 flamingo beads.
Schnauzer Head
This pattern uses 114 gray, 106 white, and 18 black beads.
Small White Dog with a Blue Collar
This pattern uses 71 light gray, 188 white, 8 black, 4 gray, and 3 light blue beads.
Shiba Inu Head
This pattern uses 111 black, 84 sand, 107 white, 12 light pink, 4 red, 8 cheddar, and 6 yellow beads.
Medium Pug Head
This pattern uses 165 black, 94 sand, 16 fawn, 13 light brown, 8 white, and 6 blush beads.
Boston Terrier Head
This pattern uses 111 black, 62 white, 18 toasted marshmallow, 7 light pink, 10 magenta, and 14 gray beads.
Brown Dog with a Blue Collar
This pattern uses 62 gingerbread, 99 honey, 69 sand, 8 black, and 5 light blue beads.
Bulldog and Tiny Brown Pup
The bulldog pattern uses a large round board, while the brown dog on the right uses a small hexagon board.
Shih Tzu Head
This pattern uses 79 white, 80 cream, 28 honey, 59 tan, 48 gingerbread, 24 black, 66 brown, 24 light gray, and 8 gray beads.
Beagle Head
This pattern uses 61 light brown, 39 brown, 48 white, 61 black, 34 gingerbread, 26 cocoa, 23 cream, and 7 gray beads.
Small Fawn Dog
This pattern uses 129 light brown, 87 tan, 221 toasted marshmallow, 2 white, 12 black, and 6 light blue beads.
Daschund with a Heart
This pattern uses 305 rust, 22 toasted marshmallow, 2 black, 4 salmon, and 27 red beads.
Pekingese Head
This pattern uses 95 sand, 218 white, 77 gray, 21 dark gray, 30 black, and 4 gingerbread beads.
White Terrier
This pattern uses 249 black, 494 white, and 20 cotton candy beads.
Hector from Omori
This pattern uses 114 black, 187 sand, 15 red, 60 white, 4 blush, and 8 tan beads.
Jake the Dog
This pattern uses 207 black, 348 cheddar, and 16 white beads.
English Bulldog Puppy
This pattern uses 191 black, 346 white, and 157 gingerbread beads.
Shiba Inu Head
This pattern uses 120 black, 170 cheddar, 158 toasted marshmallow, and 28 hot coral beads.
Easy Puppy Perler Beads
This pattern uses 110 honey, 63 light brown, 50 gingerbread, 15 blush, 30 black, 2 white, and 18 gray beads.
Shiba Inu
This pattern uses 188 black, 68 flamingo, 466 sand, 97 toasted marshmallow, 383 white, 15 light gray, 21 gray, 11 dark gray, 29 black, and 7 salmon beads.
Small Black and Brown Dog Head
This pattern uses 162 black, 56 honey, 41 white, 8 cheddar, and 9 dark gray beads.
Scrappy Dog Head
This pattern uses 104 black, 38 gingerbread, 74 light brown, 19 honey, 9 flamingo, 8 salmon, and 101 white beads.
Happy Shih Tzu
This pattern uses 271 black, 353 white, 270 gingerbread, 6 purple, 2 light blue, and 4 light pink beads.
Corgi Butt
This pattern uses 100 black, 86 honey, 96 white, 24 sand, and 1 blush bead.
Cute Corgi
This pattern uses 510 robin’s egg, 233 black, 82 cream, 127 honey, 195 white, 32 salmon, and 97 light blue beads.
Running Brown Spotted Dog
This pattern uses 192 cocoa, 129 stone, 318 toasted marshmallow, and 66 light brown beads.
Shih Tzu with Blue Bow
This pattern uses 276 honey, 228 gingerbread, 28 cobalt, 20 pastel blue, 199 white, and 27 black beads.
Blue Dog
This pattern uses 176 black, 307 robin’s egg, 8 white, 8 blush, and 4 hot coral beads.
Running White Terrier
This pattern uses 205 black, 430 white, and 264 light gray beads.
Yellow Lab Head
This pattern uses 277 cream, 134 fawn, 30 cocoa, 2 white, and 10 pink beads.
Cute Running Brown Dog
This pattern uses 232 cocoa, 464 rust, 157 gingerbread, and 220 sand beads.
Large Pug Head
This pattern uses 161 sand, 95 toasted marshmallow, 53 dark gray, 184 black, 97 tan, and 2 white beads.
Sitting Boston Terrier
This pattern uses 342 black, 18 peach, 233 white, 8 pink, and 4 gray beads.
Dog Parents and Puppies
Get four separate patterns with parents and their puppies.
Scottie Dog
This pattern uses 691 black and 15 red beads.
Bernese Mountain Dog
This pattern uses 144 black, 100 white, 46 honey, and 2 gingerbread beads.
Littlest Pet Shop Husky
This pattern uses 378 dark gray, 147 turquoise, 116 gray, 447 white, 55 black, and 6 charcoal beads.
Bull Terrier
This pattern uses 126 gray, 152 dark gray, 302 white, 157 light gray, 29 blush, 68 black, 7 hot coral, and 21 cherry beads.
Daschund Puppy
This pattern uses 277 black, 59 honey, 84 gray, 43 brown, 20 pastel yellow, and 2 white beads.
Harlequin Great Dane Puppy
This pattern uses 147 gray, 513 white, 329 black, and 20 light pink beads.
Australian Shepherd
This pattern has 156 gray, 38 dark gray, 139 black, 197 white, 78 gingerbread, 8 light blue, and 4 pink beads.
Husky Puppy
This pattern uses 117 dark gray, 266 black, 6 light pink, 15 pink, 164 light gray, 146 white, 99 pewter, and 68 gray beads.
Large French Bulldog
This pattern uses 265 pastel blue, 122 pastel yellow, 76 honey, 63 salmon, 35 sand, 23 flamingo, 96 gray, 52 white, 52 gingerbread, and 57 black beads.
Large German Shepherd
This pattern uses 170 brown, 117 black, 197 light brown, 145 honey, 77 tan, 44 white, 10 pink, and 9 light pink beads.
If you enjoyed these dog perler beads, I hope you’ll let me know in the comments. Feel free to make dog breed requests also! Then check out these other posts:
The post Dog Perler Beads (60+ Free Patterns!) appeared first on DIY Candy.
]]>I have to admit, I’m completely behind the times when it comes to Kuromi. I’m very familiar with Sanrio, of course – big Hello Kitty fan, and all the other characters like My Melody and the Little Twin Stars. I thought there wasn’t a Sanrio character that I didn’t know.
But as it turns out, Kuromi was after my time.
Yes, I’m old. Kuromi was created by Sanrio designer Yumi Yamashita and made her first appearance in 2005. I’m not sure what I was doing, but I think we can all agree that I wasn’t paying attention. Because for a long time, I had no idea she even existed!
Kuromi is an interesting character because she is My Melody’s main “rival” and depicted as mischievous and sassy. This is in stark contrast to the sweetness and innocence of My Melody.
I kind of dig her though.
Kuromi is energetic, rebellious, and often enjoys stirring up trouble. She can be seen as a bit of a tomboy, and her tough exterior hides a softer side. Despite her mischievous nature, she values her friendships and is loyal to her friends.
Maybe I see a little bit of her in myself.
Kuromi is often associated with the color black and skulls. This darker aesthetic, combined with her cute and playful nature, has made her a favorite among fans who appreciate a different twist on the typical Sanrio character.
I’ve really learned to love this devilish little cutie. And if you’re here, you probably love her too. And want to make some Kuromi perler beads!
I’ve got good news . . . we’ve got over 20 patterns for you ranging in size from large to small. There are also a variety of poses for you to check out. I guarantee you will find a perler pattern you like in this collection.
Perler beads are recommended for ages six and up, so this is a very fun craft to try with your elementary age kids. All children seem to love perler beads (also known as hama beads, fuse beads, or melty beads). But don’t be shy – adults love them too!
Before we get into the Kuromi hama beads, I want to review a few basics of using fuse beads to make sure you get the best results. If you don’t want the tips, scroll down to the bottom to get the patterns and tutorial.
Remember that the overall goal is to melt the beads together on both sides while still leaving the holes open. Here’s how you achieve success (with a rainbow as an example).
Place ironing paper or parchment paper over the beads on the pegboard. Be gentle so you don’t disturb the beads underneath.
Heat your iron to the medium setting (no steam). In a circular motion, begin to iron the project. Don’t press down too hard with the iron.
When ironed properly, the beads will still have an open center. Check and make sure your edges are melted. Let the design cool on the pegboard.
Note: BE CAREFUL about lifting up the paper while you’re ironing! If you want to check, carefully peel back paper around the edge of your design and see if all the beads are melted.
If you lift the paper up quickly and there are a lot of unmelted beads, they will easily fall off or go flying and you may be forced to start over. Sometimes the edges need more time so when you check, just check the edges and peel paper back slowly.
Another Note: some beads melt faster than others (clear melts faster than white, for example). So some holes might be larger than others. It’s okay! That’s part of the look of the project.
Remove the bead design from the pegboard. Flip it over to the non-melted side and repeat the fusing process.
Let cool completely and remove the paper again (which is reusable). Some people pull the paper off after they iron the first side, but I just wait until the end and peel off both pieces. It’s up to you!
Now that you’ve had a refresher on how to melt the beads, you can get the patterns! Keep on reading.
Mini Kuromis
If you’re looking for something small for a magnet, keychain, earrings, or similar, here are five mini patterns you can make on a 29 x 29 square board.
Small Kuromi Head
This pattern uses 95 black, 75 dark gray, 13 pink, and 40 white beads.
Heart Eyes and Tongue Out
This pattern uses 162 black, 54 flamingo, 50 white, and 2 bubble gum beads.
Sitting Kuromi
This pattern uses 309 black, 30 pink, and 137 white beads.
Kuromi Back and Devil Tail
This pattern uses 146 black, 99 dark gray, 8 flamingo, and 114 white beads.
Medium Kuromi
This pattern uses 311 black, 42 pink, and 110 white beads.
Purple Pirate
This pattern uses 84 black, 106 pastel lavender, 26 blush, 109 white, 18 purple, and 1 raspberry bead.
Holding a Red Heart
This pattern uses 241 black, 6 flamingo, 82 white, and 79 red beads.
Laying Down with Polka Dot Bow
This pattern uses 226 black, 132 gray, 166 white, 42 pink, and 16 flamingo beads.
Spiral Eyes
This pattern uses 475 black, 48 flamingo, and 128 white beads.
Hexagon Kuromi
Grab a large hexagon pegboard to make this pattern.
Large Kuromi
This pattern uses 221 black, 278 dark gray, 32 flamingo, and 143 white beads.
Heart Eyes
This pattern uses 450 black, 90 flamingo, 102 white, and 2 yellow beads.
Pink and Gray
This pattern uses 280 dark gray, 26 flamingo, 133 white, and 2 clear beads to hold the tail on.
Purple and Plum
This pattern uses 436 pastel lavender, 32 raspberry, 134 white, and 42 purple beads.
Winking with a Flower
This pattern uses 441 black, 36 pastel lavender, 156 white, and 6 pink beads.
Side View
This pattern uses 149 black, 79 dark gray, 16 flamingo, and 106 white beads.
Sitting and Winking
This pattern uses 210 black, 187 gray, 26 pink, 193 white, and 6 flamingo beads.
Holding a Pitchfork
This pattern uses 255 black, 216 gray, 16 clear, 18 blush, and 158 white beads.
Kuromi Smiling
This pattern uses 229 black, 186 gray, 26 pink, 186 white, 6 flamingo, and 9 clear beads (optional on the collar and tail).
Did you enjoy these Kuromi perler beads? Let me know in the comments! I’d love for you to check out these other posts:
The post Kuromi Perler Beads (20+ Free Patterns) appeared first on DIY Candy.
]]>[TAG0]
Visualizer: Xiao Xiao Vision
A crash of color should get the creative juices flowing first thing in the morning till late into the night. Try color-blocking a wall-mounted bookcase with a Mondrian-inspired palette of red, yellow, blue, and black. This tension shelving unit takes on a sculptural appeal under a striking paint job too.
[TAG1]
Designer: Ogeh Ibiza Remi-John
Illuminate your home office setup with a Nanoleaf Elements wall light kit. These modular, hexagonal lights have a cool wood effect and can be controlled with Alexa Google Assistant and Apple Homekit.
[TAG2]
Designer: Andres Vidoza
When your setup is heavy on equipment, blend the elements into a dark background and create dimension with mood lighting.
Team an ergonomic computer chair with a footrest to ensure that you’re always seated in the optimum position for spine support. Keep equipment close to hand to avoid twisting. This handy headphone hook keeps the workspace clear and organized.
[TAG4]
Designer: Denton Reneau
Increase your desk space with a computer stand, which makes space for smaller items underneath. It also raises your computer screen to a more comfortable viewing height.
[TAG5]
Designer: Andre Watts
Organize your earphones, games controllers and other cumbersome kit on a pegboard wall to leave room for multiple computer monitors.
[TAG6]
Designer: Matthew Encina
This double workspace setup reduces stress levels with a family of indoor plants. Floating wall shelves display the greenery at different levels and provide extra storage space for books and office supplies.
[TAG7]
Designer: Jorge Powell
A desk mat provides soft padding for forearms and wrists to prevent fatigue. A mat also prevents scratches, pen depressions and stains, improves mouse usability and stops keyboard slide. Some even have built-in wireless chargers to streamline your day.
[TAG8]
Designer: Jaime Marrero
A swivel chair is a must if you have an L-shaped desk setup or a perpendicular desk and storage unit.
[TAG9]
Designer: Michael Soledad
Bring a natural element into a high-tech home office with wood etchings and matching wooden wall shelves.
[TAG10]
Designer: MIKE | MEKUNO
Swap out simple desk legs for useful drawer units. Deep filing drawers will make keeping track of paperwork a cinch.
Maintain the minimalist aesthetic of a modern home office desk by installing slimline desk mounts with internal cable management.
[TAG12]
Designer: TEKSETUP ⤫ Tim
Extend wall shelves and pegboard organization around both edges of a corner desk situation to maximize storage potential. Unify the arrangement with hanging plants.
[TAG13]
Designer: Özge Karaoğlu
Utilize your laptop as part of your desktop setup. Elevate it with a laptop stand to match the height of your main monitor.
Take advantage of high ceilings by stretching wall shelves to the max.
[TAG15]
Designer: Pancha Aprilianto
A black metal wall organizer makes a bold addition to a clean white and wood-tone home office. Black shelf brackets and desk legs complement the aesthetic.
[TAG16]
Designer: Levar Juro
IKEA pegboards offer a cost-effective organizational solution with a multitude of add-on shelves, hooks, brackets, pen pots, magazine holders, and mini drawers.
[TAG17]
Designer: brittnaynay3
A U-shaped desk layout makes the ultimate home office setup for a combination of gaming streaming, and projects. Plant an ergonomic swivel chair with wheels at the center of it and you’re good to go.
[TAG18]
Designer: Ivan Garcia
Add a message board for inspirational quotes. A little bit of positivity can get you through a tough day.
[TAG19]
Designer: Ferik Tantomi
Choose a monitor stand that has integrated drawers to hide away stationery and spare wires.
[TAG20]
Designer: Tuan Thanh
Tuck PC towers underneath the desk with brackets or a shelf. This elevated design makes the floor area appear more spacious and makes mopping a breeze.
[TAG21]
Designer: Taylor Hoff
It’s cute to have a desk plant but a hanging plant leaves more room for office essentials.
Rather than having deep wall shelves encroaching on your head space, opt for narrow picture ledges to hold decor and small pieces of equipment. They’re the perfect depth for cameras and lenses.
[TAG23]
Designer: Adéniyi Salami
Install under-desk cable baskets to take away the tangle around your feet. Add under-desk lighting to illuminate your clean new look.
[TAG24]
Visualizer: Yara El-Fiki
If you have extra space, furnish a small meeting area for brainstorming sessions and collaboration.
[TAG25]
Visualizer: Nada Mustapha
Made-to-measure shelving units construct a high-end, tailored look.
[TAG26]
Visualizer: Evgeniy Zhdanov
Break up a busy bookshelf wall with a piece of focal art.
[TAG27]
Visualizer: Semih Keler
This quirky art piece sets the tone for the whole room. A home workspace doesn’t have to be devoid of personality.
[TAG28]
Visualizer: Xiao Xiao Vision
Splash items of interest all around the room to make your home office a fun place to be.
[TAG29]
Designer: David Guerra
Enrich your home office setup with a swathe of wood tone for a cozy cabin feel. This one has a set of retractable doors that adjoin it to the living space when the work day ends.
[TAG30]
Visualizer: Mohamed Abd Elnaby
Hang a statement chandelier above your desk to add a flash of grandeur.
[TAG31]
Designer: Iglesias-Hamelin Arquitectos
A swing arm wall lamp is easily repositioned to suit the task and keeps the desk open for projects.
[TAG32]
Designer: u/StretchyMonad
Split a long desk into a dedicated computer area and a small reading/art area.
Utilize narrow wall space around a window for vertical storage.
Bring in color-changing lights to change up the mood.
[TAG35]
Designer: Christopher Funk
Create a whimsical home office to put your mind into a creative space. This dreamy workspace resides under fluffy clouds and twinkling starlight.
[TAG36]
Designer: Matt Gibson Architecture + Design
Even awkwardly shaped spaces lend themselves to great home office setups with a custom-cut desktop.
[TAG37]
Visualizer: Tobian Design
Backlit shelves bring in slivers of atmospheric light.
[TAG38]
Visualizer: Menaa Hussien
Comfortable chairs transform the look of a formal home office, giving it a homey appeal.
Home office pieces don’t have to match. An eclectic collection fashions a relaxed boho vibe. This boho workspace uses slotted shelving systems to accommodate ever-changing displays of different-sized items.
Recommended Reading: 50 Modern Home Office Desks For Your Workspace
For more regular updates from Home Designing, join us on Facebook.
[TAG40]
If you are reading this through e-mail, please consider forwarding this mail to a few of your friends who are into interior design. Come on, you know who they are!
Related Posts:
]]>Food is one of those things that we all have in common. Let’s face it . . . these days it can, at times, feel like we don’t share a lot with our fellow man.
But everyone’s gotta eat!
No matter what your background, your favorite hobbies, color of your skin or hair, educational level, car you drive . . . or 1,000 other things . . . you eat food. Of some sort.
What goes into our stomach is the great equalizer. It unites us!
My niece and I have recently become obsessed with perler beads, and we knew that one thing we wanted to tackle was food perler beads.
It started with desserts like mini popsicles and cupcakes, then quickly escalated into a hamburger and fries with a large bowl of ramen!
It’s really fun to make food perler beads. Once you start you’re not going to stop. And we have over SEVENTY FIVE patterns for you to try!
Categories include junk food, sushi, donuts, ice cream, cake, cupcakes, fruits, vegetables, pizza, tacos, milk, burgers, breakfast food, condiments, Starbucks coffee, and more!
If there’s a food you like that’s cute, it’s probably on this list. You can always suggest we make a pattern if you’re looking for something specific. Just leave us a comment because we love coming up with new food perler beads.
Just FYI, perler beads are recommended for ages six and up, so this is a very fun idea to try with your elementary age kids. All children seem to love perler beads (also known as hama beads, fuse beads, or melty beads). But don’t be shy – adults love them too!
Before we get into the cute perler beads food, I want to review a few basics of using fuse beads to make sure you get the best results. If you don’t want the tips, scroll down to the bottom to get the patterns and tutorial.
Remember that the overall goal is to melt the beads together on both sides while still leaving the holes open. Here’s how you achieve success (with a rainbow as an example).
Place ironing paper or parchment paper over the beads on the pegboard. Be gentle so you don’t disturb the beads underneath.
Heat your iron to the medium setting (no steam). In a circular motion, begin to iron the project. Don’t press down too hard with the iron. When ironed properly, the beads will still have an open center. Check and make sure your edges are melted. Let the design cool on the pegboard.
Note: BE CAREFUL about lifting up the paper while you’re ironing! If you want to check, carefully peel back paper around the edge of your design and see if all the beads are melted.
If you lift the paper up quickly and there are a lot of unmelted beads, they will easily fall off or go flying and you may be forced to start over. Sometimes the edges need more time so when you check, just check the edges and peel paper back slowly.
Another Note: some beads melt faster than others (clear melts faster than white, for example). So some holes might be larger than others. It’s okay! That’s part of the look of the project.
Remove the bead design from the pegboard. Flip it over to the non-melted side and repeat the fusing process.
Let cool completely and remove the paper again (which is reusable). Some people pull the paper off after they iron the first side, but I just wait until the end and peel off both pieces. It’s up to you!
Now that you’ve had a refresher on how to melt the beads, you can get the patterns! Keep on reading.
Mini Desserts
You’ll get ice cream, lollipops, popsicles, a fudge pop, a tiered cake, cupcake, cookie, candy, and a banana split.
Small Foods
The patterns include pear, banana, pineapple, watermelon, bread, waffle, pie, pancakes, cookie, chicken, pizza, avocado, blueberry muffin, cake, kiwi, and an egg.
Junk Food Night
Patterns for pizza, a hot dog, popcorn, and a taco.
Frozen Yogurt and Ice Cream Cones
The frozen yogurt on the left uses 40 black, 47 white, 24 honey, and 26 pastel yellow beads. The cone on the left uses 40 sherbert, 47 pastel green, 51 pink, 32 tan, and 43 gingerbread beads.
Big Banana Split
This sundae uses 61 mint, 4 red, 29 white, 12 cheddar, 25 cream, 21 cocoa, 30 pink, 8 apricot, 24 pastel green, 31 yellow, 13 magenta, 19 light pink, and 10 twilight plum beads.
Two Ice Cream Sundaes
These patterns use 217 cranapple, 105 peach, 11 magenta, 8 red, 6 cherry, 34 white, 29 light gray, 9 sand, 8 gray, 6 light brown, 119 flamingo, 51 rose, 38 pastel yellow, 11 brown, 33 cream, 89 turquoise, 62 sky, and 56 mint beads.
Cupcakes with Frosting
The cupcake on the left uses 88 fruit punch, 92 white, 2 orange, 3 pastel green, 4 fuchsia, 2 sky, 2 yellow, and 99 blush beads. The cupcake on the right uses 11 fruit punch, 1 white, 69 pink, 115 cocoa, 52 sky, and 44 blush beads.
Round Treats and a Pretzel
You’ll get patterns for a sprinkle sugar cookie, donut with sprinkles, half eaten chocolate chip cookie, and a pretzel (that uses a small pegboard).
Pink Frosted Donut
This pattern uses 66 black, 116 cotton candy, 10 white, 45 bubble gum, 57 tan, 4 yellow, 4 parrot green, 35 brown, 2 pastel lavender, 2 red, and 2 pastel blue.
Strawberry Cake
This pattern uses 23 shamrock, 104 cranapple, 7 bright green, 76 pink, 41 white, 9 light pink, 33 purple, 23 pastel lavender, 128 cream, and 262 peach beads.
Cake Slices
The cake on the left uses 49 black, 12 dark green, 8 pastel green, 28 cherry, 42 white, 80 rust, 15 cranapple, 2 light brown, 84 cream, 5 sand, and 6 pink beads.
The cake on the right uses 22 dark green, 4 pastel green, 76 cranapple, 57 cherry, 25 pink, 2 white, 40 bubble gum, 27 light pink, 44 tan, and 61 pastel yellow beads.
Time for Sushi
This pattern uses 525 black, 294 white, 112 peach, 93 salmon, 29 pastel green, 37 dark green, 25 yellow, 74 light gray, 63 tomato, 27 tangerine, 12 cheddar, 3 pastel yellow, and 9 honey beads.
Bowl of Ramen
This pattern uses 52 gingerbread, 27 hot coral, 48 mint, 159 pastel blue, 284 white, 37 honey, 66 tan, 17 dark green, 15 magenta, 5 kiwi lime, 7 yellow, and 40 light gray beads.
Starbucks Run
Get three frappuccino patterns including a unicorn frap. Then there are four regular coffee cups, including the Starbucks holiday cup pattern.
Big and Little Boba
These patterns use 12 pastel blue, 61 white, 82 clear, 30 pastel green, 23 honey, 138 sand, 29 toasted marshmallow, and 57 black beads.
Slice of Pizza
This pattern uses 98 cocoa, 76 cream, 80 yellow, 27 pastel yellow, 10 tomato, 31 light brown, 11 hot coral, 44 sand, 17 rust, 33 cranapple, 11 light pink, 39 cherry, and 26 cheddar beads.
Loaded Pizza
This pattern uses 94 honey, 96 cheddar, 190 yellow, 164 red, 61 dark green, 97 light brown, 28 bright green, 100 tomato, 48 black, 22 pastel green, 79 cocoa, 36 dark gray, 105 raspberry, 56 white, and 114 cotton candy beads.
Jar of Nutella
This pattern uses 393 white, 123 light gray, 48 gray, 149 black, 315 brown, 27 light brown, 61 red, 14 shamrock, 12 tan, 5 yellow, and 6 rust beads.
Cookies and Milk
The milk and cookie pattern on the left uses 167 black, 116 mint, 28 plum, 213 blueberry creme, 283 light gray, 276 white, 84 brown, 38 gingerbread, 72 light brown, 220 fawn, and 19 blush beads.
The milk carton pattern on the right uses 145 pastel blue, 132 white, 27 black, and 6 blush beads.
Glass Milk Bottle
This pattern uses 82 midnight, 26 cobalt, 17 pastel blue, 114 white, 10 cranapple, 136 cream, 36 red, 8 blush, and 6 mist beads.
Flavored Milk Cartons
Get four cartons including strawberry, banana, original, and chocolate milk.
Golden Arches
These patterns use 28 white, 35 red, 139 yellow, 108 honey, 6 toothpaste, 9 kiwi lime, 2 bright green, and 7 brown beads.
McDonalds Fries and Coke
These patterns use 69 red, 129 black, 8 clear, 59 yellow, 17 sand, 37 brown, and 7 white beads.
Bottle of Ketchup, Fries and a Burger
The ketchup pattern uses 84 cocoa, 17 toasted marshmallow, 7 light gray, 8 gray, 83 cherry, 74 red, 34 hot coral, 17 flamingo, 13 honey, 17 pastel yellow, 25 brown, 43 yellow, 22 white, 4 bright green, 22 tomato, and 12 spice beads.
The burger and fries patterns use 53 cheddar, 47 yellow, 91 honey, 7 cream, 128 red, 13 bright green, and 22 brown beads.
Subway Sandwich
This pattern uses 121 gingerbread, 156 honey, 28 tomato, 15 salmon, 15 shamrock, 12 kiwi lime, 7 yellow, and 14 cream beads.
Deli Sandwich
Make two pieces of bread and then add cheese and lettuce using small boards. Make onion, the deli meat, and tomato using small round pegboards.
Minis on a Star Board and a Happy Banana
Get patterns for small pizza slices, watermelon, and ice cream cones you can make on a star board. The pattern on the right is a smiling banana with a scarf and uses a large hexagon board.
Corn Dog, Chicken Leg, and Beer
The corn dog uses 36 black, 19 red, 8 yellow, 34 honey, 2 cranapple, and 8 tan beads. The chicken leg uses 37 black, 34 cheddar, 24 orange, 6 robin’s egg, and 4 white beads.
The pint of beer pattern uses 58 black, 32 clear blue, 27 white, 33 honey, 22 yellow, and 20 cheddar beads.
Loaded Taco
This pattern uses 78 black, 32 white, 11 toasted marshmallow, 29 dark green, 66 light grown, 229 butterscotch, 91 brown, 14 red, and 18 cheddar beads.
Cheeseburger
This pattern uses 53 black, 105 tan, 13 white, 36 bright green, 21 red, 32 brown, and 24 cheddar beads.
Breakfast Bacon, Eggs, and Pancakes
These patterns use 92 white, 35 spice, 86 rust, 31 pastel yellow, 18 yellow, 23 black, 4 cheddar, 15 salmon, 4 blush, 129 sand, and 62 butterscotch beads.
Raspberry Jam and an Egg
The jam pattern uses 254 mulberry, 117 white, 210 raspberry, 146 pink, and 11 pastel green beads. The egg pattern uses 47 black, 125 white, 28 orange, 26 cheddar, and 22 robin’s egg beads.
Tons of Fruit
Get patterns for an orange, grapes, apple (including a cut open apple with seeds), lemon, and pineapple.
Fruit on Small Round Boards
Get a round lime, watermelon, cherry, and lemon slice. These are all done on small round pegboards.
Bunches of Bananas
The bunch on the left uses 52 black, 51 yellow, 52 orange, 29 cheddar, and 28 bright green beads. The peeled banana uses 106 black, 41 cream, 84 yellow, and 24 cheddar beads.
Tomato and Strawberries
The patterns on the left use 67 black, 35 bright green, 126 red, 1 dark green, 8 white, and 9 honey beads. The strawberry on the right uses 84 black, 19 shamrock, 41 pastel green, 127 red, 29 cherry, and 24 white beads.
Pineapple, Avocado, and Watermelon
The pineapple uses 48 black, 23 dark green, 9 bright green, 50 cheddar, 24 yellow, 31 pastel yellow, and 4 white beads. The avocado uses 40 black, 60 dark green, 29 pastel green, 27 sour apple, and 21 brown beads. The watermelon uses 32 black, 32 forest, 2 white, 14 light pink, 26 bright green, 94 red, and 22 dark green beads.
All the Veggies
You’ll get patterns for green onion, two carrot versions, an eggplant, radish, corn, and broccoli. It’s easy to omit the smiley faces if you they aren’t your thing!
If you enjoyed these patterns, I hope you’ll let me know in the comments! I also hope you’ll check out the following posts:
The post Food Perler Beads (75+ Free Patterns!) appeared first on DIY Candy.
]]>When starting anew, they don't use the phrase ‘clean slate' for nothing. As a matter of fact, when you're a DIYer, you tend to take this phrase quite literally—which is always a great thing! There's no better feeling than getting a fresh start without the unnecessary waste and mess in our lives! So, as Mother Nature gives the cue for starting over, be armed and ready with your personal cleaning checklist! Here are the ten crucial items you must include on your list.
At the top of my cleaning checklist is this ingenious coffee cup holder! Just attach to your wall some spray-painted wooden dowels stylishly glued together, and voila! Your mornings are clutter-free!
Who knew a vintage cigar box would make a great jewelry organizer? Folding some burlap inside the boxes is all it takes to finish this easy and simple DIY project. An organizing hack for your everyday necessities definitely belongs on your cleaning checklist!
Would it really be a cleaning checklist without a good DIY shelf? The name of this shelf basically explains how it's done: two boards of reclaimed wood drilled to the wall, fastened by vintage leather. It's perfect for displaying newfound items for spring!
Get ready for #Spring2017 with a beautiful but easy DIY clock! #DIYProjects #DIYReady https://t.co/XMXm7x4DD0 pic.twitter.com/bNrVLdW4aK
— DIY Projects (@DIYProjectsCom) February 28, 2017
Using a birdcage as a desk organizer? Who would've thought! The key to this DIY organizer is spray paint and wooden dowel rods! The best part is: this organizer is portable!
As much as we understand spring is a season of renewal, we tend to keep some old stuff from the past. If you don't want them displayed in your home, then this hidden storage should be on your cleaning checklist! Just glue together a couple of unused book spines, and you've got a secret hiding place.
Ladders aren't just for construction work anymore. They can now be used for organizing your stuff into a stylish and fashionable display. Just take this ladder display for example. Could you think of an easier way to declutter your space?
https://www.instagram.com/p/BuTYbNSn4b4/
This has got to be my favorite on this cleaning checklist! I'm excited to welcome spring because I have this amazing pegboard wall organizer. Just by drilling some wooden dowels onto a chosen size of plywood, you'll have an organizer for all kinds of stuff! Truly an investment not just for spring, but for an entire year of organizing!
Spring is also the season to try new recipes. For delicious and mouth-watering meals, you need fresh herbs and spices stored in this lovely spice jar storage! Can you believe all it takes is twisting a couple of wires and drilling nails on the wall? A must-try DIY project!
As we welcome spring, thoughts, events, and memories must be organized too! Get a couple of cork boards and paint them any way you want. I suggest painting your custom cork board in such a way that it grabs your attention every day.
If you're like me who can't stand articles of clothing lying around the house, this scarf hanger is the first thing you should make this spring. It doesn't even take much time: simply use some pliers to shape a line of wire into a hanger. Use a stretch of leather for embellishment.
Watch this video from kikomoda for more DIY items you can add to your cleaning checklist:
I'm sure going through this list has given you enough time to think about what needs to go and what needs to stay in your life. Don't think of cleaning as getting rid of stuff you might miss or need in the future. Cleaning is about one principle: keeping what's essential and important. The same could be said about life. Why waste time and energy on things which don't matter? And if there's any time to remind us of the value of a cleaning, it's spring. So welcome it with these amazing DIY projects on your cleaning checklist!
Which of these cleaning checklist items do you need the most right now? Let us know in the comments below!
Looking for more organizational DIY projects? Check out these Closet Organizer Ideas!
[TAG6]
Stay connected with us on Facebook, Twitter, Pinterest and Instagram!
Editor’s Note – This post was originally published in April 2014 and has been updated for quality and relevancy.
]]>Although all dads are different, some tell-tale signs or typical ‘dad’ things that they do make it apparent that this man knows how to change diapers (or has done it at least once). One could call it a stereotype, but we prefer to refer to it as the reality of being a dad. And if we think of a typical one, there’s quite a selection of gifts for men we believe he would appreciate receiving this Father’s Day.
Whether Dad is into fishing, fixing stuff around the house, playing sports, chilling in the garage, or his man cave with a cold one, something from our selection of the best Father’s Day gifts might just hit the spot for him.
Below, we’ve compiled an array of Father’s Day gifts 2023 edition that might be what Dad has always wanted but never got around to purchasing. We made sure to include a variety of men’s gifts to accommodate dads with different likes and preferences and include both budget-friendly and more upscale options.
Hence, fingers crossed, you will find a Father’s Day gift that checks all the required boxes! And once the gift is all sorted, you may start thinking of Father’s Day activities to make the occasion even more special!
A more pricey gift for a dad that will last him a long (and scrumptious) time.
The motto of this pizza oven-making brand is that everybody deserves great pizza. And this pizza oven has been designed with that sole purpose in mind (the hefty price explains it). So let Dad level up his pizza game and become a true pizzaiolo! He'll never want to order from Domino's again, especially when he can make pizza in less than the delivery time.
Image credits: amazon.com
An exquisite gift for a true gentleman.
Tough and durable, this wood beard comb (also great for mustache and head hair) comes with a brown or black case and a gift box, making it the ideal gift for Dad on Father's Day. Give it to a striking Viking in your life, and watch him light up with gratitude!
Image credits: amazon.com
Gift for a music-loving dad.
If Dad loves listening to the radio or has a new favorite podcast, make Dad’s shower time more enjoyable by getting him a SoundBot SB510 Bluetooth Shower Speaker. He can answer the phone through it too! For the price of less than 20 bucks, it doesn’t get better than this.
Image credits: amazon.com
A practical gift to keep Dad warm!
If Dad is an eager camper or enjoys spending time by the fire, you can't go wrong with getting him a smokeless fire pit. This portable fire pit can be used in various settings, such as a beach, patio picnic, backyard, or campground. It also doesn't require propane, kerosene, or other gases and can be loaded with wood pellets, small logs, or lava rocks. Give Dad the gift of comfort, relaxation, and many warm conversations with family and friends.
Image credits: amazon.com
A luxury gift for a polished man in your life.
This beautiful whiskey set that comes in a rustic wooden crate includes a glass decanter, 2 swirl lowball glasses, 9 chilling stones, and 2 heavy stone coasters. Present this gift to a loved novice or seasoned whiskey connoisseur who also happens to be your dad!
Image credits: amazon.com
Gift for a dad who needs more spice in his life.
If you need a gift for your hot-sauce-loving dad, look no further than the hottest hot sauce kit on Amazon! Using the kit, he can make his own unique spicy sauce and have an enjoyable and motivating experience while doing so.
Image credits: amazon.com
For a whiskey connoisseur.
This luxury set comes with 4 reusable chill whisky stones, a crystal decanter, 2 world map etched glasses, and ice tongs. If Dad is a whisky lover, a gift doesn’t get better than this.
Image credits: amazon.com
For a dad who complains about his feet hurting.
If Dad often complains about foot pain, he needs this massager. According to Amazon reviews, it not only removes soreness but also helps with foot mobility!
Image credits: amazon.com
A gift for an active dad.
Massage guns are the latest FAD in fitness. If Dad is into an active lifestyle or regularly participates in sports, a massage gun could be the perfect gift for him. All it takes is a short 30-second sweep over his shoulders to release tension and stress after a long day or to activate the body before a workout. For a price of less than two physical therapy sessions, it's a worthy investment that Dad will benefit from every day.
Image credits: amazon.com
Gift for a problem-solving dad.
Geekey multi-tool features more than 16 functions, each providing a range of possible applications in one keychain-sized tool. This handy little tool combines pretty much all tools Dad might need when faced with daily challenges. Hence, this is the perfect Father's Day gift for a dad of all trades who wants to be prepared for anything life throws at him!
Image credits: amazon.com
Father's Day gift inspired by Jeffrey "The Dude" Lebowski.
Make Dad feel snug as a bug in a rug with a terry cloth bathrobe made of 100% cotton. The bathrobe is also very absorbent, making it great to throw on after a shower, pool, or sauna. Also has pockets!
Image credits: amazon.com
Ideal Father's Day gift for an outdoorsy dad.
Dads and camping chairs go together like wine and cheese. Built to last, Coleman portable camping chair is sturdy yet very comfy, thanks to a fully cushioned seat and back for added support. Yet, what might be the best part about it is a built-in cooler that can keep up to 4 cans ready at Dad's disposal!
Image credits: amazon.com
Perfect gift for a dad who never misses a grill party.
The portable CUBE grill is explicitly made for cooking your favorite grilled foods away from home with little hassle. The tiny charcoal grill is ideal for tailgating parties, parks, beaches, campgrounds, and other outdoor areas with access to a hard surface. This is ideal for Dad if he wouldn't mind eating grilled food for every meal!
Image credits: amazon.com
For a dad who cares about his looks.
Treat Dad to a new trimming kit if he needs one because we all know too well he will never get around to getting a new one himself. “The old one does the job just fine,” he would say. This one has 37k+ 5-star ratings on Amazon, so it must be a good pick!
Image credits: amazon.com
For a dad who can turn any occasion into play time.
This table tennis set comes with two premium paddles, 3-star balls, a retractable net, and a travel bag to bring pleasure wherever you go. Whether for Dad to enjoy with his friends or family, this set guarantees a good time!
Image credits: amazon.com
For a dad who needs his full night's Zzzs.
Being The World's Greatest Dad requires a lot of energy. Help him restore that energy by assuring he is well-rested every night.
Image credits: amazon.com
Gift for a prepper dad.
In horror movies, it's always the Dad who has been preparing for the sh*t to hit the fan all along. Help Dad prepare for the zombie apocalypse by getting him a multi-functional emergency radio!
Image credits: amazon.com
Father's Day gift for a dad who is on the move a lot.
If Dad is a bit of a neat freak, Osprey Packing Cube Set could be a great addition to his life. Also, considering how much space they can save, Dad would be glad to fit all his belongings in just one bag when traveling!
Image credits: amazon.com
Gift for a dad who wants to try something new.
Whether Dad is new to smoking food or looking for a simpler solution, this electric smoker will make creating delectable smoked food so much easier. Dad and everyone who gets to try the delicious smoked goods that come out from this one will be overjoyed!
Image credits: amazon.com
Gift for a dad who likes a cold one.
Dad will be thrilled to have these at summer backyard barbecues, tailgates, and anywhere he needs to keep beer ice cold on sunny summer days!
Image credits: amazon.com
Father's Day gift for a dad who needs to upgrade his wallet.
With the move to a more cashless society, this is a great way to store & hold enough cards for everyday use. This minimalist wallet will give Dad easier access to his cards and also has built-in RFID data protection to prevent wireless theft.
Image credits: amazon.com
Gift for a wine connoisseur.
Much like beer is much better served cold, so is white wine. Hence, if Dad is more of a wine guy, this will keep him and his wine cool in the summer!
Image credits: amazon.com
For a dad who is also a certified gym rat.
If Dad is a gym rat and likes to keep himself physically active, you can't go wrong with gifting him the gold dust of bodybuilders. However, for a more affordable option that still matches the theme, you can get him a keychain that doubles as a mini supplement container!
Image credits: amazon.com
For a dad who prefers his spice rubs homemade.
Wait a damn minute, almost $250 for a pepper grinder? Yes sir. However, this one was not built to be cheap, but to be the best kitchen gadget ever. Buyers on Amazon are raving about it. This is a dream gadget for Dad if he likes to make his own BBQ spice rub.
Image credits: amazon.com
For a dad who owns way too many gadgets.
This is perfect for a dad who keeps forgetting to charge his electronic devices the night before or puts just one on to charge and forgets about the rest. This wireless charger station can simultaneously charge his phone, smartwatch, and AirPods! So no need to purchase separate cords or wait for devices to fully charge separately.
Image credits: amazon.com
Gift for a dad who always finds time to play.
For a dad who loves spending time with his kids, you can't go wrong with this fun yard game which can be played with the whole family. Even better if Dad is into arts and crafts since the set can be customized by painting it!
Image credits: amazon.com
Gift for a dad who forgets to chillax every once in a while.
If Dad has been whining about his back recently, he’ll appreciate the heated massage cushion, which he can secure on any chair.
Image credits: amazon.com
Gift for a dad who always has his nose stuck in a book.
It fits in a pocket, is portable, and can fit more books than any home library. If Dad is into books and reading, a Father’s Day gift doesn’t get better than this!
Image credits: amazon.com
For an aspiring pro golf player of the family.
This 14-sensor kit will help Dad improve his golfing skills by tracking the distance of his strokes and analyzing each swing. Dad will know just what areas of the game he needs to work on!
Image credits: amazon.com
For an active dad.
Fitbit does a similar job to the Apple Watch and tracks different fitness and health metrics; however, it’s not as accurate and convenient. Still, if Dad doesn’t need the many extra features of the Apple Watch, Fitbit is an excellent alternative with more budget-friendly options.
Image credits: amazon.com
Gift for a dad wanting to try something new.
Fermented foods are great for improving digestion and boosting the immune system. Hence, if Dad has been wanting to try something new, both hobby- and health-wise, this fermentation tool set is the ideal introduction to home fermenting. Even if Dad is a seasoned pro, he will enjoy this bundle nonetheless!
Image credits: amazon.com
For a future brewery owner.
With the independence, experience, and enjoyment of brewing beer, this craft beer kit turns beer drinkers into beer brewers! If Dad likes his Bud, he probably wouldn’t mind learning the craft of beer making, too!
Image credits: amazon.com
For a pasta-loving dad.
If Dad is a pasta kinda guy, this pasta machine will surely mac him smile!
Image credits: amazon.com
For a dad who needs no germs in his life.
An ideal gift for the germaphobe of the family. We can’t attest to if or how well it kills germs or viruses—but if the science behind it is good and it does what it says it does, it’s a germaphobe’s dream!
Image credits: amazon.com
For a sentimental dad.
If Dad played this game as a kid, he would be thrilled to receive it for Father’s Day. This will definitely make the family’s game nights more exciting for him.
Image credits: amazon.com
Gift for a dad who wants to brush up on his bartending skills.
If Dad likes his Old Fashioned, a Whiskey Sour, or Negroni prepared and served a particular way, he will definitely have a lovely time trying to mix his own concoctions at home.
Image credits: amazon.com
For a very practical dad.
Ideal for the beach, travel, camping, swimming, backpacking, and the gym, Dad will get plenty of use from it.
Image credits: amazon.com
Gift for a dad who always has his nose stuck in his emails.
If Dad travels with work a lot and has to send many emails while on the go, he will find this folding Bluetooth keyboard super handy. Also, it's compatible with most smartphones!
Image credits: amazon.com
Gift for a dad who has everything apart from a baseball cap.
Would this Father's Day gift idea list be complete if we didn't include a baseball cap? It's a foolproof gift, whether to wear on the weekends while watching the kids play soccer or go fishing.
Image credits: amazon.com
Gift for a dad who likes to measure his health in numbers.
If Dad is into tech and keeping himself active, he would love receiving this gadget that not only displays the time but also serves as a health and fitness tracker. It might be a bit of a steep learning curve, but it’s well worth it.
Image credits: amazon.com
For a handyman dad.
The epitome of a “Dad gift” includes a drill, a selection of drill bits and screw-driving bits, pliers, hex wrenches, a tape measure, a level, a hammer, a screwdriver, a battery, a battery charger, and a bag—pretty much all Dad needs to tackle any project around the house.
Image credits: amazon.com
For a dad who wants to capture every moment.
If Dad isn't yet entirely comfortable with DSLRs yet loves snapping pics, and is somewhat of a shutterbug, get him what he might be already familiar with—a Polaroid camera!
Image credits: amazon.com
Gift for a dad who likes to keep his garage space organized.
A fantastic Father's Day gift idea for a dad who's also an avid cyclist or outdoor enthusiast! Although the entire family benefits from this one, as this rack can fit 6 bikes in total, Dad will be particularly pleased about having more floor space in the garage.
Image credits: amazon.com
Gift for a dad who likes to keep everything in one place.
This little gadget fits pretty much all Dad’s electronics needs—he can make video calls on it, look up calendars and reminders, check the news or traffic updates, and obviously, stream his favorite TV shows and movies!
Image credits: amazon.com
For a tea connoisseur kinda dad.
Although it’s a kitchen appliance that can be shared by the whole family, Dad, being very peculiar with his tea or coffee, will be delighted to upgrade his old kettle for a new one!
Image credits: amazon.com
Father's Day gift for a dad who needs a break from vacuuming.
A robot vacuum, although pricey, is a very thoughtful gift. It shows your intention to help out Dad with household chores and make things easier for him. Also, with 12k plus 5-star ratings on Amazon, hard to go wrong with this one.
Image credits: amazon.com
For a cheese and wine aficionado.
If Dad likes to gather his friends and family around for a luncheon or cheese and wine night, this set will have him looking forward to planning even more of those!
Image credits: amazon.com
Gift for a coffee-loving dad.
If Dad is a coffee enthusiast and likes his coffee oozing with flavor, a pour-over coffee maker might be exactly what he was missing in his life. You may also want to get him light or medium roast beans to complete the gift!
Image credits: amazon.com
Gift for a dad who needs constant life updates from his kids.
With this smart picture frame, you can send photos and video clips directly to Dad’s office, bedroom, living room, or whichever room he decides to display the frame in. This is an ideal Father’s Day gift to keep him updated with your life or have him relive sweet old memories!
Image credits: amazon.com
For a dad who likes his classics.
Levi's 501 will forever be a dad-approved pair of pants. Durable denim, the iconic straight fit, and the signature button fly—the jeans are classics for a reason.
Image credits: amazon.com
For a dad who likes to eat more than he likes to cook.
An ideal Father's Day gift for a dad who enjoys cooking and eating delicious food but would prefer spending more time with family and the kids rather than pots and pans.
Image credits: amazon.com
Gift for a dad who has a hard time waking up in the morning.
The aggressive sound of an alarm clock puts the sleeper into an “alarmed” mode, releasing a big rush of stress hormones which is not ideal for starting the day. Help make Dad’s mornings a little more pleasant with this alarm clock which uses natural light to wake the sleeper up.
Image credits: amazon.com
For a dad who owns way too many tools but must keep every single one.
Save Dad’s nerves by getting him a tool storage that allows him to see exactly where all his tools are!
Image credits: amazon.com
For a dad who's into gourmet cooking.
This is a book Dad will immediately want to purchase after watching Rick Martinez on YouTube. Besides the mouth-watering recipes, it's a piece of art full of beautiful pictures and interesting stories. This cookbook is a feast for the eyes and, most importantly, the taste buds!
Image credits: amazon.com
For a dad who's always thirsty.
This hefty hydrator can hold 35 ounces of Dad's favorite cold drink! It perfectly fits in the cup holder of the car and, more importantly, fits in the cup holder of the chair at the baseball park. A fantastic way to keep Dad hydrated throughout the summer!
Image credits: amazon.com
For an adventurous dad.
Although this one is pricey, it’s a worthy investment that Dad would get plenty of use from. Equipped with GoPro HERO9, Dad can capture some of the fondest memories and moments that will last a lifetime, be it a family trip to the great outdoors or a beach vacation with some snorkeling fun!
Image credits: amazon.com
For a dad who values every little moment.
Once completed, this Father’s Day gift will become a priceless treasure and unique memento of Dad’s most precious memories, stories, and life lessons that may be enjoyed by current and future generations.
Image credits: amazon.com
For a dad who wants to carry his most precious memories in his pockets.
For a dad who loves capturing treasured memories and keeping them close by: With the help of this little printer gadget, Dad can print digital photos (which also double as stickers!) measuring 2x3” straight from his smartphone.
Image credits: amazon.com
For a dad who keeps forgetting stuff at home.
Memory worsens throughout the years, and this thoughtful leather wallet tray can help remind Dad to pick up his basic necessities before leaving for the day.
Image credits: amazon.com
Whoa, that's it! If you have made it to the end, we would love to know whether you've found what you were looking for! If not, we hope you at least gained some insights into what your dad might enjoy receiving on this special occasion. Also, if you are looking for more ways to get into that Father's Day spirit, we invite you to check out some of the funniest dad jokes and dad puns we've gathered from the web!
]]>Hello, fan of unicorns! How do I know that you’re a fan? Because you’re here today. You’ve joined me for to get unicorn perler beads, and so in some way these magical animals have captured your imagination.
Galloped into your heart, so to speak.
Don’t worry. They have into mine also. Who doesn’t love a horse with a rainbow mane and glitter or metallic horn? Come on! I live for the bling.
I feel that there are certain universal truths about unicorn lovers, and you’ll have to let me know in the comments if these are true for you. Unicorn appreciators:
How did I do? Did I nail it?
Even if you aren’t totally sold on the magic of ‘corns yet, I’m about to show you how great they are – through perler beads.
Hold on tight because this is going to be a crafty ride filled with color, creativity, and, of course, plenty of magic. Let’s make a unicorn together, bead by bead.
There are over 30 patterns here, with unicorns of all shapes, sizes, and types. There are some standing, head shots, profiles, and more. Everyone will find a pattern they love, I promise.
Just so you know, perler beads are recommended for ages six and up, so this is a very fun craft to try with kids. They love perler (also known as hama beads, fuse beads, or melty beads). But don’t be shy – adults love them too!
Before we get into the patterns, I want to review a few basics of using fuse beads to make sure you get the best results. If you don’t want the tips, scroll down to the bottom to get the unicorn perler bead patterns.
Remember that the overall goal is to melt the beads together on both sides while still leaving the holes open. Here’s how you get the best results, using a rainbow as an example.
Place ironing paper or parchment paper over the beads on the pegboard. Be gentle so you don’t disturb the beads underneath.
Heat your iron to the medium setting (no steam). In a circular motion, begin to iron the project. Don’t press down too hard with the iron. Move the iron in small circles, and keep it moving.
When ironed properly, the beads will still have an open center. Check and make sure your edges are melted. Let the design cool on the pegboard.
Note: BE CAREFUL about lifting up the paper while you’re ironing! If you want to check, carefully peel back paper around the edge of your design and see if all the beads are melted.
If you lift the paper up quickly and there are a lot of unmelted beads, they will easily fall off or go flying and you may be forced to start over. Sometimes the edges need more time so when you check, just check the edges and peel paper back slowly.
Another Note: some beads melt faster than others (clear melts faster than white, for example). So some holes might be larger than others. It’s okay! That’s part of the look of the project.
Remove the bead design from the pegboard. Flip it over to the non-melted side and repeat the fusing process.
Let cool completely and remove the paper again (which is reusable). Some people pull the paper off after they iron the first side, but I just wait until the end and peel off both pieces. It’s up to you!
Now if you’re ready for the unicorn perler beads, here are the patterns.
Make sure to check out these notes:
Mini Unicorns
These are perfect for using up extra beads in the manes.
Mini Rainbow
Two small standing unicorns with colorful manes.
Colorful ‘Corns
These are a bit larger, with one unicorn standing and the other running.
Unicorn with Gold Horn and Star
This pattern uses 46 yellow, 19 gold, 59 white, 36 fuschia, 2 peach, 5 magenta, 27 purple, 5 cobalt, 26 light blue, 21 bright green, 21 orange, and 3 black beads.
Pink Unicorn with Rainbow Mane
This pattern uses 101 black, 13 yellow, 11 bright green, 88 pink, 11 sky, 16 red, and 3 tangerine beads.
Dreamy Unicorn
This pattern uses 45 pink, 20 light pink, 19 cotton candy, 14 fuchsia, 68 pastel lavender, 28 sky, 26 mint, and 13 white beads.
Color Wheel
This is a horse of a different color! Use a bunch of leftover beads to make this pattern.
Pink Mane and Yellow Horn
This pattern uses 49 raspberry, 40 fuchsia, 15 yellow, 24 cheddar, 54 gray, 96 white, and 2 black beads.
Unicorn with a Heart
This square pattern uses 239 sky, 137 white, 21 magenta, 25 flamingo, 18 purple, and 1 black bead.
Running Unicorn
This pattern uses 111 gray, 19 white, 15 cheddar, 172 white, 19 yellow, 1 black, 26 kiwi lime, 20 light blue, and 17 purple beads.
Pastel Dream
This pattern uses 164 black, 49 blush, 188 white, 13 pastel yellow, 16 orange creme, 3 light gray, 2 blueberry creme, and 2 pastel green beads.
Unicorn Cake
I want this for a real birthday cake! Uses 9 pastel green, 9 light lavender, 8 pastel blue, 59 pink, 355 white, 9 pastel yellow, and 16 black beads.
Pink and Prancing
This pattern uses 7 yellow, 6 cheddar, 169 blush, 28 bubble gum, 46 grape, 34 plum, 18 white, 15 light lavender, 7 black, and 3 sky beads.
Party ‘Corns
These unicorns have been up all night! You get a head with sunglasses, a dancing ‘corn, and another one throwing up rainbows!
Unicorn with Dangling Tail
You can attach the tail using clear nylon thread if you would like it to dangle! The four gray beads in the mane on the top of the head are clear.
Pink with Colorful Mane
This pattern uses 9 yellow, 31 light blue, 38 white, 29 sky, 35 light lavender, 21 apricot, 27 kiwi lime, 114 pink, and 8 black beads.
Rainbow of Colors 3D Unicorn
Stripe this unicorn with a ton of beads! The horn is made of gold. Once done, you’ll set the hooves in the two stands and attach the horn to the front of the unicorn’s head.
Rainbow Heart and Gold Horn
This pattern uses 175 black, 305 white, 15 gold, 11 salmon, 9 cotton candy, 10 pink, 4 gray or silver, 4 magenta, 4 red, 7 orange, 7 yellow, 7 bright green, 6 sky, 3 cobalt, and 1 purple bead.
Rainbow Heart with Unicorns
This pattern uses 10 fuchsia, 62 red, 75 white, 75 black, 50 orange, 42 yellow, 36 green, 30 blue, and 16 purple beads.
Princess Unikitty
This pattern uses 16 sky, 22 pastel lavender, 82 white, 142 blush, 51 light blue, 12 black, 8 fuchsia, 2 gray, 3 pastel green, and 8 cheddar beads.
The Last Unicorn
This pattern uses 14 gray, 9 light gray, 101 salmon, 86 flamingo, 62 tan, 277 peach, 3 white, 1 charcoal, 5 brown, 4 gingerbread, 2 light brown, and 1 honey bead.
Rainbow Mane
This pattern uses 279 black, 38 blush, 5 kiwi lime, 14 light green, 32 robin’s egg, 17 lagoon, 29 pastel yellow, 11 light blue, 371 white, 14 pink, 56 light gray, 23 prickly pear, and 32 fruit punch beads.
Pretty in Pink
This pattern uses 234 black, 74 orange creme, 49 salmon, 257 light pink, 54 magenta, and 19 white beads.
Big Eyes
This pattern uses 216 black, 104 cotton candy, 504 white, 80 light blue, 82 honey, 88 pastel lavender, 31 flamingo, 7 dark blue, and 1 gray bead.
Teal Mane
Small standing unicorn with a teal mane, gold spots, and a gold horn.
Floral Crown
Front view with a rainbow mane, crown made of flowers, and a yellow horn.
Unicorn Profile
Get the side view with a four color mane and yellow horn.
Did you enjoy these unicorn hama beads? Let me know in the comments! I’d love for you to check out these other posts:
The post Unicorn Perler Beads (30+ Free Patterns) appeared first on DIY Candy.
]]>The warm weather is here and we are in full garage organizing mode. Wisconsin garages serve many purposes. They store our yard maintenance equipment, snow removal equipment, toys, tools, bicycles, vehicles and even serve as entertaining space. That is a big responsibility for a small space. Utilizing vertical space to store as much as we can is necessary. Here are five tips on how to get the most out of your vertical space, keep the floors clear and have space for your vehicles.
Install overhead storage racks or shelves to take advantage of the vertical space in your garage. These racks can be used to store items such as seasonal decorations, sports equipment, or rarely used items. Be sure to securely fasten the racks to the ceiling or wall to ensure safety.
Install wall-mounted shelves or cabinets to maximize vertical storage space. These can be used to store smaller items, tools, or gardening supplies. Use hooks or pegboards on the walls to hang frequently used tools or accessories, keeping them easily accessible.
Hang plastic bins or wire baskets from the ceiling or walls of your garage. These are great for storing lightweight items such as balls, camping gear, or automotive accessories. Use hooks or a hanging system to suspend the bins or baskets at various heights, making use of the vertical space.
Install a pegboard on the walls of your garage to create a versatile storage system. Attach hooks, hangers, or specialized pegboard accessories to hang tools, power cords, and other items. This not only keeps your belongings organized but also saves space by utilizing the vertical area.
Utilize vertical tool storage solutions to keep your tools organized and easily accessible. For example, you can mount a pegboard or a magnetic strip on a wall to hang and display your tools. Alternatively, invest in a tool cabinet or a vertical tool rack specifically designed for vertical storage of various tools.
The engineer in me reminds you to consider the weight-bearing capacity of your garage walls, ceiling, or overhead structure when implementing any vertical storage solutions. Properly secure shelves, racks, and cabinets to ensure safety and stability. At Top Shelf Home Organizing, we take pride in our ability to organize garages to make them the best use of space for you and your vehicles. If getting your garage summer-ready is overwhelming, please reach out to Jayme for a consultation.
This article was written in collaboration with our newest organizing expert, Open A. I.
Growing up in the Pacific Northwest of the US, there were always a lot of totem poles around. They’re a type of art made by carving large wood poles with faces, symbols, and figures.
Native and indigenous peoples used totem poles for historical significance, spiritual reverence, and for artistic expression. Here’s a great quote from my alma mater on their origins:
“The figures carved on Northwest Coast poles generally represent ancestors and supernatural beings that were once encountered by the ancestors of the lineage, who thereby acquired the right to represent them as crests, symbols of their identity, and records of their history.”
–Robin K. Wright, University of Washington
So now you know what a totem pole is . . . and now you have to identify your totem animal! What animal would represent YOU if carved onto a wood pole?
For me personally? It’s the platypus. As one of the world’s few venomous mammals, the platypus represents individuality and uniqueness. Two things I value greatly.
But the truth is, there are so many animals I love for their characteristics (or perceptions!). What about playful dolphins? Courageous lions? Reliable horses?
No matter what your totem animal (or your favorite animal), I’m excited to share some cute animal perler beads with you today.
Whether you’re feeling a reptile, a bird, a mammal . . . there are over 60 patterns on this list for you to create. I tried to cover everyone’s favorite animals, but let me know if there’s something you’d like for me to add in the comments.
Perler beads are recommended for ages six and up, so this is a very fun craft to try with your elementary age kids. All children seem to love perler beads (also known as hama beads, fuse beads, or melty beads). But don’t be shy – adults love them too!
Before we get into the animal perler bead patterns, I want to review a few basics of using fuse beads to make sure you get the best results. If you don’t want the tips, scroll down to the bottom to get the patterns and tutorial.
Remember that the overall goal is to melt the beads together on both sides while still leaving the holes open. Here’s how you achieve success (with a rainbow as an example).
Place ironing paper or parchment paper over the beads on the pegboard. Be gentle so you don’t disturb the beads underneath.
Heat your iron to the medium setting (no steam). In a circular motion, begin to iron the project. Don’t press down too hard with the iron. When ironed properly, the beads will still have an open center. Check and make sure your edges are melted. Let the design cool on the pegboard.
Note: BE CAREFUL about lifting up the paper while you’re ironing! If you want to check, carefully peel back paper around the edge of your design and see if all the beads are melted.
If you lift the paper up quickly and there are a lot of unmelted beads, they will easily fall off or go flying and you may be forced to start over. Sometimes the edges need more time so when you check, just check the edges and peel paper back slowly.
Another Note: some beads melt faster than others (clear melts faster than white, for example). So some holes might be larger than others. It’s okay! That’s part of the look of the project.
Remove the bead design from the pegboard. Flip it over to the non-melted side and repeat the fusing process.
Let cool completely and remove the paper again (which is reusable). Some people pull the paper off after they iron the first side, but I just wait until the end and peel off both pieces. It’s up to you!
Now that you’ve had a refresher on how to melt the beads, you can get the patterns! Keep on reading.
Make sure to check out these notes:
The animal perlers below are in alphabetical order, minus the first pattern of small animals.
Mini Animals
To get yourself started try one of these cute (and small!) animal perler bead patterns. There’s a monkey, panda, otter, fish, giraffe, elephant, hedgehog, and a crocodile.
Bear Head
This pattern uses 192 brown, 188 light brown, 24 black, 2 white, and 2 dark gray beads.
Clowder of Cats
Each cat uses 63 beads. Check out more cat perler bead patterns.
Cartoon Cow
This pattern uses 175 black, 200 white, and 23 flamingo beads.
Crocodile
This pattern uses 154 kiwi lime, 2 black, and 7 fern beads.
Deer Head
This pattern uses 76 light brown, 115 brown, 66 fawn, 53 white, and 30 dark gray beads.
Standing Deer
This pattern uses 44 charcoal, 45 light gray, 227 honey, 76 sand, 23 black, and 16 white beads.
Dogs and a Bone
These patterns use 83 cream, 7 light blue, 54 cheddar, 46 gingerbread, 53 black, 19 white, 2 light gray, 5 red, and 24 brown beads.
Dolphin (and a Shark)
The dolphin uses 67 gray, 11 robin’s egg, and 1 black bead. The shark uses 18 robin’s egg, 111 pastel blue, 29 dark blue, 2 red, and 1 black bead.
Large Dolphin
This pattern uses 122 black, 95 robin’s egg, and 276 pastel blue beads.
Cute Elephant
This pattern uses 111 black, 171 gray, 2 blush, and 4 white beads.
Large Elephant
This pattern uses 101 purple, 17 sky, 29 black, 39 kiwi lime, 32 caribbean sea, 544 gray, and 44 white beads.
Tropical Fish
The fish on the left uses 53 salmon, 116 fern, 77 cream, 1 dark blue, and 6 hot coral beads. The fish on the right uses 207 apricot, 58 spice, and 1 black bead.
Fish in a Fishbowl
This pattern uses 148 neon blue, 310 clear, 82 neon green, 39 neon orange, 2 black, 19 neon yellow, 9 grape or glow purple, 11 neon pink, 6 cocoa, 4 rust, 10 light brown, and 4 sand beads.
Goldfish in a Bag
The pattern below is done on a hexagon board. You’ll use clear blue beads for the water and clear beads for the bag.
School of Fish (and an Octopus)
Make three small fish, a rainbow fish, and an octopus!
Goldfish and Two Turtles
Goldie uses a small heart board while the turtles use a hexagon board and a few shades of green beads.
Cute Fox
This pattern uses 127 black, 31 spice, 17 salmon, 52 tangerine, 100 orange, and 90 white beads.
Sitting Fox
This pattern uses 177 orange, 78 white, and 9 black beads.
Green Frog
This pattern uses 72 shamrock, 2 white, 125 kiwi lime, 30 slime, 4 black, 26 toasted marshmallow, 8 honey, 6 brown, 10 pastel blue, and 4 blueberry creme beads.
Giraffe Head
This pattern uses 86 mint, 16 black, 22 toasted marshmallow, 24 cocoa, 22 fawn, 117 light brown, 88 white, and 44 brown beads.
Standing Giraffe
This pattern uses 171 toasted marshmallow, 21 tan, 29 cocoa, 1 black, and 65 brown beads.
Goat
This pattern uses 99 cocoa, 8 gray, 20 brown, 7 white, 110 light brown, and 10 light blue beads.
Gorilla
This pattern uses 224 black and 228 gray beads.
Guinea Pig
This pattern uses 84 light brown, 201 white, 27 black, 68 rust, 15 cranapple, 3 sand, 3 blush, and 13 cocoa beads.
Hamster
This pattern uses 65 black, 110 brown, 43 white, and 13 peach beads.
Two Horse Heads
This pattern on the left uses 315 honey, 55 gingerbread, 44 red, 6 white, 18 gray, and 10 black beads. The horse on the right uses 149 black, 147 gingerbread, and 70 white beads.
Standing Horse
This pattern uses 182 light brown, 2 light pink, 62 black, 1 light blue, and 4 gray beads.
Koala Head
This pattern uses 92 black, 146 pewter, 6 black, and 6 blush beads.
Little Llama
This pattern uses 162 toasted marshmallow, 4 black, 7 tan, and 4 each of 4 colors to make the blanket on the back.
Large Llama
This pattern uses 346 toasted marshmallow, 39 tan, 12 cocoa, 2 flamingo, 33 butterscotch, 24 turquoise, and 26 cherry beads.
Hanging Monkey
This pattern uses 82 tan, 171 brown, 3 black, and 15 peach beads.
Monkey Head
This pattern uses 121 brown, 174 toasted marshmallow, 44 light brown, 2 white, 6 black, and 4 red beads.
Narwhal
This pattern uses 109 black, 226 robin’s egg, 12 light gray, 9 gray, 2 white, and 8 light pink beads.
Otter
This pattern uses 84 cocoa, 65 sand, 61 toasted marshmallow, 6 black, and 40 light brown beads.
Emperor Penguin
This pattern uses 95 black, 18 orange, 1 blueberry creme, 8 red, 10 yellow, 92 white, 6 light gray, and 6 sand beads.
Pink Pig
This pattern uses 247 black, 698 pink, 2 white, and 4 clear beads.
Panda with Bamboo
This pattern uses 148 black, 179 white, and 43 shamrock beads.
Red Panda
This pattern uses 153 rust, 127 white, 6 tan, 96 cheddar, and 22 black beads.
Salamander
This pattern uses 30 pastel blue, 28 cream, 41 dark blue, 11 transparent turquoise, 62 cobalt, 23 bright green, and 2 black beads.
Shark
This pattern uses 122 gray, 252 mist, 25 white, and 12 light grey beads.
Shark Head
This pattern uses 311 gray, 373 white, 109 black, and 105 light blue beads.
Man Swimming in Shark Infested Waters
This pattern uses 147 light gray, 39 peach, 17 cobalt, 380 pastel blue, 42 red, 69 robin’s egg, 74 gray, 71 white, and 2 black beads.
Round Sloth and Dolphin
Both of these patterns use small round boards.
Sloth Head
This pattern uses 85 cocoa, 126 tan, 134 toasted marshmallow, and 86 light brown beads.
Sloths Just Hanging Around
The pattern on the left uses 55 dark green, 139 gingerbread, 24 sand, and 6 black beads. The pattern on the right uses 62 bright green, and 80 light brown, 348 brown, and 39 sand beads.
Squirrel
This pattern uses 108 cocoa, 72 gingerbread, 50 tan, 21 rust, 3 black, 1 white, and 2 peach beads.
Large Squirrel
This pattern uses 309 tan, 91 cranapple, 44 cocoa, 23 white, and 8 peach beads.
If you enjoyed these easy animal perler beads, let me know in the comments! I’d also love for you to check out the following posts:
The post Animal Perler Beads (60+ Free Patterns!) appeared first on DIY Candy.
]]>The first of Horvath’s neighbors moved away in late winter. This neighbor, an older man with an unclean white beard, gave no warning. Horvath discovered his leaving by chance, when he noticed that the old man’s door was hanging open. Entering the apartment after knocking, he found no one. The place was orderly except for the bedroom, where the closet was open and clothes lay strewn on the floor, and the small bathroom, where a cup of coffee, still warm to the touch, was sitting on the rim of the tub. Horvath told the doorman about this. The doorman already knew. The old man had left a note and included the apartment keys in the envelope. The doorman asked if Horvath wanted to keep the keys, since he lived next door. Horvath hesitated for a long time. He did not like to involve himself in the affairs of his neighbors, not least because the building was large, which meant that any problem he might encounter could expand, pullulate, assume truly nightmarish contours, infinite eyes, infinite mouths, infinite arms, like a classical Titan. The doorman frowned at his hesitation. He told Horvath that he himself had a lot to do, and at times like this, everybody had to pitch in and help out. Horvath lacked the strength to argue with the doorman and agreed to take the keys. Because a fight with a doorman also verges on the infinite with respect to time. That afternoon, Horvath checked the apartment to make sure the gas and water were off, and he turned off all the lights and cracked a window to keep the air inside fresh, then locked up. Horvath’s neighbors at the end of the hall asked about the old man, and Horvath told them the truth. He didn’t know anything. Everyone agreed that the old man was an asshole, so no one was too upset he had gone away. Horvath had not liked him much either. He had criticized Horvath (unjustly) for making noise. Then the old man had tried to get Horvath to join his crusade against the people who lived above him, whom he also accused of making too much noise. He tried to get everybody interested by leaving leaflets on doorsteps, and Horvath had heard that enough residents joined up to get the attention of the management board, but it had all come to nothing. The upstairs neighbors were not noisy, just like Horvath. All the same, Horvath felt an obligation. Not to the old man but to the building. What if a gas line started leaking? What if the toilet flooded in the night and ruined someone else’s apartment? To allay these fears, he started checking in on the old man’s apartment once or twice a week, just to make sure. A couple of weeks after he started, he found that the pipe feeding water to the sink was leaking and a biggish puddle had formed in the kitchen. The floor was a little waterlogged, and Horvath, who had worked as a plumber’s assistant in his youth, wanted to check with the old man’s downstairs neighbors to make sure that their kitchen ceiling was not dripping. When he got downstairs, he found that the residents, a husband and wife, were getting ready to leave. The husband was carrying their baby on his shoulder and lugging suitcases out into the hallway with his free hand, while the wife was adjusting the limp straps of a blue car seat, pulling and pulling at them, though they did not give. Before he could say anything, the wife looked up from her pulling and said they were sorry but they had to head out. They did not know when they would be back. She’d heard that Horvath had the old man’s keys — would he mind taking theirs too, just in case? She did not always trust those doormen. Horvath did not want these keys either. He took them anyway. You can’t say no to people in a moment like that unless you are some kind of Greek hero, striding beyond all boundaries. Horvath now had two apartments to watch over. The first one was annoying because the plumber kept rescheduling his visit and Horvath had to deal with the leak by using a bucket that needed changing every few days. The second caused no such problems, but Horvath disliked it because he disliked the inane expressions that the husband and wife wore in the numerous photographs on the walls, and the inane expression that he could see already developing in the eyes of their child. A week after they left, someone came knocking on Horvath’s door at six in the morning. It was another young husband, his wife standing behind him. She had tears in her eyes. The husband muttered something about the doormen and about looking after things, just for a while, and then in a voice lower still, he offered Horvath money. Horvath asked him to speak up. The young husband repeated his offer, and Horvath accepted it. The crying wife stopped crying, and her face hardened. The young husband handed over a grimy stack of bills. Horvath threw the money away as soon as he was inside, then hung the new set of keys up next to the other two sets he was responsible for. (He jury-rigged a pegboard by hammering a few nails into a clear space on his vestibule wall.) Their apartment, H3, was a real shithole. The young husband and wife had seemed well dressed and clean, but they lived in filth. Grayish gruel filled up the metal drain guards in their kitchen sink. Towels, still wet, lay in heaps on the floor. Shut in a closet, crying away, was a tiny, filthy gray kitten. She had no food or drink, and her litter box made Horvath’s eyes water. First, Horvath took the kitten up to his own apartment and cleaned her off. Then he went back down and threw out everything he could pick up in the third apartment — pillows, forks, everything. It looked better when he had finished. He found a few unused bags of litter and food and made the kitten comfortable in his own place, with a makeshift bed near the hissing radiator. He told the doorman about the keys and the kitten, and the doorman said you could never trust these fancy new owners. The doorman must have mentioned Horvath’s name to others in passing, because the stream of visitors increased: people from other floors, people he had never met, people who had nothing to do with the three apartments he was currently “watching over.” At first they arrived with stories and apologies, explained why they were leaving, told Horvath it would only be for a short while. They all wore masklike expressions while telling these stories. Soon, visitors started knocking on Horvath’s door, their faces already rigid, and handing him the keys without a word, just a piece of paper giving the apartment number. None of this bothered Horvath. He earned his living as a translator of technical documents, so his work had not been much affected. He was, now and always, free to accomplish it on his own time. Being woken up at night or early in the morning by residents abandoning the building was not a real inconvenience. No, the only true offense was that fecal, frozen expression on his neighbors’ faces. Horvath had never seen anything like it. Luckily, by the end of the first month, the visits had stopped. Horvath would wake to find, slipped under his door, envelopes containing keys, apartment numbers, and sometimes money. The money he always kept. He felt foolish for having thrown away the money from the cat owners. The new money was not much, but it was enough to pay for cat food and litter. The kitten was growing nicely; she was lean and strong now, with glossy fur and green eyes. One night, during a blizzard, Horvath counted the apartments he had been “given”: thirty-seven, out of one hundred total. His whole floor, except the unit at the opposite end, was now under his supervision, as was an entire other floor: the sixth. The stream of departing residents thinned for a while. Whenever Horvath passed the doorman on the way to the laundry room, the doorman always asked how his new “job” was going, and Horvath always answered that it was going well. Because it was. Horvath had checked each apartment. Nothing major was wrong. The fact that nothing major was wrong allowed him to spend a bit more time exploring. The gray kitten came with him. She liked to jump around as Horvath looked through the kitchen cabinets and closets and examined the furniture and books on the shelves. Sometimes the other residents on whatever floor he happened to be “inspecting” came out and glared at him. In such cases he jingled the keys he’d received until whoever it was went back inside. The other residents got used to him within three weeks, and these glares stopped. A few more residents, including some former glarers, interrupted Horvath on his rounds and gave him their keys; they all said he seemed responsible. Soon he had forty; soon, fifty. The floors below and above him: all empty. He was not worried about the holdouts. If they wanted to stay, let them stay. Since he knew nothing about them, they, in a real sense, failed to exist. Besides, he had material concerns to think about. The floors two below and two above were starting to go his way. He focused his rounds there and came up with the idea of knocking on the doors behind which people still lived, after dinner but well before anyone would be asleep. The residents seemed to know what he had come for. They either said, “No, not yet, we’ll let you know,” or they said, “As it happens, we are leaving,” and gave him the keys. He had so many now that he kept them all on a real pegboard he’d ordered so he wouldn’t have to hammer more nails into his vestibule wall. Each had a label indicating which apartment it belonged to. He kept this pegboard on the wall across from his bed, and every night as he fell asleep, he stared at it. The keys all had expressions, just like their owners. In some cases the same, in some cases different. If you don’t believe that objects wear human expressions, then you know nothing about objects or about human expressions. The key set in the upper rightmost corner — 2C — wore the expression of a syphilitic prince examining his princely chancre. 4H looked like a history professor, with the vacant, thunderous forehead that characterizes the academic class. Others resembled grocers who collaborated with secret policemen, harpists taking long pisses, tax collectors felled by the blow of a peasant’s blue, greasy hatchet. Yes, yes, it all sounds “crazy.” You have never been in the situation Horvath found himself in, however. He liked to watch these faces from his bed, and contemplating their strange variety never failed to help calm him and ease him into sleep. He extended his rounds to the remaining floors with greater confidence. He knocked more boldly and smiled into the faces of the residents when they opened their doors. Some still told him: “Not yet.” Sometimes they smiled back, and sometimes they looked frightened. One couple, oldsters, even whined at Horvath. They begged him to come back and said, “Please, please don’t kick us out — we have nowhere else to go.” Horvath was so shocked that he laughed in their faces, then apologized. He explained that he was not an agent of eviction. But the oldsters went on whining, and the husband actually began to cry, and they said once more that they had nowhere else. Why was he kicking them out, of all people? All along the floor, they said, were younger and healthier people. At this point, Horvath tried to leave, but the old woman detained him. Into his hand she put an envelope, open so that the money inside was visible, and told him that 9B was up to no good, that they had always been unreliable, and that they were planning to leave without paying any rent. Horvath tore his arm away from her cold, shaking grip and headed back to his apartment. He felt dizzy, semi-ill, and the cold stars looked down through the window, and the cold keys looked from the pegboard, for they looked at him just as he looked at them. The envelope stayed on his counter for days before he made up his mind to spend the money, and when the residents of 9B gave him their keys, he found that they were two chubby, almost identical men, smiling and largely silent, incapable of anything close to what the old woman had suggested. But the old woman was gone, her husband too, and nothing could be done to reproach them. The keys came faster and faster after this, it seemed to Horvath. He had almost seventy-five in his possession. More than six floors had fallen under his “administration.” All of this had happened by a simple, subtle, and external process. He dreamed about the apartments under his “administration.” Making his rounds now consumed much of the evening, and he only finished shortly before his customary bedtime. He dreamed about each apartment individually. He was present, walking around, looking at the books, the towels, the dishes, the toys. Sometimes the previous residents were there, sometimes not. Sometimes they spoke to him. Sometimes they ignored him. Sometimes he carried a large key ring with him. Other times it was an old-fashioned hide briefcase. In still other dreams, he wore the keys on silver-plated chains around his neck, and their weight was what dragged him back to wakefulness. These dreams left him well rested, no matter how long they went on and how intricate they were. He was able to attend to his technical translations with more clarity and vigor. More jobs had come in while the residents were leaving: demands to translate medical documents and operating instructions for sanitary technology. Horvath had never paid attention to the content of his translations, and he paid even less attention now. He only wanted to finish as soon as possible so that he could make his rounds with a clear conscience. He regularly met members of the building staff who had come looking for him: the superintendent and his mechanical team, the mail clerk, the security guy for the storage rooms, and the three junior doormen. They wanted to give him their spare keys — to make sure no one else got their hands on them if they, too, had to leave suddenly. The only building staff member who refused to acknowledge Horvath was the head doorman. Before, they had been on friendly terms. Maybe he thought Horvath was using the “outside circumstances” to steal his authority. Maybe he imagined Horvath was collecting tips that, by rights, should have been his. Whatever it was, he refused to speak to Horvath whenever Horvath crossed the lobby, staring instead at the white walls and the building’s doors, which now almost never opened or closed. Horvath tried to explain that everything had happened without his willing it. No luck. The senior doorman would ignore whatever Horvath said. Horvath was not ashamed of haranguing this man. Almost no one came to the lobby except to abandon their apartments. It was the two of them alone. Horvath yelled at the doorman, accused him of insane and conspiratorial thinking, and at last gave up in disgust. If people refused to accept the new circumstances, that was not Horvath’s fault. He had more important issues to deal with — namely, the remaining residents. There were eighteen, mostly confined to the uppermost floors, except for the lone holdout on Horvath’s own floor. The uppermost floors held the penthouses. Rich people lived in them. One was even famous, a banker. Horvath knew that these residents would not rush into his arms. Most of them maintained at least one other residence on a permanent basis, which meant that abandoning an apartment was not a major act but part of the year’s natural course. Also, some of them maintained at least one full-time staff member — a “built-in” caretaker. Though Horvath could not see an immediate way to bring these apartments under his administration, he knew that one would present itself. That’s how the “pure sequence” works, as opposed to the “logical sequence.” Horvath already wandered through these apartments in his dreams. He dreamed of the banker, tall and waxen-eyed, with a mustache and beard that were (more or less) the source of his fame. He dreamed about the maid he had seen walking along the corridor with her arms full of tangled-up yellow bedsheets. One afternoon, just as he was starting his rounds, he heard a story on the radio: domestic workers were no longer permitted to work until things improved. He raced up to the banker’s apartment and found the maid by the door. She saw Horvath coming. She knew about his administration. And she handed over the keys without saying anything. Once the banker and his maid had left, the rest of the rich people soon followed, and they all dispatched their servants to bring the keys to Horvath. These servants brought money as well. Not huge sums but much more than Horvath had collected so far. Except for the maintenance staff, the doormen, and his silent neighbor, Horvath was now alone in the building. At first the thought frightened him. He had never considered this as an outcome, because he had been consumed by the idea of “administration.” And before you leap in to insult him here, let me remind you that you would have behaved the same way. That’s how it goes — when you get what you want, a huge chasm opens, and obliterating mysteries pour through it, exhalations from Styx, Cocytus, whatever. His own apartment filled with a subaqueous weight, all the other apartments pressing down on it. It made his rounds harder, too, because he now felt a rising apprehension whenever he prepared to open a door. It usually managed to drive him back out and send him running down the hall, the way he had as a child after taking the garbage down to the garbage room. The apprehension began to interfere with his “administration.” He discovered that he was delaying his rounds as long as possible. One night, tired of his own cowardice, he forced himself to sit in an apartment while the wild anxiety filled him. He felt like he was choking, like he was drowning. He could not bear it any longer, but he refused to get up; he forced himself to sit on the cold sofa and stare out the window over the ashen roofs. He was sweating. He felt as though he might vomit. And then it ended. It ended in a single instant, like a human life. Horvath stayed where he was. He got more and more tired, inhaling the stale, unfamiliar air. He ended up falling asleep on the sofa. He woke up the next morning unsure of where he was, unafraid. He made himself coffee using the press in the kitchen and drank it while he looked through the window. He opened an odorous can of food for the kitten. After that, the fear no longer afflicted him. One morning, when the hot water to his apartment’s line had been cut off, he showered in a ninth-floor apartment using a different line and shat in the toilet afterward. He discovered a set of barbells in 5J and dragged them out, as well as laid down a yoga mat from 5R. Then, each morning, he exercised for an hour in the hall — grunting, yelling, jumping around. He ran laps back and forth down the corridor, whose length he had previously calculated. Then he showered in 6J. The owners had renovated the bathroom with marble, steel fixtures, a cavernous shower. They had also left behind piled-up towels. Horvath used one and hung it up to dry before making himself tea. He reused the same towel until it began to stink, then took a fresh one. When enough towels got dirty, he carried them over to 7R, where the owners had installed a washer and dryer. 7R was also Horvath’s source for office supplies. Whoever had lived there — and he did not know them, their key had arrived in the night — had also worked from home, and he found a bedroom closet filled with paper, pens, highlighters, and binder clips. 7K, across the hall from 7R, possessed a large library. On the shelves were a number of books in the languages Horvath knew, and he would read stretched out on a leather couch that creaked and whispered under him. After his reading period, he would go and work on whatever technical translation lay before him that day. Then he would eat his lunch in 8S, 4Q, or 5L. In 8S he had discovered a closet filled with canned goods, including smoked oysters, which he had always loved. Filthy, oily flavor, yes, that was what Horvath liked. After lunch, he did more work. The texts seemed to translate themselves. The second half of his workday was a long delight because it brought him closer and closer to the prospect of his evening rounds. He worked out for another hour, showered and changed, then either went up to 8D or down to 2H for dinner. In 8D he discovered a chest freezer full of expensive steaks; in 2D he found an identical model filled with frozen squid, mussels, salmon. Wine he took from either 5L or 2I. In the latter had lived an obese bald man who had given Horvath his keys. This man carried with him a sour, stuffy smell that clung to the money he handed over. His apartment was dim at all hours because he had piled old magazines and newspapers into towers with narrow alleys between them. Following the paths, Horvath had discovered a bedroom that held only bottles of wine stored in bookshelves, on the bed, under it, and in the tub and shower of the attached bathroom. These bottles were quite old and valuable, so Horvath took his time selecting the one he wanted whenever he visited 2I. He did not go often because of the danger that the piles might fall on him. He chose the wines by the labels. He knew nothing about wine. If the label had a horse on it, so much the better, and if it was written in French, then that was good as well. After his meal, he would check in according to the schedule he had developed: one floor every day, with visits paid to all the apartments. He never found anything amiss, but these visits served to better acquaint him with where he might replenish his stores when the supplies in his current “regulars” ran out. They were also good exercise for the gray kitten, whom he brought with him so that she could broaden her horizons and see the variety with which humanity managed to live. The kitten loved the rounds. She would stalk through the empty apartments, and many evenings she killed mice or large roaches that had begun to grow bolder in the stillness. At times, Horvath would encounter the doorman during his evening rounds. The doorman always said that he was not allowed to take the kitten out into the halls, and Horvath’s retort was always that dog owners had been allowed to take their dogs through the halls. The doorman never had an answer for this, but that never stopped him from mentioning the kitten next time. You see what I mean about the power of doormen, and how it is infinitely extensive in time? But the doorman could not call the police, who were dealing with other, more pressing matters. He could not appeal to the condo’s governing board. All its members had left the building. He could not appeal to “Leviathan” (i.e., the aggregate mass of all residents whom all doormen love and hate). Horvath began to enjoy these brief, cold exchanges. He looked forward to seeing the doorman’s wide, neatly shaved face change color with anger, and to seeing the doorman stop walking and raise his thick, hairy index finger as he delivered his bodiless, spiritless reprimand. The doorman started to lose his temper each time Horvath gave that identical response. (He never varied the wording, not once.) The gray kitten went on dancing along the carpet. One evening, the doorman brought one of the junior doormen along. To “catch” Horvath. But to Horvath’s delight, the junior doorman seemed to take his side. When the boss started waving that hairy, trembling finger, and when the deep, raucous voice announced the charges against Horvath, the junior doorman sighed. He chewed his lip. He said that Horvath had a point and that there was really no need for everyone to get so excited. The doorman now began raging at the junior doorman, calling him a backbiter and a traitor. Horvath’s kitten climbed onto the vase-topped table across from the elevator doors; there was an identical table in every hall, an identical vase, an identical mirror above it reflecting another identical hall, into which your doubles might stride at any moment. The junior doorman and his boss were now going at it. The senior doorman grabbed the junior doorman by his green lapels and began to shake him. The junior doorman, his face twisted, shoved the senior doorman away. The senior doorman fell to the ground. He sat there stunned. Then he got up and charged right at Horvath. Horvath tackled him — he was a lot bigger than the doorman, younger as well — and held him on the ground as he struggled. The junior doorman told him to be careful — the old man had been like this for a while. Eventually Horvath let the doorman up. An abyss of time yawned, my god. Like hell. Like the Stygian filths. The senior doorman walked away, and the junior doorman followed him. The next morning, when Horvath went to perform his exercise routine, he found that his equipment was gone. He searched the apartments it had come from: nothing. He ran laps and did calisthenics instead. In the shower in 6J, he thought about what other bullshit the senior doorman had dreamed up. There was more, as Horvath knew there would be. Padlocks had been installed on the chest freezers in 8D and 2D and on the enormous liquor cabinets and wine racks in 5L. But the doorman lacked the courage and equipment to seal the doors, and there were plenty of other apartments that Horvath could find his lunch in. He ate some canned hash from 7I, where a young woman had lived. In searching there, Horvath had found a series of diary volumes, as well as a box of syringes and needles, a length of yellow-brown rubber tubing, and a wooden case holding a few bags of white powder. This powder had the bitter flavor of heroin on the tongue. That evening, instead of doing his rounds, he waited. Then he took the elevator in the basement and headed to the maintenance rooms. The maintenance staff (including the senior doorman) all had complementary apartments on the first floor, and they had long since gone to bed. Horvath opened the maintenance supply room and took what he needed: the only pair of bolt cutters in the closet and two new padlocks. First he locked the supply closet. Then he found the senior doorman’s unlocked supply locker and locked it shut with the second padlock. He carried the bolt cutters back upstairs and cut the padlocks from the chest freezers and liquor cabinets. He was not worried about reprisals. Hardware stores had not been open for weeks, and the doorman had no way of obtaining another pair of bolt cutters. The next day, he went on his rounds as usual. He had no replacements for the dumbbells or yoga mat, so he again did calisthenics and ran laps until he was tired. He showered in 6J and then read in 7K. While he was reading, he heard a modest tap on the door. He looked through the peephole and saw the junior doorman. The junior doorman said that things had gotten a little bit heated and he understood, but would Horvath mind helping them out? Horvath said he would be happy to if the senior doorman apologized in person. The junior doorman went and got the senior doorman. The senior doorman’s voice was shaking as he said that he was sorry. Horvath told him that he couldn’t be understood, that he was speaking too quietly, mumbling like a coward. The senior doorman made as if to lunge at Horvath, but the junior doorman restrained him. Then he repeated the apology in a hard, clear voice. Horvath handed over the bolt cutters and closed the door. That afternoon, once he had finished his work, he drank an entire bottle of brandy in silence in 5L — in the silence and stillness that precede complete intoxication, the sickening clarity of a certain intoxication that reduces each moment to a moment and destroys the “literary quality” of events. In other words, this intoxication — only achievable under certain circumstances — reveals the pure sequence and destroys the logical, temporal sequence. This is the closest human beings can come to understanding god, for whom everything exists as a single, monstrous instant. To look out over the city not “shrouded” in snow, not “covered” in snow, the city not silent and not anything else, either, because attribution cannot exist under these stony conditions, this stony light flowing down into the world and creating each object as you look at it and annihilating it as you look away — yes, my friends, only in this manner can we truly commune with god. Who doesn’t say shit. Horvath didn’t “think” any of this; it brushed past him with its wings. He went on drinking until he emptied the bottle. The gray kitten danced and leapt beside him. Horvath was still drunk when he went back to his apartment, carrying the kitten in the crook of his arm. He had trouble walking. As he reached his floor, he saw the door of the sole remaining resident, his own neighbor, open swiftly and close. He raced over. He wanted to meet this remarkable person, to congratulate them. To offer them their share of his administration. They had earned it! But no one answered his knocks or his doorbell ringing, and he heard nothing moving beyond the door when he pressed his ear to the cold metal. The next day he suffered a terrible hangover. He skipped his exercise routine and took a long shower in 6J. After the shower, he had a look through the living room windows. They looked down onto the street entrance of the building. A white van had pulled up. It was the only moving car he had seen in weeks. Four people in livery came out of the building, followed by three men in gray coveralls. The doormen and the maintenance men. They climbed into the van. The last to go was the senior doorman, who was not wearing his hat. Horvath could see a nude spot on his head amid the still youthful hair the man had kept into late middle age. The van left. Horvath watched for a while to see if the police would come. You couldn’t just drive around without a special permit. But no police came. This meant that Horvath was really alone now except for his neighbor. He went back to the door and knocked again, because he wanted to share the good news and make the resident the same offer: half his administration. Again, no answer. He went downstairs to the maintenance rooms. Just like the other residents, the doormen and maintenance staff had left everything behind. The bolt cutters were back in the supply closet. The propane grills that residents were allowed to use on the roof stood in a row in one large storage space, and piled against the opposite wall were wooden frames holding fresh tanks of propane. Horvath also found spare coveralls (freshly laundered), winter gloves, socks, work boots, and canvas work jackets. The maintenance staff and the doormen had also kept two refrigerators filled with beer. Horvath drank a can right away, even though it was still early in the morning. He drank while he stood in the hot oblong room that held the monitors for the security cameras, and he moved his eyes from one to the other. Empty, empty, empty. There was a camera aimed at the room, he saw, when the view switched to show him standing there swaying with his back to the camera. Nothing new there: heavy, awkward shoulders, scalp reddish and bare, arms dangling like those of a puppet. He tried to peer into the minor infinity extending into the monitor as it appeared on the screen. The view flashed away before he could fish anything from that ghostly, fucked-up depth. Horvath took a cart — one of ten gray canvas carts — filled to the upper edge with tools, winter clothes, and cold beer back to his apartment. He put on the boots, socks, a canvas jacket, a pair of thick gloves. Then he rode the elevator up to the penthouse floor. He had not yet explored there. He chose the banker’s apartment first. In the front room, a vase filled with dried eucalyptus leaves stood on an ebony table under a mirror. In this mirror Horvath and the kitten appeared. She leapt off his shoulder onto the table and then onto the floor. She had trouble negotiating the bare floors and skidded when she tried to stop running. Horvath tucked her into his jacket pocket and then wandered the banker’s apartment for a while. The bedrooms, the bathrooms, the kitchen — they all gleamed with a dental light. This light stuck to the knives, the plates, the toilet handle. Maybe it looks different if you are a rich man; maybe everything stares at you with welcome. Well, what did it matter to Horvath? His administration expanded beyond the bounds of even the richest man. The apartment was freezing. It had a huge terrace along one wall. Cold air was seeping in between the seams of the doors. He stepped out onto the terrace, which was covered with snow. It was the first time he had been outside in weeks. He had a high view of the city. The stores he could see were shuttered. He saw no one in the empty streets except for a small group of police officers. In the building across the way, he saw dark windows. Floor after floor. The residents had left. There was a terrace for that building’s penthouses as well. Standing on the terrace was a figure wrapped up in a long coat, with a hat and scarf. The scarf covered the face. Horvath gestured, waved his arms. The figure on the terrace waved back. The long arms went up and down. The air was fresh and bitter. It smelled like snow. And as he stood there, snow began falling. The kitten leapt out of his pocket and started hopping around on the terrace. Every time she saw a snowflake, she leapt as if in delight or fear. The snow was white and clean. The leftover snow on the sidewalks was white and clean. The snow on the roofs was white and clean. That afternoon, Horvath searched through the apartments under his administration until he found more workout equipment: a set of resistance bands, another yoga mat, and a small treadmill. He brought them all down to the sixth floor and spent two hours exercising. After his shower, he made another extensive search — he was looking for cat supplies. He took all he found and lugged it home, though he dropped some toys off on six so that the kitten could occupy herself while he worked out. He had started taking a notebook with him and marking down anything of interest in any apartment he saw. He made more detailed notes each time he did his rounds. He added maps as well, charting each apartment’s layout and the placement of objects within each room. He added more and more details every day. At first he thought he would soon exhaust the details, but it proved impossible. In fact, it was much harder to fence out the details he did not want to include. These details — objects, colors, qualities, juxtapositions — had as much right to appear in the “administrative rolls” as any other. And he would include them, he would. Not in the first edition but in future volumes. For one volume would never suffice, he saw that now. No, you had to keep going, to keep adding. To classify everything, but to classify it all with a brand-new system, a taxonomy that existed as a circle with infinite circumference and a center located nowhere. Horvath had never considered the possibilities of such diagrams, though he had worked with diagrams all throughout his professional adult life. It had taken the unusual circumstances of his administration to awaken him to their possibilities. Because his administration extended upward, downward, and across the plane; it extended in time as well, back through the pasts of each apartment and into their futures. This annihilated some categories and gave birth to others. He stopped drawing maps and started drawing diagrams. These diagrams linked various apartments, objects, classes, qualities, times, sensations. For instance, one evening he drew:
HEIDEGGER <‑‑‑‑‑<‑‑‑‑<‑‑‑‑‑ GREEN SUNSET
12
12
12
12
SILVER DISH ‑‑‑>‑‑‑‑>‑‑‑‑‑‑‑> ORCHID
I won’t bother explaining this diagram beyond noting that it draws the obvious connections between these four objects: that Heidegger stands in a “yielded” relationship with certain sunsets, and the reverse is true for orchids and silver dishes, whereas there is a “degree one” proximity relation between Heidegger and silver dishes and a “degree two” proximity relation between green sunsets and orchids. Horvath did not care if anyone else understood these diagrams. They did not serve an outer purpose; they existed only for him. The trouble was that as long as one apartment remained closed to him, the diagrams, which were by their nature holographic, would always be incomplete and worthless. The knowledge of what the last resident’s apartment contained could throw the knowledge he had already accumulated into disorder. He knew how insane this sounded, and he was glad he did not have to justify himself to anyone. He wrote a short, polite letter explaining to this resident that the two of them were now alone in the building, and while they had never met before — Horvath apologized for this but also said he had wanted to be respectful of a stranger’s privacy — they should meet now because they existed, whether they liked it or not, in a relationship of mathematical precision and importance. He hesitated before finishing the letter. Whoever lived in that apartment had made it clear they were not interested in the outside world. It was likely that they possessed a large enough stockpile to simply wait everything out. Horvath was not a rude person. He hated unnecessary rudeness, and the emptiness of the building would magnify any rudeness into an unthinkable size, a host, mirror facing mirror. (Or something like that. Who knows?) Yet he put it in an envelope all the same, with an inscription from the end of a famous French novel written across the front. I am sure I do not need to tell you what it was. The kitten came with him to deliver the letter. She rode on his shoulder as he squatted down to slide it under the holdout’s door, and he felt her warm breath in his scanty hair. After that he kept to his routine. Morning workouts, afternoon meals, evening explorations. The kitten came with him. He had gotten used to having her as a companion, and he talked to her as he would to another human being — mostly about his findings, his eventual plans for the diagrams, and his thoughts about the last resident. Yet he heard nothing, saw nothing. He found himself reduced to listening at his own door for sounds suggesting that the last resident was walking around. He stared at the lip of light between his door and the sill in the hope that a letter might glide across it. He put tripled efforts into his diagrams. He knew completion was not possible, but he still made every effort, and he found that in making these efforts, he was rewarded with greater subtleties. Consider the following:
;SARDINE CANS !!!!!!!!!!!!!!!! HERMANN CONRING?
;@?
;@?
;@?
;@?
NIRODHA — “QUENCHING OF THE LIGHTS” — FEUDAL MEDIATIZATION
?X;
?X;
?X;
?X;
?X;
ASSFUCKING !!!!!!!!!!!!!!!!!!!!!!!!!!!!!!!!!!!!!!!!! 3PM
Efforts like this can only arrive when the “human mind” functions at a supersubtle, supercosmic level. Horvath reaped some reward for his efforts, as noted, but it was clear that they were ultimately futile unless he could manage to make contact with the last resident and look within their apartment. As for the counterargument that he could simply deduce what the last apartment contained by completing the rest of the diagrams and looking for the most significant lacunae, Horvath had raised and rejected it himself. A compromise, stained with shit and blood. 7K was the one place where Horvath could get a little rest. There, in its library, he could forget the diagrams for a while. He began to extend his daily visits there. He had already exhausted its diagrammatic possibilities, so he could simply lie on the creaking, crying couch and read. True, when he left, the problem would confront him again. True, he was wasting valuable time. This did not matter. He was content to read, to regard it as a form of sleep. One afternoon, he felt disturbed as soon as he entered. The kitten was upset as well, yowling in her high, strangled voice. There was nothing wrong with the place: no major disorder, no break-in. After an initial exploration, he located the source of the disturbance. On the coffee table next to the couch where he usually read was a book. A paperback edition, cheap, of a famous French novel. He had catalogued the apartment’s library exhaustively, and it did not contain this novel. There had been no sign of forced entry, and the apartment was empty except for Horvath and the kitten. Horvath was flipping through the book when he saw the dedication and remembered that these were the words he had scrawled (in English) across the envelope delivered to the last resident: TO THE HAPPY FEW. He raced to the elevator and back to his own floor, holding the book as it flapped with the force of his running. He expected — he did not know. When he reached the closed door, he found that nothing at all had changed. No one answered his knock or the doorbell. He heard nothing when he pressed his ear to the cold metal, and he saw nothing when he lifted up the weather stripping at the door’s bottom and peered through the gap above the sill. Yet it couldn’t be denied. The resident had “spoken” to him. How, exactly, he wasn’t sure. Perhaps they, too, had a key to 7K; perhaps they, too, “did rounds.” He didn’t care about the method the reticent had used. He cared that they had at last responded. From this, Horvath took heart. It seemed to him that he should write another note, but he could not think of what to say. Later that morning, he discovered that the kitchen faucet in 4Q had begun to leak. He called the emergency maintenance number listed in the doormen’s staff room, used when tasks outstripped the ability of the on-site maintenance men. No one answered. Horvath was not surprised, but he let it ring for a while. He went back up to 4Q and shut off the kitchen’s water supply. He could fill pots and pans with water from the bathroom. He also found that one of the windows in 9B had broken — not due to any outside action, the window being too high up for that. No, it looked like a simple case of a fracture caused by excessive cold. The owners of the apartment had manually shut off all heating before they left, and Horvath had not had the presence of mind to turn it back on. He taped over the crack and then taped a blanket over the pane itself before turning the radiator valves back on. At night, when he got back to his desk, he found that he had produced a volume of diagrams exceeding his estimates. He needed a better way to store and organize them. At the moment, they stood in four ragged piles that he had to rebuild at least once a night because drafts or the kitten knocked them over. He remembered a filing cabinet in 7L and brought that up. He discarded the papers within it, which appeared to contain poems or similar trash, after giving a sheaf to the kitten. His diagrams filled the emptied cabinet almost entirely, but at least this got them off the floor and gave him a little space to store new ones. He had trouble sleeping. There were long nights when he half-slept or dozed until dawn, longer nights when his dreams would not leave him alone. When he dreamed about dreaming, for example, or dreamed that he was awake, or dreamed that the ashes of Polish springtime had drifted down and covered everything outside, mingling with the broken, reprehensible snows. And for those wondering why the leaky faucet didn’t “count” as an answer from the last resident, and why the fractured window didn’t express their response to Horvath’s letter, let me say again that you wonder this only because you are unlike Horvath. Horvath was new to administration, but he was no amateur. He knew what an answer looked like, and he was not going to be taken in by amor fati. He avoided 7K because he had no interest in committing the “sin of hope” either, the sin that contaminates and destroys everything. When he heard noises that might be footsteps outside his door, he did not even get out of bed, because he knew they were deceptions. When in the doormen’s staff room he thought he detected movement on the screen aimed down his hallway, he turned his back. Let those shadows flit by, let them dance along the stony walls. They had nothing to do with Horvath. Besides, shortly after this, the kitten got sick. Horvath didn’t know how it had happened. She was tired; she slept almost all the time. She stopped playing with him, and she hardly ate anything. Horvath tried to convince himself that it was nothing. A cold, a passing stomach flu. Young animals got sick all the time. Yet he knew what it was from the first moment he saw the dull gleam in the kitten’s eyes. He tried everything. Feeding her soft food. Keeping her wrapped up in blankets. When she got too weak to go to her water bowl, he gave her water with a spoon and then with an eyedropper. Every morning he brought her clean sheets, taken from 3I and 6N, which had the best bedding, because she could no longer go to the litter box to piss or shit, and he painstakingly cleaned her off with damp, warm towels throughout the day. The kitten did not wail or cry. She was largely silent, looking at Horvath with her dull eyes like coals, like some underearthly hatred. He gave no thought to his own health, though he knew you could get sick from animals. He spent all the time with her that he could, keeping her on his lap while he worked. Soon she became so ill that she could not even eat the porridge he had reduced her dry food to with water. He began giving her beef and chicken broth through the eyedropper. He tried to find some explanation or hope in the diagrams. This illness had to fit in somewhere. Yet he could never make it fit. He could not find the correct directional terms or master the subtle relational effects that diagramming this terrible occurrence would have required. He started searching the apartments for some type of general “cat medicine.” (He knew even as he looked that the idea was moronic, that no such thing existed, yet he kept looking.) He started with 3H, where he had discovered the kitten. He looked everywhere, hurled down everything from the cabinets and cupboards. He looked under the sofa cushions and in a box hidden under the bed, where he found nothing but photographs of empty rooms, or of the same empty room, with a stain on the carpet that moved, or seemed to move, between each picture. The kitten got sicker. Horvath tried to prepare himself for her death. After all, why should it matter? He had tried to do his best, to give her a good life, to save her, and he could hardly pretend that she had been his lifelong best friend; they had known each other for less than four months, and there was no point in mourning someone you had known for only a few months, especially because she was an animal. Horvath, however, knew the truth about animal suffering. That it is unspeakably worse than human suffering. Animals cannot lie to themselves about freedom or redemption. They cannot rely on memory to save them. Suffering exists for animals as a total universe from which there is no escape. He went on trying and trying to save the kitten. He did not dare leave her alone, not even for one moment. He carried her with him in the pocket of the jacket he had taken from the doormen’s staff room. He also carried two bottles, one of water and one of broth, and an eyedropper. The kitten shit and pissed in the pocket, and it leaked down onto Horvath. He didn’t care. There was no one around to smell it. Let the smell fill up these empty hallways and the whole building. In fact, let the piss-and-shit smell reign at the highest peak of administration. The kitten began vomiting too, and this stained the jacket, his clothes, the carpets in the hallways, and the ottomans he sometimes let the kitten sleep on while he performed his rounds. Again, it did not matter to Horvath. Let the vomit rise up and flood the world. No matter what he did, he was unable to escape the dull fire of the kitten’s gaze — in mirrors, in windows, in those rarer and rarer moments when the kitten was awake. He dreamed about her eyes as well, as you would expect. The eyes floated in dimness, or they lit up a room where a stain moved across the carpet like some filthy Bolshevistic paramecium. The kitten weighed almost nothing at this point. Horvath let her sleep on his chest at night so that he would know right away if she stopped moving and died. This turned his sleep into vigil, because he was afraid, as noted, of leaving the animal alone. Every night he would lie down with the kitten on his chest and look into her eyes until they closed, and then his heart and body would contract, and he would start to shiver, and he would wait to see if the kitten was still breathing. At times he dared to put a finger on her prominent rib cage, to feel her thin bones pushing up against her skin through her warm fur. Other times he did not dare. One night, he awoke from a dream of the kitten’s eyes and of the paramecium, and the kitten was dead. Or so he thought at first. Then he realized that she was hardly breathing at all. A shaking panic took hold of his limbs. He flapped his hands back and forth like a child, and tears slid from his eyes into the cavities of his ears. He saw, next to his bed, his pen and pad, and because he did not know what else to do, he picked them up and — without disturbing the kitten — began to write. To describe what was happening, and to beg for her survival and for his own forgiveness. (He did not know what his crime was, but he begged all the same.) When he was done, he signed his missive. Or maybe his hand signed it on its own. The signature read M. Horvath, Administrator. He cradled the kitten, still breathing, in one arm and put the letter in an envelope with the other hand. It was hard, and harder still to seal it. Across the envelope he wrote down the dedication from the French novel (in English, again). He got up and took the kitten and the letter out into the hall. He knelt down and pushed the letter under the last resident’s door. Once it was inside, Horvath failed to resist the temptation to lift the weather stripping. As if the resident might give him a glimpse of themselves so easily. Well, nothing happened. The letter lay there looking huge in his foreshortened vision. He blew through the slit, and the letter moved a little farther into the apartment. This made him panic that he had overdone it. He got up and ran away from the door like a child. Then he ran back and lay down on the floor and put the kitten on his chest. He promised himself he would not fall asleep, but he did fall asleep, and he dreamed of the eyes and the carpet. When he woke up, he was cold, and his back and legs hurt. He had trouble moving his arms and shoulders. A new terror swept through him. The kitten was gone. Then he saw her. She was walking on her own, slowly and clumsily but alive. Walking down the hall toward him. A cry tore itself from his throat, and he offered her broth from the dropper. She ate greedily and with more ease than she had shown since the beginning of her illness. Horvath banged on the door, cried and pleaded for the resident to come out. He shouted his thanks through the cold metal and left warm tears on the cold metal.
]]>Do you remember where you were the first time you saw a rainbow? I’m not 100% sure where I was the very first time, but I distinctly remember my first double rainbow.
I was in elementary school (Hollywood Hill Elementary in Woodinville, WA), and my mom picked me up one day when it had just rained. As we were driving down the hill, I saw it.
Off in the distance. A double rainbow.
It felt so rare! So magical! I looked it up and they actually aren’t so rare – they’re just double reflections. A second arc, which is on the same plane as the primary rainbow, occurs when rays of sunlight are reflected twice within the raindrop. Boom, you have a double rainbow.
Well, whether they are rare or not, I remember my first. And I still love rainbows to this day!
Rainbows have a lot of symbolism, the most basic being the beauty after the storm. That is one of my favorite meanings. Here’s a little excerpt that sums it up perfectly:
“And of course, given that they usually appear after a storm, rainbows are a sign of hope. As Rambo explains, ‘Rainbow is about what’s on the other side of darkness,’ adding, ‘The message of the rainbow is inspiration to be in hope and joy because there are bright and beautiful times on the other side.'”
–MindBodyGreen
For many, rainbows mean prosperity (pot of gold), hope, love, friendship, and even inclusivity and diversity (Pride!).
Whatever their meaning is to you, it brings me great pleasure to share these rainbow perler beads with you today.
We’ve been doing a ton of perler bead patterns lately, and with spring and summer right around the corner – rainbows were important to add to the collection.
Perler beads are recommended for ages six and up, so this is a very fun craft to try with kids. They love perler beads (also known as hama beads, fuse beads, or melty beads). But don’t be shy – adults love them too!
Before we get into the patterns, I want to review a few basics of using fuse beads to make sure you get the best results. If you don’t want the tips, scroll down to the bottom to get the rainbow perler bead patterns.
Remember that the overall goal is to melt the beads together on both sides while still leaving the holes open. Here’s how you get the best results.
Place ironing paper or parchment paper over the beads on the pegboard. Be gentle so you don’t disturb the beads underneath.
Heat your iron to the medium setting (no steam). In a circular motion, begin to iron the project. Don’t press down too hard with the iron. Move your hand around gently in circles and keep it going. You’ll start to get the hang of it after a few tries.
When ironed properly, the beads will still have an open center. Check and make sure your edges are melted. Let the design cool on the pegboard.
Note: BE CAREFUL about lifting up the paper while you’re ironing! If you want to check, carefully peel back paper around the edge of your design and see if all the beads are melted.
If you lift the paper up quickly and there are a lot of unmelted beads, they will easily fall off or go flying and you may be forced to start over. Sometimes the edges need more time so when you check, just check the edges and peel paper back slowly.
Another Note: some beads melt faster than others (clear melts faster than white, for example). So some holes might be larger than others. It’s okay! That’s part of the look of the project.
Remove the bead design from the pegboard. Flip it over to the non-melted side and repeat the fusing process.
Note: if you see any areas you’d like to re-melt, you can do that!
Let cool completely and remove the paper again (which is reusable). Some people pull the paper off after they iron the first side, but I just wait until the end and peel off both pieces. It’s up to you!
Now if you’re ready for the rainbow perler beads, here are the patterns!
Make sure to check out these notes:
Smiling Rainbow
This pattern uses 66 red, 29 orange, 23 yellow, 5 black, 21 kiwi lime, 18 cobalt, and 15 purple beads.
Three Colors
This three stripe pattern uses 76 black, 29 red, 25 yellow, 23 light blue, and 58 white beads.
Rainbow with a Stand
You’ll make the rainbow on a large circle board and the stand pieces on a square board. The stand pieces use 145 white beads. Insert each end of the rainbow into one of the stand pieces. Makes a cute cake topper!
Heart Pegboards
Heart pegboards make awesome rainbows. Both of these options use the large boards.
Shades of Pastel
This pattern uses 120 black, 25 mint, 22 pastel yellow, 18 cheddar, 17 bubble gum, 14 light link, and 208 white beads.
Spread Between Two Clouds
This pattern uses 200 white, 54 red, 46 orange, 44 yellow, 39 kiwi lime, 30 sky, 25 light blue, and 24 pastel lavender beads.
Rainbow Heart
This pattern uses 62 pink, 60 cheddar, 54 yellow, 50 kiwi lime, 48 light blue, 38 pastel lavender, 32 magenta, 24 apricot, 20 pastel yellow, and 7 sour apple beads.
Rainbow Heart with Unicorns
This pattern uses 10 fuschia, 62 red, 75 white, 75 black, 50 orange, 42 yellow, 36 green, 30 blue, and 16 purple beads. This pattern is also part of our St. Patrick’s Day perler beads.
Rainbow Pusheen
This pattern uses 135 black, 25 red, 38 orange, 33 yellow, 20 kiwi lime, 197 gray, 8 light blue, 6 yellow, 26 magenta, and 1 cotton candy bead.
Skull and Super Mario Star
The skull pattern uses 94 black, 4 cherry, 11 red, 9 orange, 12 yellow, 13 kiwi lime, 12 sky, 8 light blue, 8 dark blue, 10 plum, 4 purple, and 3 grape beads.
The star uses 64 black, 11 red, 21 orange, 20 yellow, 27 bright green, 22 sky, 12 cobalt, 5 purple, and 3 fuchsia beads. This pattern is also part of our Super Mario perler beads!
Colorful Frame
This frame uses 24 purple, 24 flamingo, 28 pink, 32 red, 36 orange, 40 pastel yellow, 40 yellow, 40 kiwi lime, 40 bright green, 40 robin’s egg, 36 light blue, 32 dark blue, and 28 light lavender beads.
When you’re done, you can glue a 3.5″ square photo on the back using regular craft glue or E6000.
Cloud with Streamers
This pattern uses 184 robin’s egg, 43 black, 97 white, 53 red, 53 purple, 52 orange, 52 yellow, 52 bright green, and 52 light blue beads.
Bright Salamander
This pattern uses 14 cherry, 29 yellow, 16 magenta, 2 yellow, 16 red, 26 fuchsia, 34 kiwi lime, 17 orange, 25 teal, 19 honey, 25 cobalt, 28 dark blue, 17 pastel lavender, 10 purple, 10 plum, and 7 tangerine beads.
Rainbow Heart Four Leaf Clover
This pattern uses 111 shamrock, 128 blue, 137 red, 339 white, 128 purple, 130 orange, and 109 yellow beads.
Rainbow with Raindrops
This pattern is done on a round board with four raindrops . . . leave the holes on your beads open enough so that you can tie the drops onto the bottom of the clouds and make a cute mini mobile!
Color Wheels
Color wheels are a perfect way to display a variety of shades in one perler project. There’s a version on the left for a square board and verison on the right for a large round circle.
Rainbow Coasters
We love perler bead coasters, and why not make them with rainbows? Here are two options on large circles.
Outdoor Scenes
Not only do you get the rainbows but you get grass, flowers, sky, clouds, and more! Make the pattern on the left with a large hexagon board, and the pattern on the right with a large round circle.
Did you enjoy these rainbow hama beads? Let me know in the comments! I’d love for you to check out these other posts:
The post Rainbow Perler Beads (20+ Free Patterns) appeared first on DIY Candy.
]]>So my wife and I just bought and moved into our first adult house. Living in the NYC metro area, it had only been apartments before that. Needless to say, I was excited about all of the space and projects!
Well, before I could really start on any projects, I needed a work space and workbench. So I decided to build one to the size and specifications I needed. You can see below what my basement looked like. Luckily, I had a decent space to work with.
Tools used:
Supplies used:
Step #1: Designing the workbench
I grew up watching my dad work at his workspace. And he also built my first workbench so I could do projects next to him. Luckily my dad was in town, so we brainstormed about how we wanted it to look and what size it would be. We sketched out some plans on my trusty graphing pad to get an idea of what we could do. The finished product actually ended up looking pretty close to our original sketch! (Don’t use these numbers, they are just guesses and thoughts!)
Step #2: Figuring out the materials needed
I like MDF boards because they are so smooth and solid so I wanted to use that as my work surface. You could also use particle board or some other type of wood. But make sure you get a smooth surface and that it’s solid as you’re going to be hammering and banging things for years! I knew that I wanted to use peg board in the back to hang my tools on, so I needed 2 sheets of that. Then I used 2x4s for the base and cross beams. I needed 3 for the back supports and 4 for the cross beams. Then 2 more for the front legs and another 2 for the supports. I could have bought some 8’ pieces to cut down on waste, but I wanted to have some extra both in case something went wrong and to start a stockpile of scrap wood.
As a rule of thumb, I like to buy 10%-20% more material than I think I’ll need. That way, you don’t need to keep running back to the store if you split a piece of wood or lose a few screws.
Step #3: Start laying out and marking the wood
When possible, I like to lay things down on the floor to get a sense of spacing and size and how they all fit together. What’s right in planning doesn’t always look right in practice. I wanted the level of the workspace at 42” so I could easily work on it standing up (I’m 6’ tall) or while sitting on a stool. Obviously if you are shorter or taller, find the height that works best for you. Once you’ve got everything marked out and you’ve sort of visually pieced it together, it’s time to start cutting.
Step #4: Get outside structure built with legs, support and crossbeam
First I attached the back crossbeam to the two outside back support legs. Now I have height and length set. Next, I attached the supports to each leg and added the front legs. To be safe, I only put 1 screw in the front legs while I used the square and level to double check my angles. Once I was sure we were good, I attached the rest of the screws. It is very helpful to have someone else to help you hold things in place while you’re measuring/attaching things. Thanks dad!
Step #5: Add the rest of the supports and beams
Added the third back leg and the top crossbeam. Some people might think that you want the 2×4 flush up to the front to give the most support. While structurally it makes more sense, you definitely want a lip/overhang on the front edge so that you can attach a vise, clamps or other tool. I gave myself a lip on three sides. I also laid the board “flatwise” for two reasons, 1) for more support and 2) to make it easier to attach to the surface (see step #7). Front lip is 8 ½”, side lips are 3 ½”. The bottom supports are where I am going to add a shelf. They are 16” off of the floor.
Step #6: Measure desired depth of bottom shelf
I didn’t want the shelf to come all of the way out to the front as I imagined barking my shins on it and swearing up a storm. So I decided on 19” deep shelf. I still wanted a little lip, so I added the front crossbeam for the shelf 15” from the back edge. Okay! Now the base is built, time to start adding the surfaces.
Step #7: Attaching the surfaces
For my top surface, I cut the board to 72”x 30”. You don’t want much deeper as you’ll need to reach the back for your tools. For the back edge, I screwed down into the 2×4 as I wasn’t going to use that inch for any real workspace, so I didn’t mind the screw heads. For the front, I screwed up into the MDF to hold it in place (see photo.) I wanted a smooth and unblemished area in the front with no screw heads. I used 2 ½”, self-driving screws so I didn’t need to pre-drill any holes.
Step #8: Add the pegboard
I wanted to have the pegboard to be able to hang my tools on. The pegboard came in sheets of 2’x4’, so I grabbed two of them. The first one I put on its side, on the left of the bench. I just simply screwed them into the 2x4s, nothing special.
Step #9: Measure and cut wood for shelves
You’ll want to have some little shelves for hardware, safety glasses, tape, pencils, etc. You can build them any size that you want, that work best for you. I decided on 4 shelves. Using some of the leftover MDF (this is why I always overestimate!), I cut 4 shelves at about 18”x4 ½”. As you can see, I’m already using the lips on the edge of the shelf to clamp the wood I’m cutting. (Don’t be an idiot like me, always use safety glasses!)
Step #10: Install shelves and backing
Again, you can make the shelves any height that you wanted. I wanted the bottom shelf to be able to accommodate spray paint cans, so I put the first shelf at 9 ¼”. The rest I kind of eye-balled, but they’re ~4” – 5”. Just screwed them in from the side of each 2×4. For the backing, I used pegboard again. It’s one piece, measured out and attached from the back, into the supporting 2x4s.
Step #11: Finish the top of the pegboard
Using the rest of the second sheet of pegboard, I cut a long piece to finish up the top of the backing. My cat Brigit is inspecting my handiwork. I think she approves!
Step #12: Add finishing touches
I mean, right?
Final Step: Hang up your tools and fill up your shelves
Enjoy the look of this because it will never look this neat and clean again! One tip when buying the hooks and other hardware for your pegboard, get a magnetic strip! It’s great to hold random things, small stuff and oddly shaped tools. Also, I had a bunch of little containers that were in my tool box that I removed and added to the shelves. Use whatever you want, but make sure you have a bunch for all the little things that you’ll use and need.
Another view:
A pulled back view of the whole workbench. Already getting messy!
What went wrong:
No project goes exactly the way you want it. So I wanted to add this section to show you that we all have to make game-time fixes and help you look out for possible pitfalls.
Up Next: Off-Grid Solar Survival: Top 5 Things to Consider Before Diving In
Did you enjoy this post explaining how to build your own workbench? Let us know in the comment section below!
]]>For many years I thought that Hello Kitty was Sanrio, and Sanrio was Hello Kitty. I was a huge fan of Miss Kitty when I was younger, and just assumed that Sanrio was a brand with one character. For a long time!
UNTIL I learned about two other members of the team, the Little Twin Stars (Kiki and Lala). With their cute little faces and good energy, I was hooked. I had to have everything with the Twin Stars on it.
Fast forward to life as a teenager.
I went to high school in Louisville, KY and we had a Sanrio Surprises store at one of our local malls. The stuff was SO cute that I spent quite a bit of my babysitting money on trinkets (I didn’t need).
I completely fell in love with Sanrio, and all the characters! I still have some of the goodies I bought from back in that time, now 30 years ago. It’s so nostalgic for me!
My niece and I have been doing a lot of perler beads lately, and you may have seen our Hello Kitty perler beads. We also did a Hello Kitty organizer and door hanger.
They were so fun that we decided to continue and make a bunch of Sanrio perler beads. I introduced her to all the characters that were my favorites when I was young.
If you’re not familiar or need a refresher, here are the Sanrio characters we have perler bead patterns for below:
I can’t wait for you to check out the Sanrio perler bead patterns below.
Perler beads are recommended for ages six and up, so this is a very fun craft to try with your elementary age kids. All children seem to love perler beads (also known as hama beads, fuse beads, or melty beads). But don’t be shy – adults love them too!
Before we get into the summer perler bead ideas, I want to review a few basics of using fuse beads to make sure you get the best results. If you don’t want the tips, scroll down to the bottom to get the patterns and tutorial.
Remember that the overall goal is to melt the beads together on both sides while still leaving the holes open. Here’s how you achieve success (using a rainbow pattern as an example).
Place ironing paper or parchment paper over the beads on the pegboard. Be gentle so you don’t disturb the beads underneath.
Heat your iron to the medium setting (no steam). In a circular motion, begin to iron the project. Don’t press down too hard with the iron. Use small circles and keep the iron moving.
When ironed properly, the beads will still have an open center. Check and make sure your edges are melted. Let the design cool on the pegboard.
Note: BE CAREFUL about lifting up the paper while you’re ironing! If you want to check, carefully peel back paper around the edge of your design and see if all the beads are melted.
If you lift the paper up quickly and there are a lot of unmelted beads, they will easily fall off or go flying and you may be forced to start over. Sometimes the edges need more time so when you check, just check the edges and peel paper back slowly.
Another Note: some beads melt faster than others (clear melts faster than white, for example). So some holes might be larger than others. It’s okay! That’s part of the look of the project.
Remove the bead design from the pegboard. Flip it over to the non-melted side and repeat the fusing process.
Let cool completely and remove the paper again (which is reusable). Some people pull the paper off after they iron the first side, but I just wait until the end and peel off both pieces. It’s up to you!
Now that you’ve had a refresher on how to melt the beads, you can get the patterns! Keep on reading.
Make sure to check out these notes:
Mini Sanrio Characters
You’ll get a bunch of tiny characters including the Little Twin Stars, Pompompurin, Badtz-Maru, Keroppi, Pochacco, Kuromi, My Melody, Tuxedo Sam, Hello Kitty, and Cinnamaroll. These make great keychains, backpack charms, and other small trinkets.
Hello Kitty Head in Front of a Pink Heart
This pattern uses 152 black, 110 pink, 40 red, 303 white, and 3 yellow beads.
My Melody Head
This pattern uses 59 black, 89 pink, 52 white, and 5 yellow beads.
Kuromi Head
This pattern uses 95 black, 75 dark gray, 13 cotton candy, and 40 white beads.
Hello Kitty Standing with Blue Overalls, Yellow Shirt, and a Red Bow
This pattern uses 188 black, 51 red, 270 white, 14 yellow, 11 denim blue, and 58 navy beads.
Cinnamaroll Holding a Heart
This pattern uses 132 sky, 60 toothpaste, 152 white, and 24 blush beads.
Happy Pompompurin
This pattern uses 130 brown, 17 gingerbread, 278 pastel yellow, and 8 blush beads.
Hello Kitty Seated with Turquoise Overalls and a Bow
Uses 63 parrot green, 83 black, 67 light green, 200 white, 20 gray, and 2 yellow beads.
Mini Little Twin Stars
These patterns use 78 yellow, 43 turquoise, 79 pink, 48 sand, 4 gingerbread, and 34 white beads.
Excited Pochacco
The pattern on the left uses 122 black, 169 white, and 21 red beads. The pattern on the right uses 115 black, 167 white, and 26 bright green beads.
Badtz-Maru Head
This pattern uses 336 black, 60 white, and 13 yellow beads.
Hello Kitty Sitting with Pink Overalls and a Red Bow
This classic kitty uses 167 black, 51 red, 321 white, 6 yellow, and 22 pink beads.
Keroppi Head
This pattern uses 136 black, 136 white, 217 kiwi lime, and 24 pink beads.
Medium Gudetama
This pattern uses 115 black, 43 light gray, 21 gray, 68 cheddar, and 60 white beads.
Hello Kitty Toaster
This pattern uses 19 light brown, 41 sand, 45 black, 81 white, 80 flamingo, 8 sky, 6 gray, and 1 yellow bead.
Hello Kitty Blue Bandaid
This pattern uses 114 pastel blue, 146 robin’s egg, 20 light blue, 33 white, 7 cotton candy, 2 black, and 1 yellow bead.
Winking My Melody
This pattern uses 184 black, 254 pink, 34 sky, 139 white, and 2 yellow beads.
Hello Kitty Angel with a Blue Dress and Bow
This pattern uses 198 black, 302 white, 84 blue, and 2 yellow beads.
Tuxedo Sam
This pattern uses 165 dark gray, 89 white, 17 red, 221 pastel blue, and 37 yellow beads.
Sitting Chococat
This pattern uses 568 black, 32 cream, 72 white, 10 clear (to hold the whiskers), 3 gingerbread, and 9 cobalt beads.
Happy Hangyodon
This pattern uses 64 black, 27 turquoise, 106 robin’s egg, 40 white, 32 pink, and 13 magenta beads.
Kiki and Lala with a Star
This pattern uses 56 yellow, 160 pastel yellow, 76 pink, 60 turquoise, 14 flamingo, 8 toothpaste, 54 sand, 4 light brown, and 38 white beads.
Sitting Kuromi
This pattern uses 309 black, 30 pink, and 137 white beads.
Standing Cinnamaroll
This pattern uses 174 sky, 293 white, 58 toothpaste, and 6 blush beads.
My Melody with a Strawberry
This pattern uses 155 black, 172 pink, 95 white, 1 yellow, 8 kiwi lime, 14 red, and 4 pastel yellow beads.
Standing Pompompurin
This pattern uses 125 brown, 20 gingerbread, and 378 pastel yellow beads.
Walking Badtz-Maru
This pattern uses 575 black, 184 white, and 69 yellow beads.
Walking Keroppi
This pattern uses 220 black, 228 white, 246 prickly pear, 32 pink, and 44 red beads.
Little Twin Stars Riding a Horse
This pattern uses 244 tan, 95 toothpaste, 45 light lavender, 120 blush or light pink, 203 cream, 46 sand, 12 mint, 66 white, and 63 pastel yellow beads.
Lala and Kiki
Lala uses 171 black, 238 pink, 19 yellow, 70 peach, 83 pink, and 1 light gray bead. Kiki uses 173 black, 110 yellow, 169 pastel blue, 38 flesh, 40 white, and 14 pink beads.
Hello Kitty and a Large Polka Dot Bow
This pattern uses 59 parrot green, 265 black, 347 light green, 474 white, and 6 yellow beads.
Large Gudetamas
These patterns use 306 black, 369 cheddar, 434 white, 19 butterscotch, and 74 light gray beads.
If you enjoyed these Sanrio perler bead patterns, let me know in the comments! I’d also love for you to check out these other ideas:
The post Sanrio Perler Beads (30+ Free Patterns!) appeared first on DIY Candy.
]]>Hoodies are a popular fashion choice among many teens. They’re comfortable, trendy, and convenient. Many boys wear hoodies instead of jackets which makes this clothing choice multi-functional. We’ve also heard that dating partners often borrow hoodies, so having multiples is a good idea. Obviously, there are endless choices, so the style of clothing your recipient prefers and find something in a style that matches. Buy It Here!
Graphic t-shirts can be a way for teens to express their individuality and personality. The graphics and messages on the t-shirt convey a particular message or sentiment that resonates with the wearer and serves as a conversation starter. Teen boys like to wear graphic t-shirts related to gaming, Star Wars, or popular TV shows like Stranger Things. For gifting success, find a t-shirt that fits your teen’s hobby or interest, all while having a good feel and fit. Buy It Here!
If you want to complete the graphic t-shirt look, consider adding a flannel shirt. This wardrobe staple and timeless classic has made its way into teen closets. Generally, a flannel shirt is worn open over a graphic t-shirt and replaces a jacket year-round. (Teenage boys rarely wear jackets, which is why they’re not on our top ten list for teens.) Think about the boy’s favorite color and try to find one that matches. Also make sure a flannel shirt matches the style of clothing they like to wear. Another consideration is the thickness of the flannel material. If the recipient lives in a warm climate, or if you’re buying one for spring and summer, opt for a shirt made with thinner flannel. If you’re buying one for colder weather, look for shirts made with thicker or perhaps insulated flannel. Buy It Here!
Good winter gloves are essential for anyone who spends extended time outside in cold weather. Now you can take photos while still wearing your gloves to protect your fingers. If you’re thinking about buying the best winter gear for your teen, make sure the gloves you purchase are touch-screen compatible. Buy It Here!
Team logo apparel has been a staple in the teen fashion world for quite some time. It’s a popular clothing choice among teenage boys, especially if they’re fans of a particular sports team or like a team’s logo or branding. Fans love to wear their favorite team’s gear to show support! Gifting team logo apparel is a definite win. Buy It Here!
Are you looking to buy a present for a music fan? Buy them a t-shirt featuring their favorite band, musician, or concert. Showcasing their musical tastes and interests is a way for them to connect with other fans and share their musical interests. Buy It Here!
Looking for jewelry? Plain chain necklaces are a trend among boys in their teen years and can make plain outfits look more fashionable. Buy It Here!
Converse sneakers are a fashion staple for many. Now your teen can stand out in the sneaker crowd by designing their own unique pair! Buy It Here!
From books and computers to musical instruments and sports equipment, teens lug around a lot of stuff! Backpacks offer the perfect solution for carrying everything. And with so many different styles to choose from, there’s a backpack for every teen’s taste. Creative teens can personalize a simple backpack by adding drawings, embroidery, or accessories to express their individuality and make their backpack truly unique. Buy It Here!
If you’re looking to buy a teenage boy some footwear, these slides are a great option. Unlike other shoes that can be tricky to size, slides are a bit more forgiving and easy to slip on and off. Plus, they’re perfect for lounging around the house or running errands. If you want to give a gift that’s both practical and stylish, these slides are a great choice. Buy It Here!
Water bottles are no longer just a tool for hydration or a way to be environmentally friendly — they have become a fashion statement for many teens. And, with the rise of the #emotionalwaterbottle trend on TikTok, it’s clear that these bottles are more important than ever in teenagers’ lives. Water bottles are practical gifts and because they come in so many designs, colors, and patterns you’re sure to find one that a teenage boy can appreciate. Whether they prefer a sleek, stainless steel option or a colorful, patterned bottle, you can’t go wrong with gifting them a water bottle that suits their personality and style. Buy It Here!
The Fitbit Charge 5 is a fitness tracker with several features that make it popular among fitness enthusiasts. Features include a health metrics dashboard, a built-in GPS, sleep tracking, and personalized guided workouts. On top of that, it’s water-resistant and has customizable watch faces. Our teenage advisors call it a must-have. Buy It Here!
Did we mention that teens have lots of stuff? Ah yes, we did. What’s more, they often forget where they put it. They’re constantly searching for their backpacks, jackets, iPads, and phones. AirTags is the answer: a cool and trendy device that keeps track of an item’s location. Buy It Here!
This gift is a bit pricey, but we asked around and it seems that, according to teens, there are no earphones quite comparable to AirPods. AirPods are unique because of their wireless design, easy pairing, convenience, long battery life, and seamless integration with the Apple ecosystem. They provide a hassle-free listening experience that is unmatched by traditional wired earphones. This means that you have a pretty sure winner on your hands with this gift. Yay! Buy It Here!
Buy them a Bluetooth speaker so they can enjoy their favorite tunes wherever they go. These portable speakers are small in size yet deliver high-quality sound. Some even come with additional features to enhance the listening experience. This particular speaker offers white noise, making it the perfect device for teenagers trying to study or who struggle to fall asleep at night. Buy It Here!
I was blown away when my trusted teenage sources told me about hats that combine headphones and headcover. It’s a practical solution for listening to music on the go, especially when it’s cold outside, plus they’re stylish. I might have to get one of these hats, or beanies, for myself, too, when winter comes around. Buy It Here!
The Nintendo Switch provides teens with a unique and versatile gaming experience, with a wide variety of games and innovative features. Its portability, social interaction, and nostalgia factor make it a popular choice among teens. It even offers modern ways to play classic games like Mario, so maybe get one for yourself and join in the fun. Buy It Here!
Are you buying a present for someone that already has a Nintendo Switch? Prepaid Nintendo gift cards make a great gift! Or, you can purchase games yourself and send the lucky gift recipient a download code. Here are some popular Nintendo game choices:
Is your gamer wearing regular headphones? Level them up with a gaming headset! Gaming headsets offer superior sound quality, built-in microphones, comfort, durability, and specialized style that caters specifically to gaming needs. They allow gamers to fully immerse themselves in their favorite games, communicate effectively with other players, and enjoy the experience without any distractions. Buy It Here!
Skateboarding offers teens a fun and exciting physical activity that helps teens refine their balance and coordination skills and build confidence through mastering new skills. Once they get the hang of riding a skateboard, teens can hop on and use it to explore their local surroundings. Teens can skateboard on their own or meet up with friends to hang out and try new tricks. One caveat here: When people learn to skateboard and try new tricks, it’s very likely they’ll fall and they may even hurt themselves if they’re not wearing safety equipment. Skate helmets, wrist guards, and knee and elbow pads make great gifts for skateboarders, too! Buy It Here!
Get ready for some outdoor fun with a complete laser tag package! Most kits, like our pick, come with four laser guns, four target vests, and the ability to play with up to four individuals or teams. Plus, if you purchase multiple sets, they can all be used together for an even bigger crew and even more fun. A great way to get those boys outside. Buy It Here!
A punching bag is more than just a piece of equipment — it’s a stress-relieving tool that won’t hit back. We’ve all seen movie characters take out their frustrations on a punching bag, and for good reason. Teens especially love using punching bags to exercise and release pent-up energy. While there are many types of punching bags available, hanging bags are the strongest and can withstand even the most powerful punches. So if your teen is looking for a way to let off some steam and get a great workout, a punching bag is the gift to give. Buy It Here!
If you’re looking to help a teen boy build his home gym, a pull-up bar is an absolute essential. It’s an affordable option compared to other gym equipment and it’s incredibly versatile, targeting multiple muscle groups with just one piece of equipment. The best part? Many pull-up bars can be easily installed in a doorway, which means there’s no need to sacrifice floor space. Pull-up bars make a great fitness gift for teen boys! Buy It Here!
If your teen is into rock climbing, installing a climbing pegboard is a great way to add some in-home exercise that doubles as cool wall art. With 23 holes on each board, and boards that can be arranged in a variety of ways, this climbing pegboard kit offers great rock climbing training. Buy It Here!
The name “Shashibo” comes from the Japanese word “shashin,” which means “photograph,” and “bo,” which means “box.” A Shashibo Shape-Shifting Box is a three-dimensional puzzle toy that transforms into multiple geometric shapes. It consists of several interconnected magnetic cubes or panels that can be folded, twisted, and rearranged to create various forms and patterns. The Shashibo is known for its unique magnetic design, which allows it to effortlessly shift between different configurations, revealing hidden patterns and creating an engaging tactile experience. It is often described as a mesmerizing and versatile puzzle that provides hours of entertainment for people of all ages. Translation: this toy is entertaining enough to lure your teen away from their screens! Buy It Here!
An oldie but goodie that’s still popular worldwide. You’re probably already familiar with this iconic puzzle toy, but just in case you aren’t, I’ll describe it for you. A Rubik’s Cube is a three-dimensional mechanical puzzle invented by Ernő Rubik in 1974. It consists of a large cube made up of smaller cube units (cubies) that can be twisted and rotated along the vertical and horizontal axes. The cube is typically composed of six faces, each consisting of nine smaller stickers or colored squares, representing different colors. The goal of the puzzle is to arrange the cube so that each face contains a single color. Solving the Rubik’s Cube requires strategic thinking, problem-solving skills, and a series of twists and turns to manipulate the cubies into their correct positions. Enthusiasts try to solve it in the shortest possible time or explore different solving methods, and there’s a whole subculture of Rubik’s puzzlers on social media, too. If you’re looking to buy a teen boy a puzzle game, buy them a Rubik’s Cube because this vintage gem is still a winner. Buy It Here!
This flying hover ball is not only a viral TikTok trend but also promises hours of fun. Okay, but what is it? A flying orb ball, also known as a flying orb or floating ball, is a small high-tech drone in the shape of an orb that’s designed to hover or float in air. Aerodynamics and airflow create lift, allowing the orb to stay suspended in the air and appear to defy gravity. Some flying orb balls are designed for indoor use, others are more suitable for outdoor play, and still others, like this one, can be used both indoors and out. Flying orbs are controlled manually or through remote control; this particular one allows you to control its movement with your hands and it has several smart modes that range from boomerang skills to toss and hover modes. LED lights make this one extra fun to play with in the dark and it promises hours of fun. Buy It Here!
A fidget pen, like other fidget toys, is designed to provide a satisfying tactile and sensory experience and it’s a great stress relief tool for teens who may be experiencing anxiety, nervousness, or restlessness. When picking out a pen, make sure that it’s trendy, stylish, and matches the teen’s personality and interests. Buy It Here!
How a teen decorates their bedroom gives you a window into their personality and interests. Whether they use their room to hang out with friends or as a private sanctuary, gifting them a cool lamp can help them personalize their space. These fantastic prismatic-powered lamps come in either a pyramid or cube shape and use the power of science and an internal LED to create an incredible display of color. The lamp’s acrylic surfaces reflect and refract light, creating an infinite portal of color that shifts depending on where you’re standing. It’s like having a magical rainbow in your teen’s room! Buy It Here!
Does your teen want to add some fun and color to their bedroom? LED light strips are the perfect solution! With endless possibilities, you can place them behind a media center, along a wall, or even under a bed to create a magical glow. Plus, they can also brighten up those dark, hard-to-reach areas under cabinets. The best part? They’re super affordable, making them a favorite among teens looking to give their room a quick and easy makeover. Buy It Here!
Does your teen love to lounge? Then look no further than a classic bean bag chair! These chairs are the perfect way for teens to kick back and relax after a long day in the classroom, whether they’re sitting or lying down. And with a variety of colors and styles available, they’re sure to fit any teen’s sense of style. Not only are bean bag chairs incredibly comfortable, but they also add a fun and cozy vibe to any room. Buy It Here!
The teenage years can be stressful! One of the products that many teens are drawn to to help them reduce occasional anxiety is weighted blankets. The added weight can provide a sense of comfort and security. Additionally, the deep pressure touch sensation provided by the weighted blanket can help regulate the body’s sensory system, which can be helpful for individuals with sensory processing disorders. This might be the perfect gift for teens who are seeking more relaxation and calmness in their daily lives. Buy It Here!
Teens love receiving gifts, but often they’re even more thrilled by an experience. Consider arranging an outing with you or with their friends and purchasing tickets to attend their favorite sporting event or concert. This is a great opportunity to show you understand and support their interests and you’re sure to create lasting memories with this gift.
Let them game their hearts out. You provide the space and the snacks, they get to play. If sleepovers aren’t your cup of tea, consider a “sleepunder” (but don’t call it that in front of teens), which is pretty much a pretend sleepover where everyone goes home by midnight or so.
Most teens love escape rooms, both in-person and virtual. Arrange for an in-person outing with family or friends at your local escape room venue. Or give your teen the chance to connect with long-distance friends or relatives with this virtual alternative. Buy It Here!
And, to wrap it up, here are a few of our go-to gift cards for teenage boys. Just in case
The post Here are 36 Outstanding Gifts for Teenage Boys No Matter What the Occasion! appeared first on Your Teen Magazine.
]]>My obsession with stars started when I was ten years old. For Christmas that year I received – in my stocking no less – a sterling silver bracelet of linked stars. It was completely unexpected, but one of the best presents that I ever received.
Think about that. All the gifts you’ve ever gotten in your life . . . which is your favorite? It might not necessarily be the Barbie Dream House or the Hot Wheels Supreme Ultimate Garage (I’m dating myself).
The point is that sometimes the smallest gifts that you never expected are the ones that are the most important.
That bracelet, while small, started a long time love of stars. Stars are a symbol of happiness, renewal, and positivity. We get gold stars on our school papers (well, hopefully) and we see majestic ones in the sky at night.
I’ve even gone so far as to have stars tattooed on my body! I have six tattoos and half of them are stars. I’m passionate!
Lately my niece and I have been doing a lot of perler beads, and I’m sure you can imagine I was more than thrilled to make a bunch of star perler beads together!
Maybe you need a perler bead project for a birthday, Christmas, graduation, or some other celebration – or maybe you just love stars. No matter why you’re here, we have over 20 cute patterns below.
And just so you know, perler beads are recommended for ages six and up. Children love perler beads (also known as hama beads, fuse beads, or melty beads). But don’t be shy – adults love them too!
Before we get into the patterns, I want to review a few basics of using fuse beads to make sure you get the best results. If you don’t want the tips, scroll down to the bottom to get the Hello Kitty perler bead patterns.
Remember that the overall goal is to melt the beads together on both sides while still leaving the holes open. Here’s how you get the best results.
Place ironing paper or parchment paper over the beads on the pegboard. Be gentle so you don’t disturb the beads underneath.
Heat your iron to the medium setting (no steam). In a circular motion, begin to iron the project. Don’t press down too hard with the iron. When ironed properly, the beads will still have an open center. Check and make sure your edges are melted. Let the design cool on the pegboard.
Note: BE CAREFUL about lifting up the paper while you’re ironing! If you want to check, carefully peel back paper around the edge of your design and see if all the beads are melted.
If you lift the paper up quickly and there are a lot of unmelted beads, they will easily fall off or go flying and you may be forced to start over. Sometimes the edges need more time so when you check, just check the edges and peel paper back slowly.
Another Note: some beads melt faster than others (clear melts faster than white, for example). So some holes might be larger than others. It’s okay! That’s part of the look of the project.
Remove the bead design from the pegboard. Flip it over to the non-melted side and repeat the fusing process.
Let cool completely and remove the paper again (which is reusable). Some people pull the paper off after they iron the first side, but I just wait until the end and peel off both pieces. It’s up to you!
Now if you’re ready for the star perler beads, here are the patterns.
Make sure to check out these notes:
Small Shooting Star
This pattern uses 30 magenta, 63 yellow, 18 orange, 15 kiwi lime, 6 black, and 15 light blue beads.
Rainbow Star
This pattern uses 64 black, 11 red, 21 orange, 20 yellow, 27 bright green, 22 sky, 12 cobalt, 5 purple, and 3 fuchsia beads.
Super Mario Star and Bow with Star
These patterns use 124 black, 22 purple, 42 pastel lavender, 146 yellow, and 6 salmon beads.
Big Yellow Star
This pattern uses 221 yellow and 6 black beads.
Galaxy Style
This pattern uses 31 robin’s egg, 27 blueberry creme, 28 pastel lavender, 58 plum, 8 white, 59 pink, and 15 salmon beads.
Big Eyes
This pattern uses 70 black, 59 cheddar, 117 yellow, 29 honey, and 2 white beads.
Star Styles
A small star-shaped pegboard typically holds around 250 to 300 beads. Here are some cute ideas for various designs!
Florals and an Owl
There are two floral patterns for you as well as an owl on small star boards. In the middle pattern, the gray marks where clear beads should go.
Waving Star
This pattern uses 40 brown, 27 rust, 19 cheddar, 24 orange, 111 pastel yellow, 36 yellow, 7 cream, 3 pastel yellow, 2 robin’s egg, 8 black, 2 dark gray, and 6 magenta beads.
Kirby with a Star
Do you love Pokemon? So do we! This pattern uses 97 black, 66 flamingo, 178 pastel yellow, 1 cotton candy, 7 pink, and 10 yellow beads.
Shooting Star with Rainbow
This pattern uses 40 salmon, 37 cheddar, 39 pastel lavender, 22 pastel blue, 34 kiwi lime, 26 purple, 49 white, and 57 yellow beads.
Large Star with Black Border
This pattern uses 189 black, 325 yellow, 2 white, and 12 blush beads.
3-D Stars
Each star uses 134 beads. Slide the top piece down onto the bottom piece to create the star.
Excited Star
This pattern uses 79 tan, 321 mint, 32 gingerbread, and 16 blush beads.
Bashful Star
This pattern uses 79 tan, 287 mint, 42 gingerbread, 32 white, and 8 blush beads.
Large Galaxy Star
This pattern uses 170 eggplant, 58 cotton candy, 3 light pink, 29 white, 254 light lavender, 15 light gray (or silver), 142 sky, and 7 toothpaste beads.
Color Wheel Star
This pattern uses 20 purple, 20 cobalt, 20 magenta, 12 white, 20 shamrock, 20 red, 20 carribean sea, 20 orange, and 20 yellow beads.
Patriotic Stars
Here are three versions of 4th of July stars on small star boars using patriotic colorways.
Did you enjoy these star hama beads? Let me know in the comments! I’d love for you to check out these other posts:
The post Star Perler Beads (20+ Free Patterns) appeared first on DIY Candy.
]]>Do you love flowers? Of course you do – everyone loves flowers! At least that’s how I always felt when I would consider potential careers. And why for a time I thought I wanted to be a floral delivery person.
Think about it. Who can be upset when you show up with a bundle of beautiful blooms in their hands? No one! I pictured smiling faces, happiness, and lots of tips.
Until I realized you have to deliver sympathy flowers as well. Aaaaand with that realization, my dreams were crushed.
I guess there is a downside to every job, even if said employment is designed to make people happy. Even if flowers make people happy!
With spring here and summer right around the corner, I’m excited to share over 35 floral perler bead patterns that everyone is going to love. Whether you ever wanted to be a florist or not.
Perler beads are recommended for ages six and up, so this is a very fun craft to try with your elementary age children (or older). All kids seem to love perler beads (also known as hama beads, fuse beads, or melty beads). But don’t be shy – adults love them too!
There are some great patterns here just for celebrating the season, or for holidays like Mother’s Day. These make cute gifts, or as additions to other projects.
You can also add these little guys to houseplants or just display them around the home. Like I said at the beginning of this post – who doesn’t love flowers? They just add a bright pop of color everywhere you go!
Before we get into the flower hama beads, I want to review a few basics of using fuse beads to make sure you get the best results. If you don’t want the tips, scroll down to the bottom to get the patterns and tutorial.
Remember that the overall goal is to melt the beads together on both sides while still leaving the holes open. Here’s how you achieve success (with a rainbow as an example).
Place ironing paper or parchment paper over the beads on the pegboard. Be gentle so you don’t disturb the beads underneath.
Heat your iron to the medium setting (no steam). In a circular motion, begin to iron the project. Don’t press down too hard with the iron. I use a small craft iron and a tight, circular motion. I keep the iron going at all times.
When ironed properly, the beads will still have an open center. Check and make sure your edges are melted. Let the design cool on the pegboard.
Note: BE CAREFUL about lifting up the paper while you’re ironing! If you want to check, carefully peel back paper around the edge of your design and see if all the beads are melted.
If you lift the paper up quickly and there are a lot of unmelted beads, they will easily fall off or go flying and you may be forced to start over. Sometimes the edges need more time so when you check, just check the edges and peel paper back slowly.
Another Note: some beads melt faster than others (clear melts faster than white, for example). So some holes might be larger than others. It’s okay! That’s part of the look of the project.
Remove the bead design from the pegboard. Flip it over to the non-melted side and repeat the fusing process.
Let cool completely and remove the paper again (which is reusable). Some people pull the paper off after they iron the first side, but I just wait until the end and peel off both pieces. It’s up to you!
Now that you’ve had a refresher on how to melt the beads, you can get the patterns! Keep on reading.
Make sure to check out these notes:
Smiling Daisy
This pattern uses 134 black, 176 magenta, 168 sky, 56 yellow, 2 white, and 12 cheddar beads.
Small Vase of Flowers and a Tulip on a Stem
The small vase pattern uses 12 black, 28 rust, 11 fuchsia, 11 sky, 6 white, 29 kiwi lime, and 12 dark green beads. The tulip uses 68 hot coral, 99 blush, and 36 shamrock beads.
Flowers in a Vase
This pattern uses 95 black, 15 hot coral, 32 red, 5 yellow, 4 cheddar, 5 orange, 18 kiwi lime, 12 bright green, 34 dark green, and 21 shamrock beads.
Flower Petals
Each pattern uses 165 beads total – 60 for the border, 96 for the petals, and 9 for the center.
PInk and Aqua Flower
This pattern uses 104 light green, 152 peach, 48 hot coral, 20 parrot green, and 12 orange creme beads.
Bright Florals on Stems
These patterns use 73 light blue, 41 sky, 60 plum, 24 fuschia, 6 pastel yellow, 9 cheddar, 89 bright green, and 59 kiwi green beads.
Blooming Tulip
This pattern uses 147 hot coral, 24 blush, 48 fruit punch, 53 bright green, and 76 sour apple beads.
Smiling Flower
This pattern uses 120 light blue, 60 mint, 6 black, 2 flamingo, 31 dark spruce, and 34 sage beads.
Purple Pansy
This pattern uses 67 light lavender, 123 purple, 32 grape, 39 black, 7 yellow, 2 cheddar, 56 dark green, 14 bright green, and 15 pastel green.
Big Sunflower
This pattern uses 185 black, 156 cheddar, 148 yellow, 24 dark green, 24 gingerbread, 12 honey, and 8 sand beads.
Rose on a Stem
This pattern uses 80 red, 80 rose, 83 shamrock, and 25 kiwi lime.
Sunflower
This pattern uses 76 yellow, 26 cranapple, 26 gingerbread, 74 bright green, and 23 dark green beads.
Bright Pink Flower
This pattern uses 186 hot coral, 188 red, 11 orange creme, and 82 shamrock beads.
Mini Blossoms
These small blooms are great for using up extra beads!
Floral Bouquet
This pattern uses 52 sour apple, 70 fruit punch, 54 rose, 14 light gray, 39 white, 24 pink, 33 gingerbread, and 28 pastel yellow beads. You can also substitute clear beads for the light gray.
Blue Flowers
Make a flower with a stem on the left using a large hexagon board, and make a tiny bloom on the right with a small hexagon board.
Small Wildflowers
The design on the left uses a small hexagon board (great for perler bead coasters) while the design on the right uses a small star. The gray beads are clear in both designs.
Cross Stitch Design
This pattern uses 22 plum, 15 cheddar, 95 salmon, 274 peach, 70 light green, 82 blush, 40 fruit punch, 21 parrot green, and 6 cranapple beads.
Vases of Flowers
If you love flowers in vases, these patterns are going to be fun for you! The background of the design on the left is white beads.
Vintage Flowers on a Plaque
This pattern uses 180 red, 307 pastel blue, 70 dark spruce, 79 cotton candy, 34 white, 29 gingerbread, and 44 yellow beads.
Tropical Flowers
Both patterns use large round pegboards.
Wildflowers and Hibiscus
These patterns use 8 yellow, 131 light blue, 116 sky, 53 flamingo, 83 bright green, 32 plum, 131 kiwi lime, and 44 toothpaste beads.
A Rose By Any Other Name
This pattern uses 76 dark green, 62 cherry or red, 41 white, 120 magenta, 91 cranapple, 28 eggplant or raspberry, 106 sour apple, 196 bright green, and 24 clear beads as indicated by gray.
The clear beads attach the leaves to the rose and make it less fragile. You might want to omit these depending on what you are doing with the project.
Bright Floral Patterns
These patterns are made on large hexagon boards. The pattern on the right uses clear beads anywhere you see gray.
Bursting Florals
This pattern uses 108 cobalt, 240 sky, 215 cheddar, 185 orange, 164 tangerine, 68 dark green, 100 pastel yellow, 80 yellow, 28 honey, 20 gingerbread, and 1 white bead.
Pretty Peony
This pattern uses 310 light blue, 96 pastel green, 51 bright green, 62 dark green, 60 orange creme, 53 hot coral, 67 magenta, 114 cherry, 23 prickly pear, and 28 sherbert beads.
Large Rose
This pattern uses 108 kiwi lime, 69 dark green, 209 grape, 124 lagoon, 79 bright green, 109 pastel lavender, 75 robin’s egg, 106 white, 82 carribean sea, 93 light blue, and 35 dark blue beads.
Floral Teacup
I love this one because my mom had a teacup collection! This pattern uses 9 cobalt, 98 mint, 106 light gray, 301 white, 95 fern, 77 flamingo, 42 salmon, 68 light blue, 35 magenta, and 26 pink beads.
Flowers in a Watering Can
This pattern uses 143 pastel green, 80 flamingo, 71 magenta, 23 yellow, 54 pastel blue, 229 dark green, 40 cobalt, 6 cranapple, and 44 cream beads.
If you try these flower perler bead patterns, let me know in the comments! I’d also love for you to check out these additional ideas:
The post Flower Perler Beads (35+ Free Patterns!) appeared first on DIY Candy.
]]>So I’ll be honest, I don’t know that much about the history of video games. I’m in my 40s so I remember them coming about in the 1980s, of course. But the details are fuzzy.
I have four younger brothers and our first system was a classic Nintendo system, with Super Mario Brothers definitely being our best-loved game. It was everyone’s favorite, right?
Well, we played that game for a few years along with other Nintendo classics. Then in 1989, the Sega Genesis came along. My family definitely needed another gaming system (duh), so in the early 90s when the holidays rolled around . . . there was the Genesis under the Christmas tree.
I’m sure my father and brothers did ALL the research on the Sega system. I’m one of those people that’s like, okay how about you learn this first and then teach me. Or I just jump in.
What I didn’t know that Sonic the Hedgehog, released in 1991 and my family’s first Sega game, was created as a competitor to Mario Brothers! And sure enough, it totally took over our house. I had no idea it would be so . . . fun.
Bye bye, Mario and Luigi. Arrivederci, if you will.
I played hours and hours of Sonic, and beat the game more than a few times. I never got tired of it. How can you get tired of of a cool blue hedgehog who can flip and collect emeralds?
Since that time, the franchise has been made into more games, and movies, and merch. We were all obsessed I guess!
Anyhoo, if you’re here for the Sonic perler bead patterns, I’m excited to share over 40 with you. And they’re not just for Sonic. You’ll get patterns for Tails, Knuckles, Dr. Eggman, Amy Rose, Scourge, Super Sonic, Shadow, and more.
My niece and I had a great time doing these together. And if you have a request we’d love to hear in the comments. We’re always making new patterns!
Just so you know, officially perler beads are recommended for ages six and up. So far every kid I’ve met loves perler beads (also known as hama beads, fuse beads, or melty beads). I think you’ll have a great time doing this with kids . . . or for yourself!
Before we get into the patterns, I want to review a few basics of using fuse beads to make sure you get the best results (using Baby Yoda as an example). If you don’t want the tips, scroll down to the bottom to get the Sonic hama beads.
Remember that the overall goal is to melt the beads together on both sides while still leaving the holes open. Here’s how it’s done.
Place ironing paper or parchment paper over the beads on the pegboard. Be gentle so you don’t disturb the beads underneath.
Heat your iron to the medium setting (no steam). In a circular motion, begin to iron the project. Don’t press down too hard with the iron. Use small circles and keep the iron moving.
When ironed properly, the beads will still have an open center. Check and make sure your edges are melted. Let the design cool on the pegboard.
Note: BE CAREFUL about lifting up the paper while you’re ironing! If you want to check, carefully peel back paper around the edge of your design and see if all the beads are melted.
If you lift the paper up quickly and there are a lot of unmelted beads, they will easily fall off or go flying and you may be forced to start over. Sometimes the edges need more time so when you check, just check the edges and peel paper back slowly.
Another Note: some beads melt faster than others (clear melts faster than white, for example). So some holes might be larger than others. It’s okay! That’s part of the look of the project.
Remove the bead design from the pegboard. Flip it over to the non-melted side and repeat the fusing process.
Let cool completely and remove the paper again (which is reusable). Some people pull the paper off after they iron the first side, but I just wait until the end and peel off both pieces. It’s up to you!
Now if you’re ready for the Sonic perler beads, here are the patterns.
Here are just a few things to keep in mind:
Sonic, Tails, Amy, Dr. Eggman
Each of these square blocks is 18 x 20 and uses 360 beads total. They are great for coasters.
Cute Sonic
He looks so innocent! This pattern uses 163 dark blue, 71 sand, 83 white, 8 black, 4 bright green, 17 red, and 27 gray beads.
Standing Sonic
This pattern uses 125 black, 86 light blue, 34 sand, 47 white, 4 fern, and 20 red beads.
Sonic Head
This pattern uses 101 black, 22 dark blue, 136 cobalt, 40 toasted marshmallow, 12 light gray, 35 white, 4 dark gray, and 11 sand beads.
Sonic the Hedgehog
This pattern uses 177 black, 105 light blue, 60 cobalt, 39 dark gray, 35 white, 9 sky, 7 sand, 12 toasted marshmallow, 15 light brown, 42 light gray, 26 red, and 2 yellow beads.
Standing Sonic
This pattern uses 63 cobalt, 149 light blue, 14 cream, 9 sand, 36 light gray, 68 white, 2 fern, 92 black, 16 rust, 21 red, 10 cherry, and 2 yellow beads.
Thumbs Up Sonic
This pattern uses 110 cobalt, 91 pastel blue, 37 sand, 58 white, 113 black, 2 kiwi lime, 12 gingerbread, 56 gray, and 28 red beads.
Running Sonic
This pattern uses 195 light blue, 87 cobalt, 71 sand, 35 gray, 96 white, 7 black, and 159 red beads.
Large Sonic
This pattern uses 136 light blue, 116 cobalt, 39 sand, 30 periwinkle, 28 light brown, 51 light gray, 70 white, 13 blueberry creme, 45 dark gray, 39 black, 30 cranapple, and 28 red beads.
Gold Ring, Power Boots, Invisibility, and Power Up
Each of these square blocks is 18 x 20 and uses 360 beads total. They are great for coasters.
Medium Tails
This pattern uses 147 black, 137 orange, 108 white, and 4 light blue beads.
Tails Head
This pattern uses 99 black, 29 cheddar, 32 light gray, 84 white, 24 tomato, and 101 orange beads.
Large Tails
This pattern uses 140 honey, 92 orange, 75 cheddar, 82 dark gray, 60 light gray, 54 gray, 99 white, 38 black, 12 cranapple, and 11 red beads.
Flying Tails
This pattern uses 59 light gray, 65 sky, 156 white, 80 dark gray, 36 honey, 60 rust, 83 cheddar, 49 orange, 4 cobalt, 6 orange, and 5 red beads.
Medium Amy Rose
This pattern uses 55 red, 53 magenta, 78 pink, 118 black, 14 cream, 51 white, 3 bright green, 8 light brown, 9 peach, 23 robin’s egg, and 17 gray beads.
Amy Rose Head
This pattern uses 74 black, 50 magenta, 19 red, 75 pink, 20 white, 3 fern, 5 tan, 3 rust, and 10 peach beads.
Large Amy Rose
This pattern uses 178 black, 94 flamingo, 47 pink, 15 sand, 42 gray, 42 white, 7 tan, 15 light brown, 48 tomato, 33 dark gray, and 8 rose beads.
Standing Knuckles
This pattern uses 183 black, 133 red, 63 white, 14 peach, 5 bright green, and 6 yellow beads.
Knuckles Head
This pattern uses 79 black, 45 salmon, 110 red, 22 white, 37 cherry, 2 light blue, 3 light gray, and 8 toasted marshmallow beads.
Standing Dr. Eggman
This pattern uses 248 black, 34 toasted marshmallow, 48 rust, 103 red, 15 white, 52 orange, and 10 dark gray.
Robotnik in a Spaceship
This pattern uses 274 black, 223 dark gray, 188 gray, 32 fawn, 20 pastel green, 21 pastel blue, 27 brown, 116 white, 37 rust, 12 dark blue, 18 cherry, 11 red, 6 robin’s egg, 11 cheddar, 35 yellow, and 8 tangerine beads.
Large Dr. Eggman
This pattern uses 314 black, 52 dark gray, 82 light gray, 43 gray, 19 sand, 93 white, 26 tan, 32 honey, 38 brown, 18 light brown, 78 cherry, and 82 red beads.
Shadow the Hedgehog
This pattern uses 57 rust, 127 black, 34 red, 134 dark gray, 20 sand, 11 tan, 49 white, 20 gray, 10 orange, and 5 yellow.
Large Shadow the Hedgehog
This pattern uses 178 black, 33 cranapple, 41 red, 74 charcoal, 84 dark gray, 9 sand, 12 butterscotch, 13 light brown, 41 gray, 68 white, 33 light gray, 16 cheddar, and 13 yellow beads.
Evil Sonic
This pattern uses 64 bright green, 55 dark green, 82 kiwi lime, 11 toasted marshmallow, 20 red, 27 white, 3 tomato, 74 black, 13 sand, 9 brown, 3 yellow, 2 orange, 8 light gray, and 9 dark gray beads.
Scourge the Hedgehog
This pattern uses 173 black, 113 kiwi lime, 15 sand, 53 bright green, 42 gray, 41 white, 7 tan, 15 light brown, 33 dark gray, 9 yellow, and 26 red beads.
Super Sonic I
This pattern uses 168 black, 112 yellow, 56 peach, 49 white, 4 fern, and 33 red beads.
Super Smash Flash Sonic II
This pattern uses 207 toothpaste, 1 black, 62 spice, 62 cheddar, 115 yellow, 20 pastel yellow, 113 light brown, 10 butterscotch, 46 white, 32 red, 24 light gray, 23 rust, 13 dark gray, and 15 cherry beads.
What did you think of these Sonic perler beads? Let me know in the comments! I’d also love for you to check out these other patterns:
The post Sonic Perler Beads (30+ Free Patterns) appeared first on DIY Candy.
]]>[TAG0]
Designer: Molo Design
Accordion Style Paper Room Divider: Molo’s paper room divider is a flexible space partition that can be shaped into many formations. The accordion-style design expands up to 15 feet and compresses into the thickness of a book for storage. Sculptural, sound-absorbing, and magnetically modular, this room divider builds a unique backdrop for events, performances, and large homes alike.
[TAG1]
Visualizer: Mohamed Elasar
Panel Room Divider: Modular room divider panels can be adapted to any room width. These transparent panels divide the zones of a large living space without severing its impressive proportions.
[TAG2]
Visualizer: Viktoriya Romanova
Arched Room Dividers: Another floor-to-ceiling screening solution, this time with an en vogue arched aesthetic. The rotating function of these full-height room dividers means that you can decide how much privacy or light control you desire according to the time of day.
[TAG3]
Source: Inhabit Living
Hanging Room Divider: Use a bright, hanging room divider to add an instant splash of color to your home. Aqua blue panels create a beachy atmosphere even if you’re a hundred miles from the sea.
[TAG4]
Visualizer: Leonid Sizikov
Built-in Room Divider: Built-in, custom room dividers offer a long-term, sturdy solution that won’t fall over, tear, or flap in a strong breeze. Light permeable designs maintain a subtle visual link between the separated areas.
[TAG5]
Visualizer: NM Interior
Room Divider With Door: An edge-to-edge decorative screen with an integrated doorway builds a beautifully lightweight aesthetic. Rooms are completely separate but borrowed light prevails.
Folding Metal Room Divider: Perk up a plain wall or a disused corner with a folding metal room divider. These weighty screens also provide a quick solution for drawing a boundary between an open-plan home entryway and a living room.
Accordion Room Divider: Another decorative metal screen that serves as art for the home, this glamorous design is made from high-quality iron and sparkling acrylic beads.
Industrial Style Sculptural Room Divider: An awesome home addition for cycling enthusiasts! Reclaimed bicycles from Indonesia construct this industrial, sculptural design that is sure to be a conversation piece.
Plant Room Divider: Vines grow from a planter in the base of this desk to produce a live living room divider. An uplifting zoning solution for a home workspace or a commercial space.
[TAG13]
Visualizer: Suit house Studio
Glass Room Divider: Sometimes you want to dial down the noise without compromising on natural light or visual space. A glass partition offers an all-round solution.
Sliding Panel Room Divider: This versatile track system can be used as a room divider, a closet door, or a window treatment. The 4-rail track is adjustable from 45.8″ to 86″ wide, and the panels can be trimmed to any length.
[TAG16]
Visualizer: Elshad Kerimov
Sliding Glass Room Divider: Glass panels give this room divider solution a wonderfully lightweight look, while fluted texture gently distorts the adjacent space.
[TAG17]
Visualizer: Hagar Salem
Tension Rod Room Dividers: Tension rods anchor these room divider panels in place, making them a slimline solution for compact spaces. The panels can slip into a narrow gap between a dining area and the back of a sofa, leaving no protruding stands to trip over.
Modern Style Room Divider: Using a cordless 4-rail track system, this room divider makes a flexible zoning solution that can also be used as window shades. Trim to height and attach the base bars for a custom finish.
Decorative Hanging Room Divider: A floral motif and black finish give this hanging room divider a classic look. 12 individual PVC panels allow the design to be assembled to the length and configuration of your choosing.
8 ft Sliding Track Room Divider: Woven with a natural blend of 61% paper and 39% poly, this 8ft sliding track system works well in both modern and traditional settings. The woven panels attach with Velcro and are easy to clean with a microfiber duster or vacuum attachment.
[TAG24]
Muhammed Shahin[TAG7]BUY IT
Rotating TV Mount Room Divider: Enjoy watching TV in 2 rooms with just one screen, using a room divider with a rotating TV mount. Suspended from the ceiling, the TV housing unit has a floating appearance, which leaves room underneath for a modern fireplace.
[TAG26]
Visualizer: Irada Allahverdiyeva
TV Wall Room Divider: This modern room divider features a rotating TV mount at prime viewing height, while a frame of open shelving provides extra storage and display space.
Media Console Room Divider: Low and linear, this wooden media console unit suggests a separation of space without causing a tall obstruction. A built-in, slender TV stand rotates the screen to face wherever it’s wanted in an open-plan living space.
[TAG28]
Visualizer: Elemental Design
TV Stand Room Divider: This TV stand is perfectly proportioned to divide a sitting area from a kitchen. Its sturdy depth resembles a kitchen island, while its curved, racetrack-shaped silhouette makes it easy to maneuver around.
[TAG29]
Visualizer: Oleh Vynarchyk
Wooden Room Divider: Chunky wooden beams build a room divider with an imposing presence. This floor-to-ceiling design makes an attractive rustic backdrop for the TV and a solid partition between the lounge area and the home entryway.
[TAG30]
Visualizer: Shexia Space Design
Block room divider: Similar to glass blocks, a modular cube room divider builds a uniform, stacked appearance that allows light to flow straight through. A smart aesthetic for commercial office spaces.
Room Divider With Chalkboard Panels: Embellish a chalkboard room divider with your own designs, or use the panels to record important notes, telephone messages, weekly menus, or shopping lists.
[TAG33]
Visualizer: Kamran Karimov
Muxarabi screen: A decorative muxarabi screen is as beautiful as it is functional. It becomes the artwork in the room, it is a portal of light in adjoining spaces, and it is a gatekeeper of zones.
Personalized Room Divider: Letter blocks slot into this perforated room divider to create a design that is as unique as you are. It also includes an integrated wooden bench in its base, which serves both sides of the partition.
5 Foot White Pegboard Room Divider: We all need extra storage space, so a pegboard room divider makes perfect sense. Simply attach standard pegboard hooks to hang hats, jewelry, bags, cooking utensils, or even decorative elements. A foldable pegboard also makes a nifty companion for displaying and selling items at craft fairs and boutiques.
Van Gogh Irises And Starry Night Room Divider: Fans of Vincent Van Gogh won’t be able to resist these folding masterpieces. Choose from Starry Night or Irises.
Van Gogh Almond Blossoms Room Divider: This room divider is bound to please fans of Van Gogh and Japanese art alike. Elegant almond blossoms grow across a striking teal background, which has a waterproof coating to make it splash-resistant.
Gustav Klimt ‘The Kiss’ Room Divider: “The Kiss” by Gustav Klimt shimmers with gold leaf in its original form. Unfortunately, this art print room divider does not have the same rich coating, but it does have mesmerizing color and an air of romance.
Japanese Shoji Screen Style Folding Room Divider: Build a Japanese-style interior with an authentic looking Shoji screen room divider.
Asian Style Folding Room Divider With Floral Prints: This Asian-style folding room divider features delicate floral prints that complement a feminine bedroom decor scheme, a sunlight-filled conservatory, or a pretty garden room.
Japanese Plum Blossom Printed Folding Room Divider: Red blossoms paint a fiery pattern across this Japanese plum blossom printed folding room divider. Black outlines depict a traditional Shoji screen.
Mid Century Modern Style Room Divider: Complete a bold mid-century modern home interior with a geometric room divider. Made with quality paulownia wood and two-way hinges, this sturdy piece can be folded in either direction.
Rustic Folding Room Divider: Wood louver panels give this folding room divider a rustic appearance, which looks at home in a relaxed living room, dining room, bedroom, or study.
Bamboo Room Divider: Sustainable bamboo panels and a pine wood frame make this room divider an environmentally-friendly option. Its natural tone melds with most color schemes, which means that you can relocate it around the house as desired.
Solid Wood Folding Room Divider: Six panels of pale paulownia wood stretch this slatted room divider to a length of 94.5”. The freestanding louver screen folds up when not in use to save space.
Modern Farmhouse Style Room Divider: Add instant modern farmhouse appeal without having to install barn doors! Simply unfold this farmhouse-style room divider and you’re good to go.
Foldable Open Bookcase Room Divider: Get yourself an instant bookcase without any DIY plans or materials involved! Simply fold out four hinged frames and slide in three removable shelves.
Folding Room Divider With Shelves: This shelved room divider has a filled-in louver backdrop, making it perfect for building privacy.
Curtain Room Divider: Simple but effective, a curtain room divider on a tension rod is relatively cheap to buy and easy to install.
Portable Room Divider With Wheels: A room divider on wheels provides ultimate portability. Forget straining your back every time you need to shade an open-plan living space from the sun or glean some privacy, simply push and glide.
Patterned Hanging Room Divider: Snap-fit high-density polyester pieces into a stunning 3D art piece and room divider. An intriguing piece to elevate a large living room, hotel lobby, bar, or school reception area…
… Incorporate different colored felt pieces to achieve dazzling designs.
Sound Proof Room Divider: Manage acoustics with this sound absorbing room divider. A superb solution for combined workspaces.
Open Bookcase Room Divider: 5 tiers of open shelves and 2 concealed cabinets make this bookcase room divider a valuable piece of furniture for storage and display.
Large Industrial Style Open Bookshelf Room Divider: Black metal framework and roomy wooden shelves construct a rustic room divider that looks best filled with books and vintage treasures.
Black Steel Brass And Wood Room Divider Bookshelf: Handcrafted from brass, black steel, and wood, this exquisite room divider is custom-made to order.
Floral PVC Room Divider: Intricate flower patterns fill this modular, PVC room divider with charm. A black finish gives the cheerful design a bold presence.
Arched Boho Style Room Divider: Looking like a piece of elaborate vintage lace, this arched, hand-carved boho room divider has a distressed whitewashed finish with metallic gold accents.
Bohemian Style Macrame Curtain Room Divider: Add bohemian charm to your interior with a macramé curtain room divider. This environmentally-friendly product is made from sustainable 100% cotton, which is also biodegradable.
Rattan Sunflower Patterned Room Divider: Naturally grown rattan is used to form this delightful sunflower room divider design, which is sure to add a touch of summer to a living space or bedroom.
Recommended Reading: A Sleek Apartment That Divides Rooms Creatively
For more regular updates from Home Designing, join us on Facebook.
[TAG86]
If you are reading this through e-mail, please consider forwarding this mail to a few of your friends who are into interior design. Come on, you know who they are!
Related Posts:
]]>The poor dinosaurs. They never had a chance! Not enough food, too many volcanoes, and changing temperatures. Oh, and then other dinosaurs coming after them all the time!
It was a rough life.
We learned a lot more about it with the movie Jurassic Park, released when I was in high school and still a classic to this day. I’m sure you know there were a ton of other movies released after that, ’cause for some reason, we all just love dinosaurs!
I grew up with four brothers, and it became a household love. We never saw a natural history museum we didn’t like! The skeletons of creatures from times long ago are unreal.
We incorporated dinos into our crafts and play as well. And since we’ve been trying a ton of perler beads around here lately, we decided to make some dinosaur perler beads!
Yep, I’m here today to meld the two worlds: the thunderous land of the dinosaurs and the small yet mighty universe of perler beads.
Can you imagine a vicious t-rex, a majestic brontosaurus, or a mighty triceratops coming to life with some plastic beads and an iron? Well, we’re going to make it happen today!
If you’re new to perler beads, they are recommended for ages six and up, so this is a very fun craft to try with your elementary age kids. All children seem to love perler beads (also known as hama beads, fuse beads, or melty beads). But don’t be shy – adults love them too!
I’ve got over 40 patterns for you below, ranging from very easy to more difficult. And “difficult” is all relative in perler-ing. Nothing is really that hard 🙂
Before we get into the dinosaur hama beads, I want to review a few basics of using fuse beads to make sure you get the best results. If you don’t want the tips, scroll down to the bottom to get the patterns and tutorial.
Remember that the overall goal is to melt the beads together on both sides while still leaving the holes open. Here’s how you will achieve success (with a rainbow as an example).
Place ironing paper or parchment paper over the beads on the pegboard. Be gentle so you don’t disturb the beads underneath.
Heat your iron to the medium setting (no steam). In a circular motion, begin to iron the project. Don’t press down too hard with the iron. When ironed properly, the beads will still have an open center.
I keep the iron moving and use small, circular strokes.
Check and make sure your edges are melted. Let the design cool on the pegboard.
Note: BE CAREFUL about lifting up the paper while you’re ironing! If you want to check, carefully peel back paper around the edge of your design and see if all the beads are melted.
If you lift the paper up quickly and there are a lot of unmelted beads, they will easily fall off or go flying and you may be forced to start over. Sometimes the edges need more time so when you check, just check the edges and peel paper back slowly.
Another Note: some beads melt faster than others (clear melts faster than white, for example). So some holes might be larger than others. It’s okay! That’s part of the look of the project.
Remove the bead design from the pegboard. Flip it over to the non-melted side and repeat the fusing process.
Let cool completely and remove the paper again (which is reusable). Some people pull the paper off after they iron the first side, but I just wait until the end and peel off both pieces. It’s up to you!
Now that you’ve had a refresher on how to melt the beads, you can get the patterns! Keep on reading.
Make sure to check out these notes:
I’ll start with some mini patterns, go into more general patterns then into alphabetical order! Enjoy.
Mini Dinos
Make a t-rex, parasaurolophus, brontosaurus, palm tree, stegosaurus, and triceratops.
Medium Dinos
Use small boards to make a brontosaurus, triceratops, ankylosaurus, and stegosaurus.
Small T Rex
This pattern uses 22 robin’s egg, 49 light blue, 34 dark blue, and 5 white beads.
Mini Dino and Volcano
This pattern uses 27 tomato, 8 orange, 2 yellow, 52 pastel blue, 89 gray, 1 black, 2 cobalt, 8 white, and 12 dark gray beads.
Three Dimensional Dino
This pattern uses 103 light blue, 1 black, 20 pastel green, and 8 robin’s egg beads. Once you’re done, insert the legs into the body portion to make your dinosaur stand.
Exploding Volcano
This pattern uses 56 light gray, 332 robin’s egg, 15 dark gray, 13 yellow, 13 black, 20 cheddar, 19 spice, 8 cherry, 68 light brown, 51 brown, 33 sour apple, 68 bright green, and 29 shamrock beads.
Blue Dinosaur in Grass
This pattern uses 11 cheddar, 129 lagoon, 1 cobalt, 14 white, 34 teal, and 27 shamrock beads.
Jurassic Park Logo
This pattern uses 88 red, 222 black, and 267 yellow beads.
Jurassic Park T Rex
This pattern uses 321 black, 93 dark green, 152 kiwi lime, and 35 white beads.
Mini Brontos
Why do these little brontosaurus make me squeal? They seem happy somehow. Customize with your favorite colors.
Orange Brontosaurus
This pattern uses 297 orange, 3 white, 1 black, 2 blush, 46 spice, and 37 toasted marshmallow beads.
Medium Brontosaurus
This pattern uses 271 blueberry creme, 1 black, 2 light gray, 128 periwinkle, and 53 gray beads.
Large Bronto
This pattern uses 230 shamrock, 318 kiwi green, 1 black, and 63 pastel green beads.
Medium Parasaurolophus
This pattern uses 145 black, 180 red, 8 white, 27 orange, and 4 cherry beads.
Large Parasaurolophus
This pattern uses 156 light green, 170 parrot green, and 1 black bead.
Medium Pterodactyl
This pattern uses 165 black, 174 light blue, 11 white, 6 light gray, and 2 cheddar beads.
Large Pterodactyl
This pattern uses 75 salmon, 92 blush, 1 black, 151 peach, and 1 clear bead (keeps the leg attached).
Tyrannosaurus Rex with Scales
Some theorize the t-rex had scales. If you’re one of those people, you’ll love this pattern! It uses 140 parrot green, 106 mint, 38 toasted marshmallow, 1 black, 3 blush, and 11 light green beads.
Blue Tyrannosaurus
This pattern uses 209 light blue, 2 black, 2 yellow, 3 white, 7 red, and 104 robin’s egg beads.
Green Tyrannosaurus Rex
This pattern uses 148 dark green, 97 bright green, 18 light brown, 1 black, 2 blush, 14 kiwi green, and 6 light gray beads.
Large Tyrannosaurus Rex
This pattern uses 287 forest, 6 white, 3 gray, 26 sage, 19 evergreen, and 44 kiwi green beads.
Green and Blue Triceratops
This pattern uses 71 turquoise, 187 prickly pear, 8 white, 1 black, and 1 blush bead.
Smiling Triceratops
This pattern uses 16 toasted marshmallow, 245 stone, 42 brown, 3 white, 1 dark blue, and 3 cranapple beads.
Big Blue Triceratops
This pattern uses 212 black, 65 robin’s egg, 360 light blue, and 18 cobalt beads.
Surprised Triceratops
This pattern uses 149 black, 149 shamrock, 27 light gray, 216 kiwi lime, 14 white, and 6 pink beads.
Pink Stegosaurus
This pattern uses 53 raspberry, 198 peach, and 2 black beads.
Surprised Stegosaurus
This pattern uses 143 black, 191 parrot green, 164 light green, 8 white, and 4 light gray beads.
Smiling Stegosaurus
This pattern uses 185 black, 355 pastel green, 37 orange, 8 bright green, 12 pastel yellow, and 11 white beads.
Purple Stegosaurus and Baby Triceratops
These patterns are fun because they use hexagon and round boards!
Running Velociraptor
This pattern uses 348 robin’s egg, 140 blush, 1 black, 40 hot coral, 42 sour apple, 69 pastel green, 62 kiwi lime, and 139 shamrock beads.
Baby Dino Coming Out of an Egg
This pattern uses 237 black, 49 bright green, kiwi lime, 5 robin’s egg, 14 honey, 243 cobalt, and 302 toasted marshmallow beads.
Brontosaurus Skeleton
Uses 265 black and 174 white beads.
Tyrannosaurus Skeleton
Uses 218 black and 167 white beads.
Triceratops Skeleton
Uses 264 black and 208 white beads.
Tyrannosaurus Rex Skull
This pattern uses 554 white and 104 black beads.
Did you enjoy these dinosaur perler beads? Let me know in the comments! I’d love for you to also check out the following posts:
The post Dinosaur Perler Beads (40+ Free Patterns) appeared first on DIY Candy.
]]>Creative and practical storage solutions not only help to keep your home tidy but also add a touch of style and personality. Here are five inventive storage ideas that can help you make the most of your new home, with practical tips for implementing these solutions…
Built-in storage is an excellent way to maximise space in your home while also offering a sleek and discreet appearance. You can make the most of existing alcoves with shelves and desk spaces (like I did with my dressing table alcove below), or add floor-to-ceiling shelves, or use it as a wardrobe.
When incorporating built-in storage into your home’s design, consider the room’s layout and purpose, as well as the storage needs of the occupants. For instance, a built-in bookcase in an alcove in your living room can add character while offering a convenient storage solution for your book collection.
In bedrooms, built-in wardrobes can be designed to accommodate various clothing items, accessories, and shoes, making it easier to keep your belongings organised. You can even use the built-in wardrobe to create a ‘nook’ for your bed like I have, creating a cosier, more enclosed feel when you’re in bed.
Maximising vertical space is a clever way to increase storage capacity without compromising on floor space. Wall-mounted shelves, ladder shelves, and floating corner shelves are all popular vertical storage solutions. To choose the right option for your home, consider the room’s dimensions, the weight of the items you plan to store, and the overall aesthetic you’re aiming for.
For example, a wall-mounted shelf in the bathroom can provide extra storage for toiletries and towels, while floating corner shelves are particularly useful in small rooms, as they make use of otherwise-unused space and can be easily customised to suit your needs.
Ladder shelves in the living room can display decorative items and store books or media collections. I have a vintage Ladderax system that’s customisable, so I can add or remove shelves and cupboards as needed, and it can even house a handy fold-out desk for working from home.
Multipurpose furniture is both practical and space-saving, making it ideal for new homeowners looking to optimise their storage options. Some popular multipurpose furniture pieces include storage beds, ottoman benches with storage compartments, and extendable dining tables with built-in storage.
To select the right multipurpose furniture for your needs, think about the size of your room, your lifestyle, and the types of items you need to store. A bed with storage compartments can provide ample space for seasonal clothing and other belongings, while an ottoman bench can serve as a stylish seating option with a hidden storage compartment.
Capitalising on underused spaces in your home can help you make the most of your available storage capacity. Some innovative underused space storage solutions include under-stairs storage, above-door shelves, and ‘toe-kick’ drawers in the kitchen.
When implementing these solutions, be sure to take accurate measurements of your space and choose materials and designs that complement your home’s decor. Toe-kick drawers in the kitchen can store baking trays, cutting boards, or even children’s art supplies, keeping these items out of sight but easily accessible. Under-stairs storage can be used to store coats, shoes, or cleaning supplies, while above-door shelves can provide extra storage in bathrooms or bedrooms for items that are used infrequently.
Customisable storage solutions are an excellent way to create a tailored storage system that meets your unique needs. Modular shelving systems, pegboard walls, and adjustable closet organisers all offer a high degree of personalisation, as they are easy to customise.
To configure these solutions effectively, consider the types of items you need to store, the amount of space you have available, and your preferred method of organisation. Modular shelving systems can be adapted to fit various room sizes and shapes, making them ideal for both small and large spaces.
Pegboard walls are a versatile option for garages, craft rooms, or home offices, allowing you to store and organise tools, stationery, and other supplies easily. Adjustable closet organisers can be customised to accommodate clothing, shoes, and accessories, making it simple to keep your wardrobe organised and accessible.
When implementing these creative storage ideas, keep the following tips in mind:
Thinking creatively about storage can help you maximise the space of your new home. Don’t be afraid to think outside the box and experiment with these concepts to create a living space that is both functional and stylish. Remember to consider the future, prioritise accessibility, and choose aesthetically pleasing options to make your storage solutions as effective as possible.
Let me know what clever storage solutions you’ve added in your own home – I’d love to hear your storage hacks in the comments below.
This blog post is an advertisement feature that has been written in collaboration with a sponsor. The pink links in this post indicate a sponsored link
]]>In this guide, we will walk you through exactly how to transform your small garage into a well-organized, efficient space, regardless of how little room you have.
We’ll cover how to effectively plan out your garage space, sort and purge your items, install and utilize storage systems and accessories, and even carve out a little corner for your hobbies or workbench.
Then, we’ll cover how to make your garage more comfortable and look good while improving your lighting and ventilation.
Let’s get started.
Organizing a small, one-car garage can feel overwhelming. But…proper planning (and a lot of measuring) can make it much more manageable.
That revolves around three core ideas: evaluating your needs, creating garage zones, and continually reassessing as things change.
No matter how you use your garage, its primary function is to store vehicles. Any small garage organization plan needs to factor in ample space for parking.
For the rest of this article, we’ll make some assumptions based on the dimensions of a typical one-car garage and the size of an average car in the US.
Let’s assume you want an additional 2′ on each side of your car so you don’t have to squeeze in and out. We’ll also leave an extra foot in front and behind your car to make parking easier.
That leaves us with three feet of space along one side wall and two feet along the back wall. This will vary depending on the dimensions of your vehicle.
In a later section, we’ll cover solutions to help maximize that limited amount of space in your small garage.
Next, think about how you want to use your garage.
Is it solely for car parking, or does it also need to accommodate storage, workshop areas, or even a home gym?
The answers will give you a clearer picture of what your garage should look like.
Once that’s done, the concept of ‘zone planning’ comes into play.
The idea is to partition your garage into zones dedicated to a specific purpose.
For example, you might create zones for car maintenance, gardening, sports gear, or a hobby. This deliberate planning ensures every inch of your garage is used effectively and items are easy to locate.
Remember, your garage is not static, so expect your needs to evolve over time.
Don’t be afraid to consistently reassess your garage layout.
For example, if you’ve picked up a new hobby or your kids have outgrown their sports equipment, it’s OK to change things up.
This way, you’re ensuring that your garage adapts to the changing needs of your household.
Statistics suggest that 15%-25% of Americans can’t park their car inside their garage because of excessive clutter.
So no matter what small garage storage solutions you end up with, you need to start by decluttering your garage.
I have an entire article on my “No-Stress” method of decluttering your garage, breaking it down into manageable tasks.
Here are some of the highlights:
Stage 1: Clearing Floor Space: Start with disposing of large items such as old mattresses, outdated computers, piles of recycling, unused paint cans, empty boxes, and stacks of old newspapers or magazines.
This initial step creates workable space and delivers quick, visible results.
Stage 2: Sorting Items: Next, categorize all items into piles of similar products. Maintain clear space between piles to prevent a sense of being overwhelmed.
Your garage should be tidier by the end of this stage but don’t worry if it’s not fully organized yet.
Stage 3: Determining Their Fate: Pick a pile and sort items into three categories: discard, donate/sell, or keep. Dispose of things you haven’t used within the last year and anything that no longer serves a purpose in your life.
For items of potential value, use platforms like eBay to decide whether to sell, donate, or discard them.
Stage 4: Implement Storage Solutions: Once your clutter is under control, it’s time to introduce storage solutions.
In the next section, we’ll look at some of the best small garage storage solutions to help you make the most of your limited space.
This approach emphasizes breaking down the decluttering process into small, manageable tasks, taking regular breaks to maintain motivation, simplifying wherever possible, and finding intelligent storage solutions.
Once you’ve sorted and purged your items, the next step is to make the best use of the available space.
Small garages like yours can become functional and organized with the right storage systems and accessories. Let’s explore some options suitable for your one-car garage.
Finding the right cabinets is crucial if you have a small one-car garage. You need to look at factors such as depth, options, construction quality, and price.
I looked at the off-the-shelf garage cabinet brands to see which ones were best suited for small garages.
I could rule out most cabinets quickly, as they were just too deep. This included the NewAge Pro (24″ deep), Ulti-Mate 2.0 (21″), Gladiator Flex (19″), and the Husky Regular Duty (20″) and Heavy Duty cabinets (24″).
That leaves us with four brands: Craftsman, Seville Classics UltraHD, Gladiator RTA and Premier, and NewAge Bold.
Craftsman offers 18″ deep cabinets in their Ready-to-Assemble (RTA) line, but the options are limited. They also have sturdier, welded cabinets, but these are 21″ deep, possibly too big for smaller garages.
Seville Classics UltraHD has 18″ options too. However, they don’t feel as solid or durable as other brands.
Then we have Gladiator and NewAge.
Both brands provide plenty of 18″ options, which is perfect for smaller spaces.
Gladiator’s RTA and Premier cabinets let you mix and match to your heart’s content.
NewAge’s Bold series also has a wide model range but with a higher price tag. That said, they offer a ton of pre-configured sets, often at a discount to purchasing individual pieces.
At the end of the day, while all four brands have something to offer, Gladiator and NewAge stand out for small garages due to their size, flexibility, solid construction, and option variety.
Every inch counts in a small garage.
I love my Gladiator workbenches, but they’re 25″ deep. That’s too much wasted space when you’re not using them.
That’s where a folding workbench can really shine. It’s there when you need it and tucks away when you don’t.
Surprisingly, there aren’t many off-the-shelf solutions to choose from, but my favorite is the Husky WSH72FWB. It’s an adjustable height, 6′ long workbench with a solid wood top.
Because it’s height-adjustable, it lets you work standing up or sitting down. You set the workbench to fit you, not the other way around.
Then, when your project is finished, it folds up flat against the wall, giving you space to park your car.
It’s heavy-duty, supporting up to 800 lbs. Despite its strength, it’s easy to move around, thanks to the built-in casters. That means you can shift your workspace around the garage as needed.
So if you’re trying to make the most out of your small garage, this Husky 6′ folding workbench is definitely worth a look.
In a small garage, every square foot matters, especially when you’re trying to squeeze in a car or two.
That’s why wall storage is such a great option. It frees up valuable floor space, keeping your garage uncluttered and easy to navigate.
Let’s start with pegboards. When you don’t have room for a rolling tool chest, pegboards are the perfect solution for hanging up hand tools, brushes, and other small items.
Pegboards let you see all your tools at a glance. Plus, they’re customizable, so you can easily rearrange hooks and bins as your tool collection grows.
For larger tools, I like track systems like the Gladiator GearTrack. It’s a heavy-duty solution ideal for lawn tools and equipment.
With various hooks and bins designed to slot into the track, you can hang everything from bikes to ladders while keeping them easy to reach.
Finally, there are wall-mounted cabinets. These are ideal for storing items you want to keep out of sight and out of the way. Whether it’s paint cans, hardware assortments, or automotive supplies, wall-mounted cabinets can hold it all without eating up any floor space.
When organizing a small garage, we often forget to look up.
Taking advantage of your garage’s ceiling height can help you store more without sacrificing floor or wall space.
Overhead storage racks, ceiling-mounted tote storage, and wall shelves are excellent solutions for leveraging vertical space in your garage.
Overhead storage racks make good use of the typically unused space above your head. They’re great for storing seldom used or seasonal items. They also free up your garage floor for essentials such as parking your car or a workspace.
Ceiling-mounted tote storage offers a neat, organized way to store items in totes above your car. Like ceiling racks, it’s a great way to store seasonal or rarely used items.
You’ve probably got shelves in your garage already. But, many homeowners with small garages make the most out of their vertical space by stacking shelves above garage cabinets, slatwall, or pegboard.
That provides additional storage and quick access to frequently used tools or supplies while keeping your garage neat.
Your garage can take on a lot of different roles: workspace, storage spot, or hobby center. You might want to spend more time there if it feels comfortable and inviting.
Identify the vibe you want – modern, rustic, or eclectic. Consider your budget and the necessary materials for your garage revamp.
Adding a small rug or garage mat is a straightforward way to improve your garage’s comfort. They help cushion your hard concrete floor and provide additional insulation.
Rugs or mats can brighten the concrete floor and distinguish areas like workspace, storage, or seating.
Next, art or plants can make your garage feel more appealing. Artwork, posters, or murals bring personality, and plants enhance air quality while adding a natural touch, making the space feel vibrant.
Lastly, consider adding furniture or accessories.
A comfortable chair, a practical table, or a mini fridge make the space more functional. It provides seating, storage, and a place for guests, making your small garage the perfect place to hang out with friends.
Improving your small garage’s lighting and ventilation can take it to the next level.
Enhanced lighting can significantly improve the visibility within your small garage. This becomes important for tasks requiring precision, such as vehicle repairs or DIY projects.
Better lighting also helps improve efficiency. You’ll be able to navigate and work in your space more effectively, reducing the time spent searching for tools or other items.
Better lighting also contributes to safety and reduces the likelihood of accidents.
Finally, lighting has a huge impact on the look and feel of your garage. With strategic lighting, you can create a pleasant atmosphere and highlight certain features you wish to emphasize.
Installing proper ventilation is especially important if you use your garage for activities that generate harmful substances like chemical fumes or car exhaust. Ensuring adequate ventilation can effectively clear these potential hazards from the air.
More importantly, a well-ventilated garage helps control the temperature.
In the summer, ventilation works to circulate air around your garage so you feel cooler. In winter, it can help to reduce condensation and dampness.
Finally, ventilation can help to control odors. Good ventilation can clear the air and keep the space smelling fresh if your garage is used for projects that produce strong smells, such as painting or staining wood.
Whether your cozy, one-car garage serves as a haven for your hobbies, a central storage hub, or simply a shelter for your car, the right tweaks and additions can significantly enhance its functionality.
We’ve guided you through essential steps of this transformation journey, sharing some of my favorite products to help maximize the space in small garages.
But remember, the ultimate goal isn’t just about maximizing space.
It’s about creating a garage that reflects your lifestyle, caters to your unique needs, and fills you with satisfaction every time you walk through the door.
The post Squeeze More Into Less: Your Guide to Small Garage Organization appeared first on Garage Transformed.
]]>Whether managing the lights and darks, or compartmentalizing your drawers to separate paired items, or creating new storage items to help you with all your things, you can do easy bedroom organizing before the holiday starts to kick in. The holiday will keep you busy, so you better start adapting some bedroom organization ideas to make your life easier. Take it from me because I learned these things the hard way. Check out all the different ways you can organize efficiently. See the list below and tell me what works best for you!
This is so effective for small bedroom spaces because you're maximizing the space above and below your closet. It makes life easy by compelling you to sort out the lights and the darks, too! Though you can customize these containers according to your needs, like storing seasonal items apart from clothes.
Use some space that seems to be dead or awkward and turn it into something useful! This corner looks like you can't put anything in there but with the help of shelves, it turns out to be a storage space that can hold books, vases, and other items you wish to display. Take a look at your corners at home and see if you can apply this trick.
Who thought bins could look this chic and personalized? With the help of an upgrade and custom tags, these dollar-store bins can be your storage friend. Put your craft items, supplies, hair accessories or just about anything else in these storage bins, and you'll see some improvement in your bedroom organization.
Remember the items you have in your room that shouldn't really have a permanent space? Books from the library, gifts you have to give, seasonal clothes, and used things you want to donate? Store them like this, with correct labels. It's very efficient because you can organize them and at the same time, not forget what to do with them. You also know what is inside by writing it on the label area.
You take a look at your closet space and think it's full, but really, you just did not maximize the space. Avoid piling up your clothes and other items. Use racks to properly organize your closet, and have wires, hooks, or pins where you can hang your items. Also, place similar items together and put them in one place. Indeed, organizing makes life easier.
Take good care of your precious jewelry and accessories with this kind of storage. Hang those necklaces to avoid coiling, and for easy access too. Sort rings and other items in boxes. For your dangling earrings, hook them up on the board. This will eliminate the chance of losing a piece or two, or wasting time finding your accessories.
This type of shoe storage is a clever hack for those who want to gain the easiest access to their shoes. I can imagine having one in my room, and being able to plan my outfit already because I can see my shoes! Also, a lot of shoe storage idea often take more space than necessary. This might do the trick for your room.
Drawers are organizers in themselves but sometimes, it's not enough to just put your clothing items in there. When it involves so many pieces that are different from one another, it would be wise to have drawer organizers. This way your socks won't mix up with your scarves, hankies, or with your shoelaces.
Make your studio feel extra spacious with these helpful ideas https://t.co/YAZYD6Be33 pic.twitter.com/zrhYUO4EbU
— DIY Projects (@DIYProjectsCom) October 3, 2016
With proper organization, your bedroom can hold so many essential items. Take this area in the bedroom– it looks narrow but it has maximized as much space as possible. The shelves near the ceiling can store up your bags and other items.
Some bedrooms also hold mini offices, enough for your desk, computer, supplies and work documents. You can avoid the clutter by using drawers to organize most of your office items. This way you stay productive in the confines of your bedroom.
If a big table or desk can use up a large space in your bedroom, go for a smaller one. Don't worry about where to put your office supplies and papers. A pegboard can definitely help you with that. Use a pegboard and attach racks, rolls, hooks, and other things to hold your items. It would be a truly organized mini office inside your bedroom.
Yes, cake stands can hold other items too. Place the cake stand on your desk, side table or vanity table and place several items so you can easily locate them. Got plenty of perfume bottles? Place it there. Want to put all your makeup in one place? The cake stand would be the perfect spot.
Whether your bedroom is large or small these organizing ideas will keep everything in order, giving you relaxing place to rest in. The empty space under your bed can be used as a practical space with these under the bed drawers. Made by installing wheels to a wooden box, or you can repurpose old drawer from a chest.
Make use of headboard storage space by integrating shelving for everything from books and lamps to favorite framed photos. You can purchase shelved headboards, or build your own out of old drawers or pallets.
Save some space with a hanging laundry hamper hiding discreetly at the back of a door. It’s easy to create your own with fabric and an embroidery hoop.
Everyone needs to store trash somewhere. The only issue is that any trash bin will use at least a square foot of space. Until it doesn’t because you’re going to hide yours in a tilting cabinet. Not only will it keep your waste out of sight, but it’ll also double as a makeup counter or nightstand.
This guide doesn't get old, and you can use it especially on days when you feel like there's just so much going on in your closet. Once you free up your closet from the items you don't need, you'll be surprised at how much space you actually have. Make some important decisions, like keeping what you need and letting go of the items you no longer use. This infographic is helpful in making the right decision. So have fun decluttering and trace your path as you go!
Here is a video about more storage tips to add to your bedroom organization ideas from Better Homes and Gardens:
Create more space in your bedroom by simply organizing your space. You might be surprised at how much room there is left for the things that will come your way, especially this holiday season. Adapt these ideas to your room for more efficient storing.
Do you have other bedroom organization ideas, you want to share with us? Let us know in the comments section below.
Up Next: Closet Organizer Ideas | Chic Ideas In Organizing Bedroom Closets, Clothing and Accessories
Stay connected with us on Facebook, Twitter, Pinterest, and Instagram!
Editor’s Note – This post was originally published in December 2016 and has been updated for quality and relevancy.
]]>How to store cans is always hotly debated on by home organizers. While there are a lot of storage ideas out there, sometimes the most effective solution is the simplest. Consider organizing your stock of canned food in can racks or wire baskets, just like what Emily from Eleven Gables did.
https://www.instagram.com/p/BWJD0qxFRt8/
Never forget an item on your shopping list again. By either gluing thin chalkboards cut to fit your pantry doors or painting the doors themselves with chalkboard paint, you’ll have an evergreen inventory, grocery list, and to-do list greeting you each morning! We have Decorating Cents to thank for this awesome organization idea.
One of the chief clutter culprits in your kitchen? Half-eaten bags of chips. While your restraint not to eat the whole bag in one go is admirable, it still doesn’t solve the problem of how they can be stored efficiently and in the most organized way. Enter this ingenious hack from Lookie What I Did—simply install a short rail and a row of clips inside your kitchen cabinet or pantry. With this, you can easily clip the bag of chips neatly in a row.
Smaller pantries bear the burden of having to make every square inch work. Make good use of the wasted space in the inner corner of your pantry by installing pencil holders from the dollar store to hold all the smaller tins and bottles. The post by Domestic Imperfection can walk you through this organization idea.
All these mistakes are easy to make, especially when you get just as excited as I do in giving my basement a make… https://t.co/DQ7T5QDODn
— DIY Projects (@DIYProjectsCom) October 24, 2017
If you’ve decided to make kitchen pantry organization a priority project this year, why not completely redo your pantry? Assess the kind of storage you truly need and build around your requirements. Installing cubby holes that perfectly fit your baskets and trays, partitions, and slide-out shelves are all easily achievable with proper planning and careful measurement. Get tips on how to reorganize your pantry with this post from Clean Mama.
Oversized lidded glass jars are every organized homemaker’s must-have. As you can see in this organization tip by Design Improvised, the large glass jars are not just stylish but also very functional. Make glass jars an essential feature of your kitchen pantry organization by attaching chalkboard labels on them. Everyone in the family will easily find what they’re looking for and you’ll also know when you’re running low on something at a glance.
When it comes to kitchen pantry organization, corners are always a bone of contention. They easily become black holes for cans, condiments, and other bulk items that never see the light of day again. Consider hooking up your pantry with some lazy susans, just like this idea from Burlap & Denim. You end up storing more items at the same time making them accessible.
Where would we be without the indispensable over-the-door shoe organizer? Bring one in the kitchen to level up your kitchen pantry organization like what this post by Many Makings suggests. The clear pockets make it easy to stash and find snacks, soup mixes, and bottles of condiments, among others. Your kids won’t need to rummage through your pantry for an after-school snack anymore.
If you’re constantly rummaging through the dark depths of your pantry shelves, why not consider installing slide-out shelves? Check out Remodelando la Casa's post and get some ideas on how to do this yourself. With a bit of woodworking, you’ll be able to access the deepest recesses of your pantry in one fluid motion!
Your tiered bathroom caddy can do double duty as a kitchen pantry organization tool as what The Frugal Homemaker suggests. Unload your chips, snacks, and other small pantry items from your shelves and store them here instead. This way, they’re always within arm’s reach on the kitchen counter, or already on display for when guests come by your home.
Bust out your tools and make this amazing rotating can system by Lacquer and Lace. You'll be able to readily access whatever canned food you need as well as do a quick inventory of your supplies at a glance. Doesn't the image of these extremely well-organized can system make your heart sing?
I am inspired by what this crafty mama from The Yummy Life did! She figured out how much extra floor space she had in her kitchen and came up with a whole new pantry—an extension if you will. This plain cabinet was then filled with the right-size baskets to add a whole new place to store her dry goods. And the best part about it is her TV fits perfectly atop the cabinet, making this pantry a great multi-tasker!
I just love how doable and simple this pegboard pantry organizer by Arts & Crackers is! I can see how this can work in a kitchen—just hang it on a cabinet door or a vacant space on the wall. If you want, you can customize it by adding more organizers or making it prettier with paint.
Looking for even more inspiration? Take a look at this video by MissLizHeart for more kitchen pantry organization ideas:
Every homemaker’s dream is to have a well-stocked, well-equipped, and optimally organized kitchen. Be it a little nook we are making do in our first rental or the majestic, marble-countered playground we’ve always wanted, kitchen pantry organization will always be an essential part of keeping house.
Aren’t all of these kitchen pantry organization ideas awesome? Which project made you go, “Eureka!”? Let us know in the comments section below!
Up Next: DIY Laundry Room Organization Ideas and Tips
Stay connected with me on Facebook, Twitter, Pinterest and Instagram!
Editor’s Note – This post was originally published in December 2016 and has been updated for quality and relevancy.
]]>Consider yourself lucky because this blog post will provide 4 genius yet simple solutions for storing all sorts of items without completely overhauling your current storage system. So leave those over-the-door shelves and endless packing boxes behind – these organization suggestions are sure to make life easier no matter what space or items you’re dealing with!
Self-storage options are a great way to store items that you don’t have room for in your home. These storage facilities provide secure, climate-controlled units for short or long-term rental and come in all sorts of sizes so you can choose one that best fits your needs. Self-storage and mobile self-storage are ideal for anyone with seasonal decorations, extra furniture, or other items they don’t necessarily need in their home but don’t want to get rid of. Plus they can be incredibly convenient – you can even rent a mobile storage unit and have it dropped off at your residence so you don’t have to worry about transporting your belongings yourself!
A pegboard wall is an easy and attractive way to make use of vertical space in your home, while also adding an aesthetically pleasing touch. Using pegs, baskets, and other hooks to hang items like tools, utensils, pots/pans, and even jewelry can be a great way to keep your space organized while also keeping it looking stylish. A bonus? Having all your items on display will make them easier to find when needed! To get the most out of your pegboard wall, you can customize and arrange the pegs as needed to best fit your organizational needs and even choose different colors/materials for a fun and creative look.
Utilize the furniture pieces you already have in your home, like ottomans, trunks, and sofas that double as storage space. Ottomans, for example, are great for storing extra blankets and pillows, while a coffee table with drawers can be used to store books or other living room items. Trunks and footlockers can also be utilized as storage options throughout the house, providing both functional storage and a bit of vintage charm.
In addition to these furniture pieces, be sure to look for decorative boxes and baskets of different sizes that can easily fit on shelves or in cabinets – these are great for storing small items like office supplies, jewelry, and other odds-and-ends.
If you’re feeling crafty and want to customize the look and feel of your shelves, go DIY! Look for tutorials online that teach you how to build your shelving system with wood or other materials. This way, you can design and build shelves in any style or size that will fit the best into your home. Additionally, DIY shelving is easier to install than conventional shelving and provides a more economical storage solution if you have lots of items to store. Plus, it’s a great way to add a touch of creativity to your space. With a few basic tools, some wood, and a vision for your shelves you can easily create the perfect storage solution that’s both functional and stylish.
There are many creative ways to store the items in your home without completely overhauling your storage system. Utilize self-storage options, take advantage of vertical space with a pegboard wall, get creative with furniture storage, and go DIY for customized shelves that fit perfectly into your home. With these four genius yet simple solutions, you’re sure to find the perfect storage solution for your home!
The post 4 Creative Ways You Can Store Your Belongings appeared first on Koupon Karen.
]]>Picture it – 1999, and it’s your girl’s first trip to Europe. First time out of the country! Yes . . I was 22 years old, and while I had been on a plane many times – I had never been to Europe, or anywhere international.
I went with friends, and we were traveling to several countries. One of them who had traveled a lot before let me know that there would be down time on the train.
SO I brought some books . . . and a Nintendo Game Boy. With one cartridge. Pokemon!
I played hours and hours of that game when I was on the train just hanging out, and when I couldn’t sleep. And you know what? I wasn’t the only one. Everyone loves Pokemon, and if you’re here, you probably do too.
If you’ve never played it before, Pokemon is a role-playing video game in which you are a Pokemon trainer. The goal is to become a master. And who doesn’t want to be a master? I’m in.
The key to victory over the game lies in understanding your Pokemon’s strengths, weaknesses, and the elemental type advantages. It’s a mix of strategy and adventure, and that’s what I love about it.
If you’ve been here before, you know we love perler beads . . . and we also love video games!
We’ve brought the two together before with Among Us, Minecraft, and now we’re doing Pokemon perler beads. And I’m so excited to share them with you, because it brings back all the goods memories of game play over the years.
My mission today is to bring your favorite characters to life through beads! If you’re trying to recreate Pikachu’s electrifying charm, Bulbasaur’s vibrant green hues, or the fiery spectacle that is Charizard, I’ve got you covered.
All your favorite characters are part of this collection! Either keep scrolling or do a search on the page to find the pattern you’re looking for. You can always leave me a comment too!
Remember that perler beads are recommended for ages six and up, so this is a very fun craft to try with children. They love perler beads (also known as hama beads, fuse beads, or melty beads). But don’t be shy – adults love them as well.
Before we get into the patterns, I want to review a few basics of using fuse beads to make sure you get the best results (using Baby Yoda as an example). If you don’t want the tips, scroll down to the bottom to get the Pokemon hama bead patterns.
Remember that the overall goal is to melt the beads together on both sides while still leaving the holes open. Here’s how you’ll do that.
Note: If your project is really large, check out the tape method, which keeps everything together while ironing.
Once your project is done, place ironing paper or parchment paper over the beads on the pegboard. Be gentle so you don’t disturb the beads underneath.
Heat your iron to the medium setting (no steam). In a circular motion, begin to iron the project. Don’t press down too hard with the iron. When ironed properly, the beads will still have an open center. Check and make sure your edges are melted. Let the design cool on the pegboard.
Note: BE CAREFUL about lifting up the paper while you’re ironing! If you want to check, carefully peel back paper around the edge of your design and see if all the beads are melted.
If you lift the paper up quickly and there are a lot of unmelted beads, they will easily fall off or go flying and you may be forced to start over. Sometimes the edges need more time so when you check, just check the edges and peel paper back slowly.
Another Note: some beads melt faster than others (clear melts faster than white, for example). So some holes might be larger than others. It’s okay! That’s part of the look of the project.
Remove the bead design from the pegboard. Flip it over to the non-melted side and repeat the fusing process.
Let cool completely and remove the paper again (which is reusable). Some people pull the paper off after they iron the first side, but I just wait until the end and peel off both pieces. It’s up to you!
Now if you’re ready for the Pokemon perler beads, here are the patterns.
Mini Pokemon Perler Bead Patterns
Get a tiny Pokeball, Charmander, Umbreon, Pikachu, Bulbasaur, and Squirtle.
Face Down Pikachu
This pattern uses 87 black, 9 gingerbread, 119 yellow, and 8 tomato beads.
Cute Little Kirby
This pattern uses 84 black, 67 light pink, 48 cotton candy, 8 magenta, 24 white, 10 dark green, and 6 dark blue beads.
Small Eevees
Charmander Front and Side
Charizard
This pattern uses 86 black, 125 cheddar, 63 orange, 15 parrot green, 8 white, 35 teal, 2 gray, 24 pastel yellow, and 12 yellow beads.
Medium Bulbasaur
This pattern uses 77 black, 52 sour apple, 14 bright green, 40 sky, 37 parrot green, 6 white, and 2 red beads.
Medium Squirtle
This pattern uses 89 black, 55 pastel blue, 32 light blue, 4 brown, 23 gingerbread, 7 white, 4 light gray, 7 yellow, and 4 parrot green beads.
Jumping Kirby
This pattern uses 65 black, 26 cotton candy, 103 light pink, and 10 red beads.
Small Meowth
This pattern uses 87 black, 33 white, 6 tomato, 13 brown, 8 gray, 2 yellow, and 27 sand beads.
Medium Snorlax
This pattern uses 103 black, 13 light green, 73 pastel yellow, 28 parrot green, 38 cheddar, 9 white, 30 parrot green, and 11 gingerbread beads.
Medium Lucario
This pattern uses 100 black, 13 light blue, 4 cobalt, 23 pastel blue, 37 slate blue, 3 white, 2 red, 1 mist, and 4 pastel yellow beads.
Small Ash Ketchum
This pattern uses 103 black, 13
Standing Pikachu
This pattern uses 122 white, 179 yellow, 2 white, and 8 red beads.
Medium Mimikyu
This pattern uses 178 black, 80 pastel yellow, 13 gray, 17 yellow, 14 gingerbread, and 2 blush.
Medium Umbreon
This pattern uses 104 black, 39 gray, 10 cheddar, 23 yellow, 63 charcoal, 2 white, 2 cranapple, and 1 red bead.
Standing Vaporeon
This pattern uses 87 black, 62 pastel blue, 56 light blue, 27 dark gray, 8 yellow, 9 pastel yellow, 8 gray, 13 white, and 4 dark blue beads.
Medium Mudkip
This pattern uses 66 black, 55 sky, 36 mint, 13 light blue, 6 white, and 16 honey beads.
Medium Espeon
This pattern uses 136 black, 56 frosted lilac, 63 light lavender, 3 white, and 3 red beads.
Medium Leafeon
This pattern uses 94 black, 60 mint, 17 light gray, 16 carribean sea, 22 sand, 16 light brown, 60 cream, and 2 white beads.
Pikachu Head
This pattern uses 138 black, 248 yellow, 2 white, and 28 red.
Medium Blastoise
This pattern uses 122 black, 22 gray, 16 white, 22 brown, 55 pastel blue, 35 light blue, 12 fawn, and 7 sand beads.
Large Bulbasaur
This pattern uses 201 black, 18 fern, kiwi lime, 23 sour apple, 203 mint, 13 teal, 42 parrot green, 18 white, and 20 red beads.
Large Meowth
This pattern uses 259 black, 147 cream, 26 gingerbread, 29 light brown, 5 cheddar, 11 yellow, 60 tan, 1 white, and 2 blush beads.
Medium Mewtwo
This pattern uses 125 black, 84 white, 29 gray, 16 light lavender, 17 purple, and 13 charcoal beads.
Large Lucario
This pattern uses 85 black, 38 light blue, 45 charcoal, 41 slate blue, 22 red, 11 white, 6 yellow, 10 pastel yellow, and 10 cream beads.
Excited Kirby
This pattern uses 123 black, 315 cotton candy, 6 white, 2 cobalt, 14 hot pink, and 25 red beads.
Standing Snorlax
This pattern uses 123 black, 160 teal, and 211 cream beads.
Medium Typhlosion
This pattern uses 94 black, 22 cherry, 32 red, 65 cobalt, 5 yellow, 111 cream, and 6 sand beads.
Pikachu with Tail
This pattern uses 283 black, 490 yellow, 5 gingerbread, 10 cheddar, 2 white, and 24 red beads.
Medium Venusaur
This pattern uses 161 black, 16 hot coral, 17 yellow, 42 red, 13 bright green, 73 sky, 13 dark green, 66 turquoise, and 8 white beads.
Large Umbreon
This pattern uses 238 black, 39 yellow, 6 red, 8 white, 12 gray, and 16 gingerbread beads.
Large Blastoise
This pattern uses 128 black, 101 light blue, 54 pastel blue, 24 white, 16 fawn, 6 charcoal, 4 gingerbread, 40 tan, and 32 sand beads.
Large Blaziken
This pattern uses 97 black, 59 red, 26 dark gray, 59 cream, 23 rust, 25 cranapple, 1 sky, 27 yellow, 16 gray, 7 light gray, and 4 cheddar beads.
Large Ash Ketchum
This pattern uses 180 black, 47 red, 60 white, 7 fern, 28 tan, 55 sand, 18 light gray, 16 dark blue, 4 kiwi lime, 6 yellow, and 15 carribean sea beads.
Large Pikachu
This pattern uses 65 black, 117 cheddar, 145 gingerbread, 413 yellow, 2 white, 16 red, 28 light brown, and 7 cream beads.
Large Standing Pikachu
This pattern uses 248 black, 557 yellow, 76 cheddar, 2 white, 24 red, and 11 gingerbread beads.
Large Eevee
This pattern uses 305 black, 236 tan, 24 light brown, 216 tan, 126 sand, 88 toasted marshmallow, 2 white, and 2 brown beads.
Large Charmander
This pattern uses 89 light brown, 195 rust, 209 orange, 70 charcoal, 75 cheddar, 9 white, 5 teal, 4 carribean sea, 1 robin’s egg, 14 honey, 54 yellow, and 24 cream beads.
Large Squirtle
This pattern uses 432 pastel blue, 79 light blue, 30 gingerbread, 101 black, 16 gray, 5 white, 79 honey, 39 butterscotch, and 75 cream beads.
Extra Large Bulbasaur
This pattern uses 22 olive, 34 slime, 92 dark spruce, 76 kiwi apple, 39 sour apple, 78 forest, 190 lagoon, 107 mint, 70 teal, 73 light green, 7 frosted lilac, 7 red, 23 cranapple, 20 white, and 8 hot coral beads.
Skipping Kirby
This pattern uses 296 black, 619 flamingo, 97 light pink, 20 white, 198 salmon, 8 cobalt, 5 light blue, 159 fruit punch, 213 cherry, and 40 red beads.
Large Snorlax
This pattern uses 196 black, 64 lagoon, 112 teal, 242 cream, and 90 cheddar beads.
Large Mudkip
This pattern uses 292 black, 53 robin’s egg, 330 sky, 116 light gray, 105 butterscotch, 2 white, 4 gingerbread, 51 mist, and 12 honey beads.
Large Gengar
This pattern uses 87 black, 181 purple, 44 light lavender, 36 dark gray, 16 magenta, and 15 white beads.
Large Lucario
This pattern uses 33 cobalt, 104 black, 80 light blue, 50 charcoal, 126 slate blue, 1 cranapple, 7 white, 3 red, 7 mist, 39 pastel blue, 10 tan, and 10 yellow beads.
Large Typhlosion
This pattern uses 203 red, 67 yellow, 24 cheddar, 37 dark blue, 73 orange, 109 pastel blue, 52 black, 42 light blue, 185 sand, 32 fawn, and 5 white beads.
Christmas Pikachu
This pattern uses 223 black, 30 pastel blue, 612 yellow, 30 kiwi lime, 102 gray (or silver), 54 red, 2 white, and 7 gingerbread beads.
What did you think of these Pokemon perler beads? Let me know in the comments! I’d also love for you to check out these other patterns:
The post Pokemon Perler Beads (50+ Patterns!) appeared first on DIY Candy.
]]>