10 Essential Steps for Installing Mounted Bathroom Shelves
You'll successfully install mounted bathroom shelves by following these 10 essential steps: prepare the bathroom by clearing clutter, protecting surfaces, and inspecting walls for studs and pipes; choose the right shelf style and measure the wall, taking note of obstructions and weight capacity; mark the wall for drilling, selecting the appropriate drill bit and creating pilot holes; install wall anchors, assembling and attaching the shelf to them; add decorative trim and finishing touches; test the shelf's stability and make adjustments as needed. By following these steps, you'll be well on your way to a beautifully organized bathroom - and there's more to uncover to guarantee a flawless finish.
Key Takeaways
- Clear the bathroom of clutter, towels, and personal items, and protect surfaces with drop cloths to ensure a safe and efficient installation process.
- Choose a shelf style that fits the bathroom's aesthetic and needs, considering factors such as color scheme, size, and material weight capacity.
- Measure the wall accurately, identifying studs, wires, and pipes, and mark drilling spots ensuring level alignment for proper shelf placement.
- Select the appropriate drill bits and wall anchors based on wall material, and drill pilot holes carefully to ensure precise installation and stability.
- Test the shelf's stability by gradually adding weight, observing for signs of strain, and making adjustments as needed to ensure safe and reliable use.
Prepare the Bathroom for Installation
Clear the bathroom of any clutter, towels, and personal items to create a safe and unobstructed workspace. You don't want any tripping hazards or obstructions getting in the way of your installation tools. This is a vital step in achieving the best bathroom organization.
Next, cover the floor and any surrounding surfaces with drop cloths or old sheets to protect them from dust, debris, and any stray drill bits.
Take down any existing shelves, towel bars, or accessories to prevent damage or interference with the new installation. If you're replacing old shelves, remove any remaining adhesive or residue to guarantee a smooth surface for your new shelves.
Finally, inspect the walls for any studs, wires, or pipes that may affect the shelf's placement or installation. Having a clear understanding of the bathroom's layout will help you determine the best placement for your shelves and secure a successful installation.
Choose the Right Shelf Style
Your bathroom's unique style and needs dictate the type of shelf you should install. The shelf style you choose will greatly impact the overall look and functionality of your bathroom. Reflect on the shelf materials that will complement your bathroom's aesthetic.
For instance, glass shelves will add a touch of elegance, while wooden shelves will bring warmth to the space. Metal shelves, on the other hand, will give your bathroom a modern, industrial feel.
When it comes to aesthetic considerations, think about the color scheme and style of your bathroom. If you have a modern bathroom, a sleek, minimalist shelf might be the way to go. If your bathroom has a more traditional or vintage vibe, a decorative shelf with ornate details could be a better fit.
Don't forget to contemplate the size and shape of the shelf, as well. A narrow shelf might be perfect for a small bathroom, while a larger shelf could be ideal for a spacious bathroom.
Measure the Bathroom Wall
You'll need to analyze the wall space to determine the ideal shelf placement, considering factors like window and door locations, plumbing fixtures, and electrical outlets.
This assessment will help you identify the most suitable areas for your shelves, ensuring they don't obstruct essential bathroom functions.
Wall Space Analysis
Measuring the bathroom wall is a crucial step in determining the best placement and size of your mounted shelves. You'll want to identify the studs, as they'll provide the necessary support for your shelves. Grab a stud finder or knock gently on the wall to locate them. Mark their position with a pencil, as you'll need to drill into these areas.
Next, measure the width of your wall, taking note of any obstructions like plumbing or electrical fixtures. Consider the shelf material and its weight capacity – will it hold the items you plan to store? For example, if you're using glass shelves, they mightn't be suitable for heavy items like bulky toiletries.
Measure the space between the studs, usually 16 inches on center, to determine the maximum shelf length. Don't forget to factor in the shelf's thickness and any decorative trim you might add.
With these measurements, you'll be able to choose the perfect shelf size and placement for your bathroom. Remember, accurate measurements are key to a successful installation, so take your time and double-check your work.
Shelf Placement Options
With the wall space analysis complete, it's time to reflect on shelf placement options that maximize storage while maintaining aesthetic appeal.
Now, it's crucial to evaluate the shelf height. You'll want to position the shelves at a comfortable height, allowing easy access to stored items. Typically, shelves between 30 and 40 inches from the floor work well for bathroom essentials like towels and toiletries.
When deciding on shelf placement, contemplate the aesthetic balance of your bathroom. Symmetrical arrangements can create a sense of harmony, while asymmetrical layouts can add visual interest.
Verify your shelves don't obstruct the mirror or other essential fixtures. Also, take into account the location of plumbing fixtures, electrical outlets, and any other obstacles that might impact shelf placement.
Measure the bathroom wall carefully, taking note of any studs, switches, or other potential hindrances. Use a level to confirm your shelves will be perfectly horizontal.
Mark the Wall for Drilling
You'll need to verify the wall measurement accuracy by double-checking your calculations to avoid any mistakes.
Next, select the appropriate drill bit according to the type of wall anchor or screw you're using, as specified in the manufacturer's guide.
Now, mark the exact spot where you'll drill, making certain it's level and aligned with the shelf's mounting hardware.
Wall Measurement Accuracy
At this crucial stage, accurate wall measurements are essential to guarantee a successful installation of your mounted bathroom shelves. You don't want to end up with a wonky shelf that looks like it was installed by a DIY novice. To avoid this, break out your trusty measuring tools, including a level, a tape measure, and a stud finder.
Measure the width of your shelf and mark the wall with a pencil, making sure to account for any obstructions like electrical outlets or plumbing fixtures.
Next, identify the type of wall material you're working with - drywall, plaster, or something else - as this will affect the type of anchors you'll need. Take precise measurements of the distance between the wall studs, which are usually 16 inches on center.
Don't rely on guesswork or eyeballing it; accuracy is key here. Double-check your measurements to verify they're correct, and then mark the spot where you'll drill.
Drill Bit Selection Guide
Now that you've accurately marked the wall for drilling, it's crucial to select the right drill bit for the job. You don't want to be stuck with a bit that's as useful as a rubber screwdriver.
With so many drill bit types out there, it's vital to choose the one that's compatible with your wall material.
For drywall, a standard twist bit or a self-drilling anchor bit will do the trick. If you're working with tile, porcelain, or glass, you'll need a carbide-tipped masonry bit or a diamond-coated bit to avoid damaging the material.
And for those pesky concrete walls, a hammer drill bit is your best bet. Don't even think about using a wood bit on metal studs - that's just asking for trouble!
When in doubt, consult the packaging or manufacturer's instructions for guidance.
Marking the Drill Spot
The wall's surface, once a pristine expanse, is about to become a battleground of sorts, with your drill and marked drill spot vying for dominance. It's time to get precise and deliberate about where you'll be drilling. You've selected the perfect drill bit, now it's time to mark the spot.
To guarantee a successful drill, you need to take into account the wall materials and corresponding drill depth. Use the following table as a guide:
| Wall Material | Recommended Drill Depth |
|---|---|
| Drywall | 1-1.5 inches |
| Plywood | 1.5-2 inches |
| Plaster | 2-2.5 inches |
| Concrete | 2.5-3 inches |
| Tile | 1-1.5 inches (depending on tile type) |
Take your level and a pencil, and carefully mark the spot where you'll be drilling. Make certain it's straight, level, and aligned with your shelf's mounting bracket. Double-check your measurements to avoid any mistakes. Remember, a small miscalculation can lead to a big headache.
Drill Pilot Holes Carefully
Two essential factors determine the success of your mounted bathroom shelves installation: the type of drill bit and the precision with which you create pilot holes.
You don't want to end up with a shelf that's held together by hope and prayers, do you?
When drilling pilot holes, keep in mind that the weight of your shelf and the type of wall materials you're working with are vital considerations.
For instance:
-
Use a drill bit that's appropriate for your wall type: If you're working with drywall, a thin drill bit will do the trick. For heavier materials like concrete or brick, you'll need a more sturdy bit.
-
Drill slowly and steadily: Apply gentle to moderate pressure, and avoid applying too much pressure, which can cause the drill to slip or the wall to crack.
-
Keep your drill bit straight and level: This guarantees that your pilot hole is precise and won't compromise the structural integrity of your shelf or wall.
Install Wall Anchors Securely
You'll need to choose the right type of anchor for your wall material, as plastic, metal, or molly bolts are required for different surfaces.
When drilling, precision is key: hold the drill straight and level to guarantee the anchor sits securely in the wall.
Properly installing wall anchors is critical to supporting the weight of your shelves and preventing them from falling.
Anchor Types Matter
About three-quarters of all shelving installations rely on wall anchors for support, making anchor type selection a critical decision. You don't want your beautiful bathroom shelves to come crashing down, do you? The right anchor type can make all the difference.
When choosing wall anchors, evaluate the anchor materials and their corresponding weight capacity. You'll want to select anchors that can support the weight of your shelves, plus the items you plan to store on them.
Here are some factors to evaluate:
-
Plastic anchors: Lightweight and inexpensive, but may not be suitable for heavy loads.
-
Metal anchors: More durable and can support heavier weights, but may be more expensive.
-
Molly bolts: Provide extra holding power and are ideal for heavier shelves or those that will hold a lot of weight.
Drill With Precision
Now that you've selected the right anchor type for your bathroom shelves, it's time to install them securely. To do this, you'll need to drill with precision and confidence. Remember, drill safety is key, so put on those safety goggles and keep loose clothing and long hair tied back.
When drilling, maintain a firm grip on the drill, keeping your dominant hand on the handle and your other hand supporting the body of the drill. Apply gentle to moderate pressure, depending on the type of anchor and wall material. Use a steady, back-and-forth motion to create a pilot hole, then switch to a slower, more controlled motion to screw in the anchor.
Avoid applying too much pressure, which can cause the drill to slip or the anchor to strip. Mastering drill techniques takes practice, so don't be too hard on yourself if it takes a few tries to get it right.
Take breaks if needed, and reassess your drill angle or technique if the anchor isn't going in smoothly. With patience and precision, you'll be installing those bathroom shelves like a pro in no time.
Assemble the Shelf Components
Assemble the Shelf Components
How carefully you prepare the shelf components will greatly impact the overall stability and appearance of your mounted bathroom shelves. You've drilled the holes with precision, now it's time to bring all the pieces together.
Start by gathering all the shelf materials, including the shelves, brackets, and any decorative trim.
Before you begin assembly, double-check the manufacturer's instructions to verify you have all the necessary assembly tools, such as an Allen wrench or screwdriver.
Then, follow these key steps:
- Lay out the shelf components in the order they'll be assembled to facilitate a smooth process
- Use a soft cloth to wipe down the shelf materials to remove any dust or debris that may affect the finish
- Apply a small amount of silicone-based adhesive to any joints or connections to establish a secure bond
Attach the Shelf to Anchors
With your shelf components prepared and assembled, you're ready to secure them to the anchors. This step requires attention to detail to guarantee your shelf can hold the weight you plan to put on it. Consider the shelf weight and the anchor depth to determine the best attachment method.
| Anchor Type | Anchor Depth | Shelf Weight Capacity |
|---|---|---|
| Plastic Hollow-Wall | 1-2 inches | Up to 10 lbs |
| Metal Hollow-Wall | 1.5-3 inches | Up to 20 lbs |
| Solid-Wall | 2-4 inches | Up to 50 lbs |
Choose the appropriate anchors based on the table above. For example, if you expect your shelf to hold 15 lbs, use metal hollow-wall anchors with a depth of 2 inches. Hold the shelf against the wall, confirming it's level, and mark the anchor locations. Drill pilot holes, then screw the anchors into place. Finally, attach the shelf to the anchors, making certain they're securely fastened. Remember, it's better to err on the side of caution – if you're uncertain about the weight capacity, choose a more secure anchor option.
Add Decorative Trim and Finishing
Two essential elements remain to complete your mounted bathroom shelf: decorative trim and finishing touches. These final flourishes will enhance your shelf from functional to fabulous, and we're excited to guide you through the process.
When it comes to decorative trim, the possibilities are endless. You can choose from various materials, such as wood, MDF, or PVC, and select a style that complements your bathroom's aesthetic.
Consider the following options:
-
Rustic charm: Add a distressed wood trim to give your shelf a cozy, vintage vibe.
-
Modern sleek: Opt for a minimalist PVC trim in a crisp white or bold color to create a streamlined look.
-
Elegant sophistication: Choose an ornate wood trim with intricate carvings to add a touch of luxury to your bathroom.
Remember to measure carefully and cut your trim to fit snugly around the edges of your shelf. Once applied, your decorative trim will add a professional finish to your installation.
Test and Adjust the Shelf
The shelf is now taking shape, and it's time to guarantee it's functioning as intended. You've put in the effort to install it, so don't let it fail due to poor testing.
Start by placing a moderate load on the shelf, about 75% of its intended load capacity. Observe how it responds – does it sag, wobble, or remain steady? Check the shelf stability by gently pushing it from side to side and front to back. If it feels unstable, you may need to adjust the mounting brackets or add additional support.
Next, test the shelf with heavier loads, gradually increasing the weight to its maximum capacity. Pay attention to any signs of strain, such as creaking or flexing.
If you notice any issues, it's better to address them now rather than risking a collapse later. Make adjustments as needed, and retest the shelf until you're confident it can handle the weight you plan to put on it.
Frequently Asked Questions
Can I Install Shelves in a Bathroom With Tiles or Wallpaper?
You can install shelves in a bathroom with tiles or wallpaper, but you'll need to take extra precautions during tile installation and exercise wallpaper care to avoid damage, ensuring a secure and stylish shelf setup.
How Do I Clean the Shelf After Installation Is Complete?
When you're done admiring your handiwork, grab a soft cloth and mild soap to clean your new shelf. For glass or metal shelves, use a gentle glass cleaner and a microfiber cloth, while wood shelves require a wood-specific cleaner and a soft, dry cloth.
Are Mounted Shelves Suitable for Holding Heavy Bathroom Items?
Coincidentally, you're wondering if mounted shelves can handle the heavy stuff, right? You're in luck! Most shelves have a weight capacity specified, and choosing the right shelf materials (like sturdy glass or reinforced wood) guarantees your bathroom essentials stay put, safely.
Can I Install Shelves in a Bathroom With a Humid Environment?
You're wondering if you can install shelves in a humid bathroom? Absolutely! Choose shelf materials with built-in humidity resistance, like stainless steel, anodized aluminum, or powder-coated finishes, and you'll be drying off in no time, sans water damage worries!
How Often Should I Inspect and Maintain My Bathroom Shelves?
As you bask in the glory of your newly installed shelves, remember to schedule regular check-ups - we're talking every 3-6 months - to guarantee shelf durability and prevent water damage, because a little maintenance goes a long way in keeping your bathroom oasis, well, oasis-like!
Conclusion
You've successfully installed your mounted bathroom shelves! Remember, "measure twice, cut once" - those precise measurements and careful drilling paid off. Now, step back and admire your handiwork. Your new shelves are not only functional, but also a stylish addition to your bathroom. With these 10 essential steps, you've enhanced your space and proved that with patience and attention to detail, you can achieve a professional-looking result.
Related Posts
-
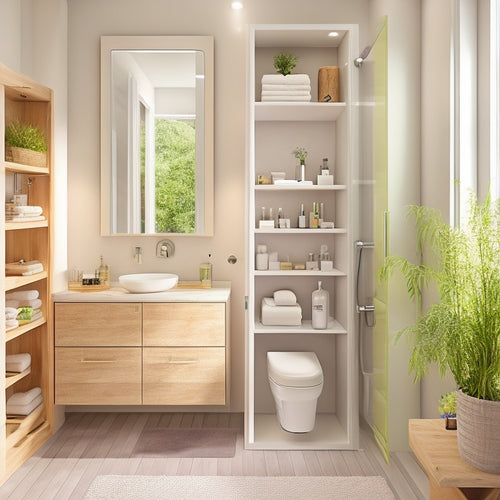
Modular Bathroom Storage for Small Spaces
Modular bathroom storage is your go-to solution for small spaces, turning clutter into chic organization. Use wall-mo...
-
Planner Preferences Spark Paper Vs. Digital Debate
The debate between paper and digital planners has ignited a passionate discussion among planner enthusiasts, with eac...
-

Revolutionizing Mimosa Bars With Creative Printables
Revolutionize your mimosa bar with creative printables that take the experience to the next level. Elevate the setup ...


