10 Essential Steps for Shower Room Wall Installation
Share
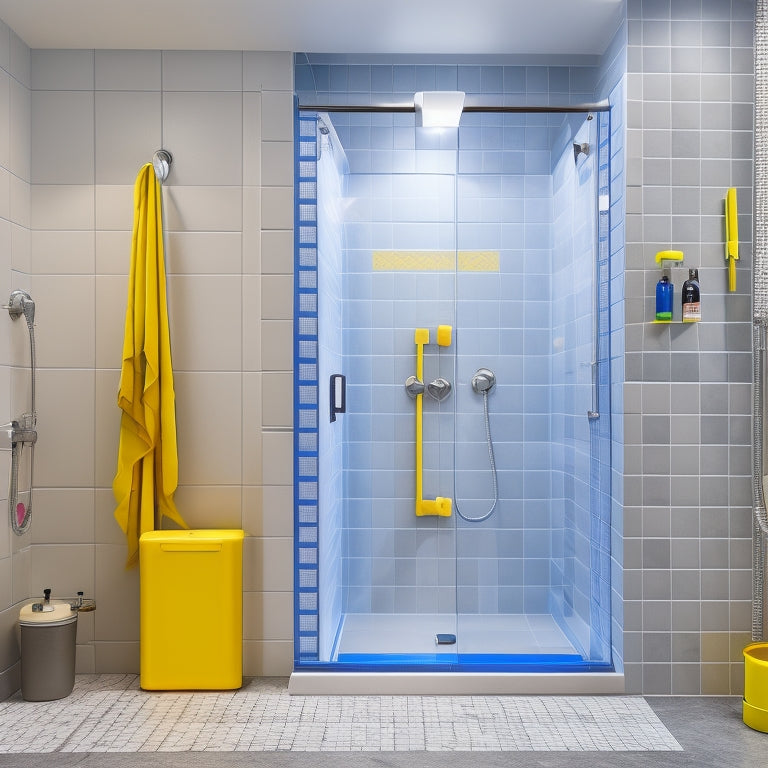
You'll change your bathroom into a stunning shower room by following these 10 essential steps: prepare the area, measure and mark the walls, select the right material, cut panels to size, apply adhesive, install and secure panels, seal edges and joints, grout and caulk the walls, perform a final inspection, and guarantee proper water drainage. From choosing durable materials to guaranteeing watertight seals, each step is vital to achieving a functional and beautiful space. By following these guidelines, you'll be well on your way to creating a serene oasis - and with the right details, you'll reveal a truly exceptional shower room experience.
Key Takeaways
- Prepare the shower room area by clearing the space, inspecting for obstructions, and covering floors and surfaces with drop cloths or plastic sheets.
- Measure and mark the walls accurately to ensure precise fit and alignment of wall panels, considering electrical outlets, plumbing fixtures, and obstructions.
- Choose the right wall material based on durability, ease of cleaning, and water resistance, considering aesthetic appeal and functional requirements.
- Apply adhesive to wall panels using a notched trowel, ensuring panels are clean and dry, and follow manufacturer's instructions for application and drying times.
- Ensure proper water drainage by maintaining a minimum slope of 1/4 inch per foot and applying a waterproof membrane to the entire shower area.
Prepare the Shower Room Area
Clear the shower room area of any furniture, fixtures, and flooring to guarantee a safe and unobstructed workspace.
You don't want any obstacles getting in the way of your shower room makeover. This will give you a clean slate to work with and allow you to visualize your shower room layout.
Next, gather your essential tools, including a utility knife, tape measure, level, and a pencil.
You'll need these to get the job done efficiently. Take a moment to inspect the area for any electrical outlets, plumbing fixtures, or other obstructions that might affect your wall installation.
Now, cover the floor and any surrounding surfaces with drop cloths or plastic sheets to protect them from mess and damage.
This will save you from having to clean up a huge mess later on. With your workspace prepared, you're ready to move on to the next step in your shower room wall installation.
Measure and Mark the Walls
You'll need to take precise measurements of your shower room walls to guarantee a successful installation. Measure the width, height, and any obstructions, recording these measurements to reference later.
Next, use a level and a pencil to mark the walls with the necessary guidelines, taking care to make your marks straight and accurate.
Wall Measurement Accuracy
Measure your shower room walls with precision to guarantee a successful installation. You'd be surprised how a small measurement error can throw off the entire project. To avoid this, gather your trusty measurement tools, including a tape measure, level, and laser level.
Take precise measurements of the width, height, and any obstructions, like plumbing fixtures or electrical outlets. Record these measurements carefully to verify accuracy.
Don't forget to check the wall alignment, making sure it's straight and even. A wonky wall can lead to a wonky installation!
Double-check your measurements to prevent any mistakes. It's better to take your time now than to rush through the process and end up with a faulty installation.
Wall Marking Techniques
With accurate measurements in hand, you're ready to transfer them to the shower room walls. This is where the magic happens, and your shower room starts taking shape.
To guarantee a flawless installation, it's vital to mark the walls correctly. You'll need the right marking tools for the job, such as a level, a pencil, and a chalk line reel.
- Use a level to guarantee wall alignment, as even the slightest deviation can throw off the entire installation.
- Mark the wall studs to determine where to place the wall panels or tiles.
- Create a grid pattern on the wall to guide your tile placement or panel installation.
- Double-check your marks to avoid any mistakes that could cost you time and resources.
Choose the Right Wall Material
Selecting the right wall material is essential to ensuring your shower room wall installation meets both aesthetic and functional requirements. You want a material that's durable, easy to clean, and resistant to water damage. But, let's be real, you also want it to look fabulous!
When choosing a wall material, consider the following factors:
| Material | Durability & Aesthetic Appeal |
|---|---|
| Ceramic Tiles | High durability, easy to clean, and comes in a variety of styles and colors. |
| Glass Panels | High aesthetic appeal, easy to clean, and can add a touch of luxury to your shower room. |
| Acrylic Panels | High durability, easy to install, and comes in a range of colors and patterns. |
| Natural Stone | High aesthetic appeal, durable, but can be high maintenance and expensive. |
Cut the Wall Panels to Size
You'll need to measure the wall panels accurately to guarantee a precise fit, considering any obstructions or cutouts.
Next, choose a cutting method that suits your panel material, whether it's a utility knife, circular saw, or jigsaw.
Before making the cuts, double-check your measurements and prepare the wall surface to guarantee a smooth installation process.
Panel Measurement Tips
Accurate measurements are essential when cutting wall panels to size, as even a slight miscalculation can lead to costly mistakes and delays.
You don't want to end up with panels that are too small or too large, as this can affect the overall look and functionality of your shower room.
To guarantee accurate measurements, make sure you:
- Use high-quality measurement tools, such as a laser level or a digital tape measure, to get precise readings.
- Take into account the type of panel you're working with, as different materials may have varying thicknesses and textures.
- Measure the area where the panel will be installed, taking note of any obstructions or irregularities.
- Double-check your measurements to avoid errors, and consider having a second person verify your calculations.
Accurate Cutting Methods
With your measurements in hand, it's time to cut the wall panels to size. This is where precision techniques come into play. You'll need the right cutting tools for the job, so make certain you have a high-quality tile cutter, a circular saw, or a jigsaw, depending on the type of panel you're working with.
Before you start cutting, double-check your measurements to verify accuracy. It's better to be safe than sorry, and a small mistake can lead to costly rework. Use a pencil to mark the cut lines on the panel, and then use a straightedge or a template to guide your cutting tool.
For more complex cuts, such as curves or angles, consider using a specialized cutting tool or seeking professional help.
Wall Preparation Checks
Before cutting the wall panels to size, perform a series of wall preparation checks to validate a smooth installation process. This vital step helps identify potential issues that could lead to costly reworks or even safety hazards down the line.
Make certain to check the following:
-
Wall surface assessment: Inspect the wall for any cracks, unevenness, or old adhesive residue that might affect the new panel's adhesion.
-
Moisture barrier evaluation: Verify that the moisture barrier is correctly installed and free of damage to prevent water seepage behind the panels.
-
Electrical outlet and plumbing checks: Ascertain that all outlets and plumbing fixtures are properly sealed and won't interfere with the panel installation.
- Wall stud alignment: Confirm that the wall studs are straight and securely fastened to support the weight of the panels.
Apply Adhesive to Wall Panels
Your wall panels are now ready to receive the adhesive that will secure them firmly to the shower room wall.
You've got two main adhesive types to choose from: solvent-based and water-based. Solvent-based adhesives are stronger, but they've stronger fumes and longer drying times. Water-based adhesives are eco-friendlier and dry faster, but they mightn't be as strong. Choose the one that suits your needs and follows the manufacturer's instructions.
Before applying the adhesive, verify your panels are clean and dry. Remove any dirt, dust, or oils that might affect the bonding process.
Now, grab your notched trowel and scoop up some adhesive. Hold the trowel at a 45-degree angle and spread a thin, even layer onto the back of the panel, covering about 90% of the surface.
Don't forget to maintain panel alignment by using a spirit level or laser level to verify they're straight and plumb.
You're now ready to fix the panels to the wall, but that's a story for the next step.
Fix Wall Panels to the Wall
You'll now fix the wall panels to the wall, ensuring they're properly aligned and securely fastened.
Start by following the panel placement guidance to position the panels correctly, then secure the panel edges to prevent movement.
Next, apply the panel adhesive according to the manufacturer's instructions to guarantee a strong bond.
Panel Placement Guidance
The wall preparation phase is complete, and it's time to fix the wall panels to the wall.
You've reached the most exciting part of the process – seeing your design come to life! For a flawless installation, follow these panel placement guidance tips:
-
Start by identifying the center point of each wall and mark it with a pencil. This will guarantee your panels are evenly spaced and symmetrical.
-
Consider the design considerations and panel aesthetics you want to achieve. Do you want a seamless look or a decorative trim? Plan accordingly.
-
Use a spirit level to confirm the panels are straight and level. You don't want any wonky panels ruining your shower room's ambiance!
- Apply a thin layer of adhesive to the back of each panel, following the manufacturer's instructions. This will guarantee a strong bond between the panel and the wall.
Remember to take your time and work methodically to avoid mistakes.
With these tips, you'll be well on your way to a stunning shower room that's both functional and visually appealing.
Secure Panel Edges
Fixing the panels to the wall securely is essential, as it directly impacts the overall appearance and functionality of your shower room. You've got this far, so don't let sloppy installation ruin your hard work.
To guarantee a professional finish, perfect panel alignment techniques. Start by checking the panels for any warping or bowing, and adjust them accordingly. Use a spirit level to confirm they're straight and level.
Next, focus on edge sealing methods to prevent water from seeping behind the panels. Apply a thin bead of sealant to the back of the panel edges, making sure to cover the entire surface. Then, press the panels firmly onto the wall, using a rubber mallet to eliminate any air pockets.
For added security, use mechanical fixings like screws or clips to hold the panels in place. Remember to space them evenly, about 300mm apart, to maintain a consistent appearance.
Panel Adhesive Application
With your panels securely aligned and edges sealed, it's time to apply the panel adhesive to fix them to the wall. This is a vital step, as it guarantees your shower room walls are watertight and durable.
You'll need to choose the right adhesive type for your panels - acrylic, polyurethane, or silicone-based adhesives are popular options.
- Make certain to follow the manufacturer's instructions for application techniques, as these can vary.
- Apply a thin, even layer of adhesive to the back of the panel, using a notched trowel or spreader.
- Press the panel firmly onto the wall, guaranteeing good contact and avoiding air bubbles.
- Use a level to check the panel's alignment and make any necessary adjustments before the adhesive sets.
Ensure Proper Water Drainage
Most shower room walls require a slight slope to guarantee water flows towards the drain, rather than accumulating on the floor.
You'll want to verify a minimum drainage slope of 1/4 inch per foot to prevent water from pooling. This gentle incline might seem minor, but it's vital for directing water towards the drain.
Next, you'll need to apply a waterproof membrane to the entire shower area, including the walls and floor.
This membrane will prevent water from seeping behind the panels and causing damage. Make certain to follow the manufacturer's instructions for application and drying times.
When installing the shower panels, maintain the drainage slope by using wedges or shims to support the panels.
This will confirm the water flows freely towards the drain, reducing the risk of water accumulation and potential damage.
Seal the Joints and Edges
Every joint and edge in your shower room wall installation is a potential pathway for water to escape, so it's crucial that you seal them properly.
You've worked hard to get this far, and you don't want all that effort to go down the drain (literally!).
To guarantee a watertight seal, focus on the following:
-
Inspect and clean the joints: Remove any debris or old adhesive to create a smooth surface for sealing.
-
Apply a joint sealant: Choose a waterproof sealant specifically designed for shower room use, and apply it according to the manufacturer's instructions.
-
Use edge protection: Install edge trims or profiles to protect the joints from water and mechanical stress.
- Test the seal: Inspect the joints and edges after sealing to confirm they're watertight.
Grout and Caulk the Walls
You've sealed the joints and edges, now it's time to focus on grouting and caulking the walls. This is where the magic happens, and your shower room walls start to take shape.
When it comes to grouting, you'll need to choose the right type for your walls. Epoxy-based grout is ideal for high-moisture areas, while acrylic grout is a good choice for most shower rooms. Make sure to follow the manufacturer's instructions for mixing and application.
Once you've applied the grout, let it set according to the instructions before wiping away excess grout with a damp cloth.
Next, it's time for caulk application. Use a caulk gun to apply a bead of caulk around the edges of the walls, making sure to fill any gaps or cracks. Smooth out the caulk with a damp finger or caulk tool, and wipe away any excess.
Don't forget to caulk around any fixtures, such as showerheads or handles. With grout and caulk in place, your shower room walls are now waterproof and ready for the final touches.
Final Inspection and Touch-ups
Your shower room walls are now fully grouted and caulked, and it's the right moment to put them under scrutiny.
It's crucial to conduct a thorough final inspection to make certain everything is perfect before calling it a day.
Here's your final inspection checklist:
- Check for lippage (uneven tile edges) and address any issues
- Verify that all tiles are securely fastened and plumb
- Inspect grout and caulk for cracks, voids, or unevenness
- Test the shower area for water leaks or drainage issues
If you find any imperfections, don't panic!
This is where touch-up techniques come into play. For minor issues, you can use a grout touch-up tool or caulk tube to fill in gaps.
For more significant problems, you may need to remove and re-grout or re-caulk entire sections.
Remember, attention to detail is key in this final stage.
Take your time, and you'll be enjoying your new shower room in no time.
Frequently Asked Questions
Can I Use a Single Type of Wall Material for the Entire Shower Room?
You're wondering if you can get away with using a single type of wall material for the entire shower room? Yeah, you can, but consider a shower materials comparison - some options are more durable than others, so choose wisely to avoid a watery mess!
How Do I Ensure the Wall Panels Are Completely Waterproof?
You'll want to perfect waterproofing techniques to guarantee a leak-free shower room! Apply a waterproof membrane behind the panels, then seal each panel's edges and joints with a waterproof sealant, making certain to follow the manufacturer's instructions to the letter.
What Is the Recommended Thickness for Shower Room Wall Panels?
Think of shower room wall panels as the protective armor for your bathroom - you want them thick enough to withstand water's sneakiest attacks! For a watertight defense, opt for panels with a minimum 10mm thickness, made from durable materials like PVC or acrylic, and installed using expert techniques.
Can I Install Shower Room Wall Panels Over Existing Tile?
You're wondering if you can skip the hassle of tile removal and install shower room wall panels over existing tile? Check the panel compatibility first, but generally, it's doable, and you'll save time, but not your sanity – that's still up for grabs!
Do I Need to Hire a Professional for Shower Room Wall Installation?
Are you ready to immerse yourself in the world of shower room wall installation like a scuba diver plunging into the ocean? While cost considerations might tempt you to DIY, consider the complexity of the task - it's like steering through treacherous waters, so hiring a pro might be the safer bet.
Conclusion
You've made it to the final step of shower room wall installation! Remember, a successful installation requires attention to detail and a focus on waterproofing. Did you know that 80% of water damage in bathrooms occurs due to improper waterproofing? Don't let your hard work go down the drain - double-check your seals and joints to guarantee a watertight finish. With these 10 essential steps, you'll be enjoying your new shower room in no time.
Related Posts
-

Top-Rated Compact Shower Caddies for Small Showers
When searching for top-rated compact shower caddies for small showers, focus on space-saving designs that maximize ve...
-

Stylish and Practical Shower Caddy Designs
When it comes to stylish and practical shower caddy designs, you've got plenty of options that effortlessly blend fun...
-

Craft a Functional Bedside Caddy Today
Craft a functional bedside caddy by first gathering essential materials, including durable background fabric, contras...


