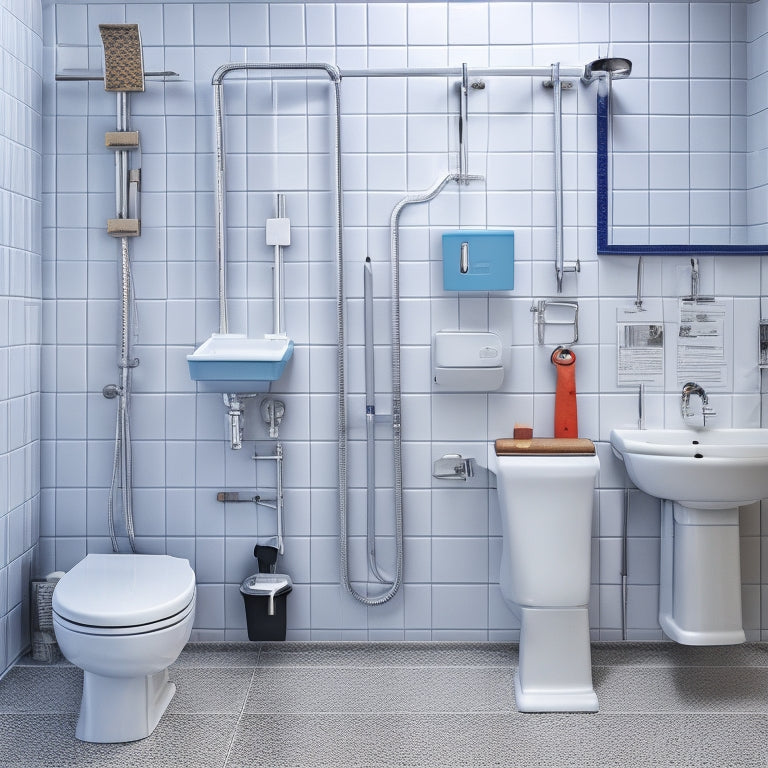
A Wall-Mounted Toilet Installation Guide
Share
You're about to initiate a wall-mounted toilet installation project, and it's essential to get it right. Start by preparing the wall, ensuring it's level, reinforced, and free of hidden plumbing or electrical wiring. Choose the right toilet model, considering space constraints, personal preferences, and compatibility with your wall type. Measure accurately, determining the ideal location and accounting for the carrier system and additional features. From there, you'll install the carrier system, mount the toilet tank, connect water supply lines, test for leaks and flushing, and make final adjustments. Now that you've set the stage, it's time to drill down into the details to guarantee a successful installation.
Key Takeaways
- Assess the wall's levelness and structural integrity to avoid installation issues and ensure a secure toilet mounting.
- Choose a toilet model that fits your space constraints, personal preferences, and wall type (drywall, concrete, or tile).
- Measure the wall space accurately to facilitate a successful installation, considering toilet height, distance, and spacing from fixtures.
- Install the carrier system securely to the wall, following the manufacturer's instructions and using a level to ensure proper alignment.
- Test the toilet for leaks and flushing efficiency, adjusting the flapper or fill valve as needed to ensure optimal performance.
Preparing the Wall for Installation
How level is your wall? Don't worry, we're not asking about your emotional state (although, let's be real, installing a wall-mounted toilet can be a thrilling experience).
We're talking about the literal levelness of your wall. You see, a wonky wall can lead to a wonky toilet, and trust us, you don't want that.
To guarantee your wall is ready for its close-up, you'll need to assess its structural integrity. This is where wall reinforcement techniques come in.
You may need to add additional studs or install a reinforced backer board to support the toilet's weight.
Don't forget to check for any hidden plumbing considerations, like pipes or electrical wiring, that could interfere with your installation.
Choosing the Right Toilet Model
With your wall properly prepared and reinforced, you're ready to select the ideal toilet model for your wall-mounted installation.
This is where things get exciting – or at least, as exciting as toilet shopping can get! You'll encounter various toilet styles, each with its unique features and benefits.
Consider the space constraints, your personal preferences, and the installation materials you'll need. For instance, compact toilets are perfect for small bathrooms, while wall-hung toilets offer a sleek, modern look.
Look for models with a wall-mounting system that's compatible with your wall type (drywall, concrete, or tile). Some toilets come with an in-wall tank, which requires special installation materials. Others have an exposed tank, making maintenance a breeze.
Take your time to research and compare different models. Remember, the right toilet will make your wall-mounted installation a success – and a joy to use!
Measuring for Accurate Placement
You'll need to determine the ideal location for your wall-mounted toilet, marking the spot where the toilet will be installed.
Next, measure the wall space to guarantee you have enough room for the toilet's carrier system and any additional features, such as a bidet or seat warmer.
Accurate measurements are vital to a successful installation, so take your time and double-check your calculations.
Toilet Location Marking
Accurate toilet placement hinges on precise measurement, guaranteeing a stress-free installation process. You'll want to get this right to avoid any, ahem, messy mistakes.
To mark the toilet location, you'll need to take into account a few vital factors.
-
Toilet height: Measure from the floor to the top of the toilet bowl. Standard heights range from 15 to 19 inches, but check your local plumbing codes for specific requirements.
-
Distance from the wall: Make certain you have enough clearance for comfortable use. Typically, this is around 12 inches from the wall to the center of the toilet.
-
Offset from adjacent fixtures: Measure the distance from the toilet to adjacent fixtures, such as sinks or bidets, to guarantee proper spacing.
- Floor joist location: Identify the floor joist location to secure the toilet to the wall correctly.
Wall Space Measurement
Most wall-mounted toilets require a minimum of 2 inches of clearance from the rear of the toilet to the wall, while some models demand up to 6 inches.
You'll need to measure your wall space accurately to guarantee a proper fit. Take into account wall type considerations, such as drywall, tile, or concrete, as each requires different installation methods.
Additionally, consider plumbing access – you'll need to accommodate the toilet's plumbing connections, which may require more clearance.
Measure the distance from the wall to the center of the toilet's mounting holes. This will give you the correct offset for your toilet.
Don't forget to check the toilet's specifications, as some models have unique requirements. Use a level to guarantee your measurements are straight and level.
Record your measurements carefully, as you'll need them for the next steps in the installation process. With accurate measurements, you'll be well on your way to a successful wall-mounted toilet installation.
Installing the Carrier System
You'll start by mounting the carrier frame to the wall, ensuring it's level and securely fastened.
Next, you'll prepare the wall surface by cleaning and drying it, and then apply the recommended adhesive to guarantee a strong bond.
Mounting the Carrier Frame
Mounting the Carrier Frame
The first step in mounting the carrier frame is to identify the studs in your bathroom wall, as this is where the carrier system will be anchored.
You'll want to make certain you're attaching it to something that can support the weight of the toilet and, you know, the occasional enthusiastic user.
To guarantee a secure installation, you'll need to:
- Check the manufacturer's instructions for specific guidance on frame materials and installation tools
- Use a level to guarantee the frame is straight and even
- Mark the wall with a pencil to guide your drilling and screwing
- Double-check your measurements to avoid any costly mistakes
Preparing the Wall Surface
With the carrier frame mounted, turn your attention to preparing the wall surface for the carrier system installation. This essential step guarantees a sturdy and secure toilet installation.
Begin by inspecting the wall surface materials, identifying any imperfections or weaknesses. Check for cracks, holes, or water damage that could compromise the carrier system's hold.
Next, clean the wall surface thoroughly to remove dirt, grime, or old adhesive residue. A degreaser or wire brush can come in handy for this task.
Once clean, evaluate the wall's structural integrity. If you're dealing with a plaster or drywall surface, consider reinforcing it with additional support, such as plywood or MDF, to provide a solid base for the carrier system.
Proper wall surface preparation is fundamental to prevent toilet installation failures. Take your time to get this step right, and you'll be rewarded with a safe, reliable, and leak-free toilet installation.
Securing the Carrier Plate
The carrier plate, a critical component of the wall-mounted toilet installation, is now ready to be secured.
You've made it this far, and you're doing great! Now, it's time to get serious about attaching this plate to the wall. Make sure you have your trusty plumbing tools within arm's reach, as you'll need them for the valve installation later on.
To secure the carrier plate, follow these essential steps:
- Mark the wall studs with a pencil, ensuring the plate's screw holes align perfectly with the studs.
- Hold the plate against the wall, double-checking its levelness and plumbness.
- Drill pilot holes for the screws, then insert the screws and tighten them firmly.
- Verify the plate is securely fastened to the wall, with no signs of movement or wobbling.
Mounting the Toilet Tank
Hang the toilet tank on the wall by locating the mounting holes on the back of the tank and aligning them with the corresponding holes on the wall bracket.
Verify you're working with the correct toilet tank type, as some models have varying hole configurations. For a standard tank, you'll typically find two or three mounting holes.
Using your installation tools, such as a level and a screwdriver, secure the tank to the wall bracket. Start by inserting the screws into the holes, then tighten them firmly in a star pattern to avoid damaging the tank or wall.
Be gentle, as you don't want to overtighten and risk cracking the tank. If your tank comes with a built-in overflow tube, ascertain it's properly aligned with the fill valve.
Double-check the tank's levelness and make any necessary adjustments.
With the tank securely mounted, you can now focus on the next step in the installation process.
Remember to refer to your toilet's specific installation manual for unique requirements, as different models may have varying mounting procedures.
Connecting Water Supply Lines
One crucial aspect of the wall-mounted toilet installation is connecting the water supply lines, which demands attention to detail to guarantee a leak-free and functional system.
You'll need to determine the type of water supply lines you're working with, as they can vary depending on the location and age of your home.
When connecting the water supply lines, keep the following in mind:
- Identify the shut-off valves for the toilet's water supply and verify they're easily accessible for future maintenance.
- Position the valves close to the toilet to minimize water loss in case of a leak.
- Use flexible water supply lines to accommodate any slight movements of the wall-mounted toilet.
- Familiarize yourself with local plumbing codes and regulations regarding water supply types and valve placement to avoid costly rework.
Testing for Leaks and Flushing
With water supply lines connected, you're ready to test the wall-mounted toilet for leaks and confirm proper flushing function.
It's time to make sure your hard work doesn't go down the drain – literally. Inspect the connections for any signs of moisture or water droplets, as these can indicate leaks. Turn on the water supply and check the toilet's fill valve, flapper, and wax ring for any leaks.
Don't forget to inspect the toilet's base, where it meets the wall, for any signs of water seepage.
Next, test the toilet's flushing efficiency by flushing it several times. Observe how quickly the water level drops and whether the toilet paper disappears with ease.
If the toilet doesn't flush efficiently, you may need to adjust the flapper or fill valve. Remember, leak detection is key to avoiding costly water damage and a messy cleanup.
Final Touches and Adjustments
Now that you've verified the wall-mounted toilet's leak-free and efficient performance, it's time to focus on the finer details.
You're almost done, and these final touches will make all the difference in the world. Remember, it's all about the aesthetic considerations at this point.
-
Adjust the toilet seat to your preferred height and angle. Yes, it's a thing, and it can make a huge difference in comfort.
-
Check the toilet paper holder's alignment and adjust it if necessary. You don't want it to be crooked or obstruct the surrounding area.
-
Inspect the surrounding area for any signs of water damage, mineral deposits, or other imperfections. You might need to touch up some paint or replace a few tiles.
- Finally, take a step back and admire your handiwork. Make any finishing touches to the surrounding area, like re-caulking the joints or re-grouting the tiles.
Frequently Asked Questions
Can I Install a Wall-Mounted Toilet in a Mobile Home?
You're wondering if you can install a wall-mounted toilet in your mobile home, but here's the deal: it's doable, but be prepared for installation challenges and plumbing considerations that'll make your head spin - unless you're a pro, that is!
Do Wall-Mounted Toilets Require More Maintenance Than Traditional Toilets?
You'll find that wall-mounted toilets don't necessarily require more maintenance than traditional ones, but their unique design does pose some cleaning challenges, like dust accumulation behind the bowl, which increases maintenance frequency.
Can I Convert a Traditional Toilet to a Wall-Mounted Toilet?
You're thinking of flipping the script on your traditional toilet, but can you really turn it into a sleek wall-mounted throne? Unfortunately, it's not a simple swap, as you'll face installation challenges and design considerations that'll make your head spin.
Are Wall-Mounted Toilets Suitable for People With Mobility Issues?
You're wondering if wall-mounted toilets are suitable for people with mobility issues. Fortunately, they can be! With design considerations like raised seating and accessibility features like grab bars, you'll find it's a comfortable, convenient option that's easy to maneuver.
Can I Install a Wall-Mounted Toilet on a Concrete Floor?
Get ready to drill into the concrete jungle! You're wondering if you can install a wall-mounted throne on a concrete floor. The answer lies in meeting specific installation requirements, ensuring concrete compatibility, and following the manufacturer's instructions to avoid a royal flush of errors.
Conclusion
You've successfully installed your wall-mounted toilet! With these steps, you've not only saved floor space but also added a sleek, modern touch to your bathroom. Did you know that wall-mounted toilets can reduce water consumption by up to 20% compared to traditional floor-mounted models? Now, take a step back and admire your handiwork, knowing you've not only upgraded your bathroom's style but also contributed to a more sustainable future.
Related Posts
-

Space-Saving Bathroom Shelves With Open Design
Space-saving bathroom shelves with an open design can convert your compact space into a stylish sanctuary. By maximiz...
-

Floating Shelves for Bathroom Beauty Organization
By incorporating floating shelves into your bathroom design, you can effortlessly convert cluttered countertops and w...
-

RADICAL HEALTH REVOLUTION: Blueprint for Eternal Wellness
I've spent years feeling stuck, searching for a way to break free from mediocre health and access a life of vibrancy ...


