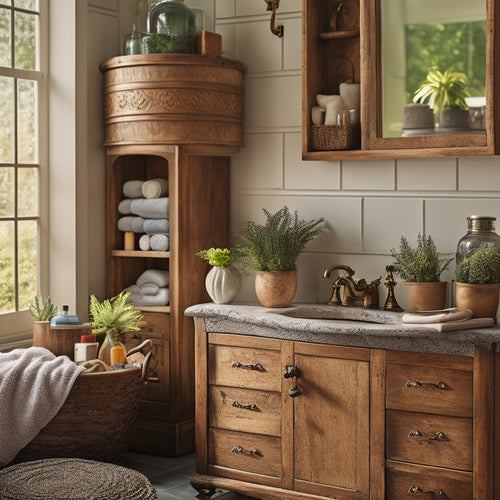
DIY Enthusiasts Master Bathroom Shelf Construction
Share
You'll start by building the sliding shelf base, cutting four pieces of 2 x 2 lumber for vertical supports and shelf boards from white melamine particle board. Make sure the supports are taller than the slide mechanism and customize the shelf size for best space usage. Next, assemble the shelf and rails by attaching side mount drawer slides to the vertical supports, securing shelf boards to rails with wood screws, and maintaining precise shelf alignment. Finally, install the shelf and slides onto your vanity, focusing on a secure and functional fit. Now you're ready to take your master bathroom shelf to the next level.
Key Takeaways
• Cut vertical supports taller than the slide mechanism and customize shelf size for optimal space utilization in the bathroom vanity.
• Attach side mount drawer slides to vertical supports, ensuring even spacing and alignment with shelf boards for a smooth sliding action.
• Secure shelf boards to rails with wood screws, maintaining precise alignment to prevent wobbling and using a level to confirm horizontal and parallel rails.
• Focus on securing a functional fit in the bathroom vanity, ensuring the shelf and rails are fully assembled before installation.
• Incorporate creative DIY storage solutions, such as PVC pipe holders or stackable bins, to maximize functionality and create a clutter-free bathroom.
Building the Sliding Shelf Base
Cut four pieces of 2 x 2 lumber to the desired length for the shelf base's vertical supports, making sure they're slightly taller than the slide mechanism to allow for smooth operation.
Next, cut the shelf boards from white melamine particle board, selecting a material that's durable, water-resistant, and easy to clean. Consider your space optimization needs and customize the shelf size accordingly – this will guarantee a perfect fit under your sink or in your desired area.
For a seamless look, choose materials that complement your bathroom's aesthetic. With your materials ready, you're set to begin constructing the sliding shelf base.
Remember to measure twice, cut once, and assemble with precision to achieve a sturdy and functional base.
Assembling the Shelf and Rails
As you prepare to assemble the shelf and rails, attach the side mount drawer slides to the vertical supports. Make sure they're evenly spaced and aligned with the shelf boards to guarantee a smooth sliding motion.
Next, secure the shelf boards to the rails, maintaining precise shelf alignment to prevent any wobbling or unevenness. Use wood screws to attach the rails to the shelf boards, ensuring they're firmly fixed.
For rail attachment, use a level to confirm the rails are perfectly horizontal and parallel to each other. This precise alignment will facilitate a seamless sliding motion and a sturdy shelf structure.
Installing the Shelf and Slides
With the shelf and rails fully assembled, you can now focus on installing the shelf and slides into the bathroom vanity, ensuring a secure and functional fit.
To achieve this, follow these important steps:
-
Verify proper alignment of the shelf with the vanity by measuring and marking the slide mounting points carefully.
-
Install the slides onto the vanity, making sure they're level and evenly spaced.
-
Place the shelf onto the slides, adjusting it to fit snugly and smoothly.
Adding DIY Storage Solutions
Now that your sliding shelf is securely in place, you can maximize its functionality by incorporating creative DIY storage solutions that cater to your specific bathroom needs. To achieve peak bathroom organization, consider these clever ideas:
| Storage Solution | Materials | Cost |
|---|---|---|
| PVC Pipe Holder | PVC pipe, drill, screws | $5 |
| Stackable Bins | Plastic bins, adhesive magnets | $10 |
| Towel Rack | Wooden dowel, hooks, screws | $8 |
| Q-tip Holder | Small container, glue, decorative paper | $3 |
| Hair Accessories Holder | Small tray, adhesive magnets | $6 |
These dollar store hacks and storage ideas will help you create a clutter-free bathroom. By incorporating these creative solutions, you'll be able to store your bathroom essentials efficiently, making your morning routine a breeze.
Reader Success Stories and Tips
You've probably been inspired by the versatility of the sliding shelf idea and are enthusiastic to share your own creative storage solutions and tips that have transformed your bathroom space. We love hearing from you, our DIY enthusiasts, and the amazing project variations you've come up with!
Here are a few reader success stories and tips to get you started:
-
One reader used reclaimed wood to create a rustic sliding shelf that added a touch of elegance to their bathroom.
-
Another reader repurposed an old cabinet door to create a sliding storage compartment for their beauty products.
-
A third reader incorporated a tension rod to hang towels, freeing up valuable shelf space for other essentials.
Your testimonials and advice are invaluable to our community, so keep sharing your experiences and tips!
Frequently Asked Questions
Can I Use MDF Instead of White Melamine Particle Board?
You're considering MDF over white melamine particle board? In a recent project, Sarah used MDF for her kitchen shelves and loved its smooth finish. MDF's advantages include being less expensive and easier to cut, but it's less durable; make sure to properly seal and protect it from moisture to make it work for you.
How Do I Adjust the Shelf Height for Different Sink Sizes?
To adjust the shelf height for different sink sizes, you'll measure the sink's dimensions, then calculate the shelf's ideal height based on those Sink Measurements. Next, you'll customize the Shelf Customization by cutting the rails to fit your specific needs.
Are Soft-Close Drawer Slides Necessary for a Bathroom Vanity?
When planning vanity upgrades, you'll wonder if soft-close drawer slides are necessary. While they're not essential, they'll elevate your sliding expectations by providing a smooth, quiet closure, especially in a humid bathroom environment where regular slides might wear out faster.
Can I Add a Second Shelf or Multiple Tiers to the Design?
You're wondering if a single shelf is enough, right? Absolutely not! You can easily add a second shelf or multiple tiers to create tiered storage, experimenting with different shelving configurations to maximize your space.
Will This Sliding Shelf Idea Work for Corner Bathroom Sink Installations?
'You'll need to adapt the sliding shelf design for corner bathroom sink installations by addressing corner constraints and making angle adjustments to guarantee a smooth pull-out motion and proper fit around the sink.'
Related Posts
-

Multi-Functional Vintage Bathroom Storage Units
Multi-functional vintage bathroom storage units merge style with function, helping you create an organized and aesthe...
-

Revolutionizing Mimosa Bars With Creative Printables
Revolutionize your mimosa bar with creative printables that take the experience to the next level. Elevate the setup ...
-

Dartmouth's Diverse Campus Support Networks Unveiled
Dartmouth College offers a wide-reaching network of support systems and resources, fostering an inclusive environment...


