
DIY Rustic Bathroom Storage Projects
You can release your creativity and add rustic charm to your bathroom with DIY storage projects that breathe new life into reclaimed wood. Reclaimed wood's unique character and natural patina will conceal any imperfections, creating a one-of-a-kind aesthetic that celebrates aged materials. Exposed screws can add an industrial touch, while wooden crates and repurposed boards can be converted into functional storage solutions. To get started, measure your bathroom space carefully to determine the perfect fit for your project. With a little creativity, you can craft a rustic haven that's both visually stunning and functional, and now you're ready to take the first step towards creating your own rustic bathroom oasis.
What You Need to Know
- Use reclaimed wood to add rustic charm and eco-friendly credentials to your bathroom storage solutions.
- Repurpose wooden crates and planks to create unique shelving units and wall panels that conceal storage compartments.
- Exposed screws and industrial materials can add character to your DIY project, emphasizing craftsmanship and aesthetic appeal.
- Measure your bathroom space accurately to determine the best storage solutions and identify "dead" zones for optimization.
- Consider using distressed finishes and natural patina to conceal imperfections and celebrate the beauty of aged materials in your design.
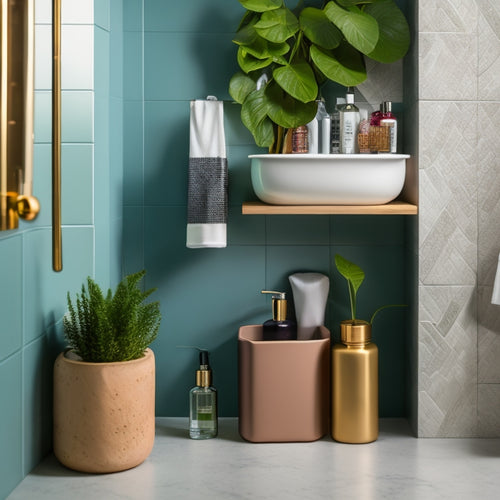
Reclaimed Wood Adds Charm
You can add a touch of rustic charm to your bathroom storage with reclaimed wood.
Consider repurposing old wooden crates as shelves, where you can store towels, toiletries, or decorative items. By incorporating customizable shelf configurations, you can maximize storage capacity and maintain organization.
Alternatively, attach rustic boards as panels to your cabinet doors or walls to create a unique, textured look.
Wooden Crates as Shelves
With a few rustic wooden crates, you can create a unique and functional storage solution for your bathroom. By stacking and arranging them, you can create a one-of-a-kind shelving unit that adds a touch of rustic charm to your space.
You can use crate organization to categorize and store bathroom essentials like towels, toiletries, and linens. To add some visual interest, try shelf styling by grouping similar items together or creating a vignette with decorative items.
In addition, incorporating modern floating shelves can create an illusion of weightlessness and enhance the overall ambiance of your bathroom. Moreover, using reclaimed wood accents can evoke a natural feel and add to the rustic charm of your storage solution.
To get started, gather a few wooden crates of varying sizes and clean them thoroughly. You can leave them as is or give them a fresh coat of paint or stain to match your bathroom's aesthetic.
Once you've prepared your crates, start arranging them to create a shelving unit that suits your needs. You can attach them to the wall for added stability or leave them freestanding.
With a little creativity, you can create a functional and stylish storage solution that adds a touch of rustic charm to your bathroom.
Rustic Boards as Panels
Rustic boards can enhance your bathroom storage by adding a touch of natural charm. You can repurpose old wooden planks or purchase reclaimed wood to create unique panels that add warmth and character to your bathroom. This DIY project is perfect for those who want to infuse their space with rustic aesthetics.
By incorporating material selection that reflects your style, durability, and eco-friendliness, you can create a bathroom that not only looks great but also aligns with your values.
To install the panels, start by measuring the area where you want to place them. Cut the rustic boards to size, and sand them down to smooth out any rough edges. Next, attach the panels to the wall using a strong adhesive or screws. Make sure they're level and securely fastened to avoid any accidents.
Panel installation is a relatively simple process, but it can make a big impact on the overall look and feel of your bathroom. You can use the panels to create a focal point, add texture to a plain wall, or even conceal storage compartments.
With a little creativity, you can turn your bathroom into a cozy retreat that reflects your personal style.
Natural Patina Hides Flaws
You'll love how natural patina creates the illusion of a flawless finish, hiding imperfections and adding character to your rustic bathroom storage.
As you work with reclaimed wood, you'll start to uncover the beauty in its distressed state, where scratches and scars tell a story of their own.
By incorporating ample storage for toiletries and skincare products customizable shelf dividers, you'll create a functional space that's both organized and aesthetically pleasing.
Flawless Finish Illusion
Behind the charm of a rustic bathroom lies a clever secret: natural patina can cleverly disguise imperfections. You can achieve a flawless finish illusion by embracing the beauty of worn, weathered finishes. This approach not only hides flaws but also adds character to your bathroom storage projects.
To create a flawless finish illusion, combine the right techniques with suitable finish materials. Here's a breakdown of some popular options:
| Techniques | Finish Materials |
|---|---|
| Distressing | Reclaimed wood, metal |
| Rustifying | Iron, steel, copper |
| Aging | Paint, stain, wax |
| Weathering | Wood, stone, concrete |
| Patinating | Metal, copper, bronze |
Distressed Beauty Unveiled
How do you achieve that perfectly imperfect look in your bathroom storage projects? It's all about embracing the beauty of distressing. By intentionally roughing up your materials, you can create a look that's uniquely yours. Think vintage accents and farmhouse decor – it's all about celebrating the imperfections that come with age.
In fact, reclaimed wood vanities can add historical character and elegance to your bathroom design. Furthermore, embracing natural textures and earthy tones can evoke a cozy ambiance.
To get started, try sanding away at your materials to reveal the natural patina beneath. This will give your project a worn, weathered look that's full of character. You can also experiment with different staining techniques to add depth and dimension to your design.
Remember, the goal is to create a look that's intentionally imperfect, so don't be afraid to get a little rough.
As you work, imagine the stories your materials could tell if they could talk. The scratches, the scuffs, the worn edges – they all add up to a unique narrative that's all your own.
Exposed Screws Add Character
When you choose to leave screws exposed, you're revealing the rustic charm that lies beneath the surface of your DIY bathroom storage project.
This intentional design decision lets the industrial style of your creation shine, adding a touch of authenticity to the space.
Rustic Charm Revealed
With rustic bathroom storage projects, the devil is in the details, and one of the most striking elements that can add character to your space is deliberately leaving screws exposed. This design choice may seem counterintuitive, but it's a transformative factor for achieving a truly rustic look. By leaving screws visible, you're adding a touch of industrial chic to your bathroom, which pairs perfectly with rustic aesthetics.
Plus, it's a great way to draw attention to the craftsmanship that went into building your storage unit.
To take your rustic charm to the next level, consider incorporating vintage accessories into your design. Old metal signs, distressed wooden crates, or antique fixtures can add a unique touch to your bathroom.
By combining these elements with exposed screws, you'll create a space that feels both rugged and refined. Remember, the key to pulling off this look is to accept imperfection and celebrate the beauty of raw, unfinished materials.
Industrial Style Shines
Behind the rustic bathroom storage projects that exude industrial style, exposed screws are often the unsung heroes. They add a touch of ruggedness and authenticity, hinting at the raw, unbridled essence of industrial design. When you incorporate exposed screws into your DIY project, you're not just adding functionality; you're making a statement about the beauty of imperfection.
Industrial accents like exposed screws bring an urban edge to your bathroom, evoking the gritty, no-nonsense vibe of city streets. They pair perfectly with reclaimed wood, metal pipes, and other industrial elements to create a look that's both rough-around-the-edges and refined.
By embracing the exposed screws, you're celebrating the beauty of imperfection and the freedom to create something truly unique.
As you work on your DIY project, don't be afraid to let those screws shine. Leave them unpainted or distressed to add to the industrial aesthetic. Alternatively, you can paint them a bold color to create a striking contrast.
Either way, the exposed screws will become a defining feature of your industrial-chic bathroom storage project, adding character and personality to the space.
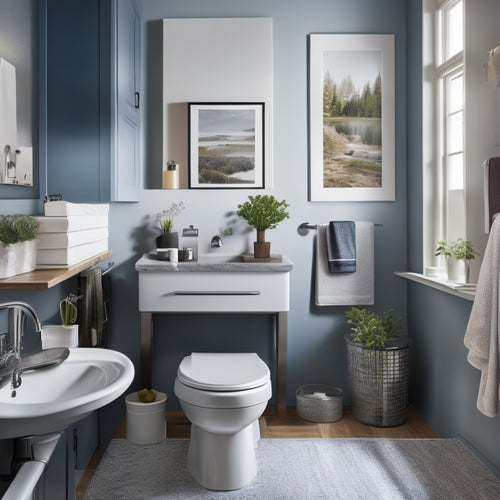
Measure Your Bathroom Space
You'll need to assess how much space you have available in your bathroom to determine the size and type of storage solutions that will fit comfortably.
Take out your tape measure and record the dimensions of the areas where you plan to install your rustic storage projects, considering any obstacles like plumbing fixtures or electrical outlets.
Space Availability Check
Take stock of your bathroom's dimensions to determine the ideal storage solutions. You want to maximize space optimization, so it's crucial to assess the area you're working with.
Start by identifying the "dead" zones in your bathroom, such as the space above the toilet or beneath the sink. Consider the dimensions of your bathroom fixtures, like the vanity and shower, to determine how much space you have available for storage.
Measure the width, length, and height of your bathroom, as well as the distance between fixtures and any obstacles. This will give you a clear understanding of the space you have to work with.
Make note of any windows, doors, or other features that may impact your storage solutions. By doing so, you'll be able to visualize the space and identify areas where you can install shelves, cabinets, or other storage units.
This will help you create a functional and organized bathroom that meets your needs and reflects your personal style.
Measurement Tips Needed
Accurate measurements are fundamental to creating a functional and organized bathroom. You'll need to take precise measurements of your bathroom space to guarantee your DIY storage project fits perfectly. Start by measuring the length, width, and height of your bathroom, including any obstructions like plumbing fixtures or electrical outlets. Use a tape measure or laser level to get accurate dimensions.
When measuring, consider the space where you plan to install your storage solution. Take note of any corners, alcoves, or recesses that could affect the fit. Record your measurements in a notebook or on a design app to visualize your space. Don't forget to measure the doors, windows, and any existing fixtures that may impact your storage design.
To guarantee a seamless installation, use measurement techniques like creating a floor plan or sketching a 3D model of your bathroom. This will help you identify potential issues before you start building.
Cost-Effective Reclaimed Wood Option
You'll love the unique character and eco-friendly benefits of using reclaimed wood in your bathroom storage project.
Not only does it add a touch of rustic charm, but it also reduces waste and preserves a piece of history.
Reclaimed Wood Benefits
Sustainability meets style in the world of reclaimed wood, where the past and present converge to create a unique aesthetic. By choosing reclaimed wood for your DIY rustic bathroom storage project, you're not only reducing waste but also preserving history.
The sustainability benefits of using reclaimed wood are undeniable - it reduces the demand for new lumber, decreases the amount of waste sent to landfills, and helps to conserve natural resources.
As you work with reclaimed wood, you'll notice the distinct character it brings to your project. The imperfections and weathered beauty of the wood add a touch of authenticity to your bathroom storage solution.
Plus, using eco-friendly materials like reclaimed wood aligns with your values of freedom and environmental responsibility. You'll feel good about the impact you're making while creating a one-of-a-kind space that reflects your personal style.
With reclaimed wood, you can achieve a rustic, country charm that's both functional and visually stunning.
Frequently Asked Questions
Can I Use Reclaimed Wood With a Pre-Existing Bathroom Layout?
You can definitely incorporate reclaimed wood into your existing bathroom layout, considering the space's constraints and measuring carefully to guarantee a seamless fit, and exploring various reclaimed wood options that complement your bathroom layout considerations.
Will Rustic Storage Projects Increase My Bathroom's Resale Value?
When you incorporate rustic charm into your bathroom, you'll likely enhance its resale value, as buyers are drawn to unique, character-filled spaces that evoke a sense of warmth and personality, making your bathroom stand out in a crowded market.
How Do I Clean and Maintain Rustic Bathroom Storage Pieces?
You keep your rustic bathroom storage pieces looking their best by dusting regularly, wiping down surfaces with a damp cloth, and using gentle cleaning techniques. Follow these maintenance tips to preserve the natural beauty of your unique storage solutions.
Are DIY Rustic Bathroom Storage Projects Suitable for Small Bathrooms?
You'll love that 70% of homeowners prioritize functionality in small bathrooms! Yes, you can create space-saving solutions with creative organization, like wall-mounted shelves and corner units, perfect for maximizing every inch of your tiny oasis.
Can I Mix Rustic Storage With Modern Bathroom Fixtures?
You can totally blend rustic charm with modern elegance by mixing storage styles - think reclaimed wood shelves with sleek faucets or a vintage vanity with modern lighting, creating a look that's both cozy and sophisticated.
Explore More
As you hammer the final nail into your DIY rustic bathroom storage project, imagine the stories the reclaimed wood could tell. Like a wise old friend, it's weathered the storms of time, its natural patina a confirmation to its rich history. Now, it's found a new purpose, holding your treasures and tales within its worn, wooden arms. Your bathroom's altered into a cozy haven, where the past meets the present, and every morning begins with a touch of rustic charm.
Related Posts
-
Stylish and Practical Shower Caddy Designs
When it comes to stylish and practical shower caddy designs, you've got plenty of options that effortlessly blend fun...
-

Global Forum on Environmental Science & Solutions
The Global Forum on Environmental Science and Solutions is an essential platform for experts to convene, share knowle...
-
Bathroom Planner Workbook Review: A Home Project Manager
The Bathroom Planner Workbook is a game-changer for homeowners seeking a stress-free bathroom remodel. This all-encom...


