DIY Wall-Mounted Bathroom Organizers
You can instantly free up useful space in your bathroom by installing DIY wall-mounted organizers that employ vertical areas, optimize bathroom real estate, and clear cluttered countertops. Start by maximizing storage space with shelving, hooks, or pegboards, and optimize areas like under-sink cabinets and behind-mirror shelves. Adjustable shelf dividers and customizable layouts can fit unique bathroom layouts, and don't forget to measure your bathroom space precisely to guarantee a perfect fit. With the right DIY wall-mounted organizers, you'll be on your way to a clutter-free bathroom - and there's even more you can do to create your ideal space.
What You Need to Know
- Utilize vertical areas by installing shelving, hooks, or pegboards to create additional storage for towels, toilet paper, and decorative items.
- Optimize bathroom real estate by incorporating adjustable shelves, storage racks, and behind-mirror shelves to maximize storage capacity.
- Clear cluttered countertops by implementing clutter reduction strategies, repurposing everyday items, and using stackable baskets or tiered shelves.
- Choose adjustable shelf solutions that offer customizable storage options, removable baskets, and adjustable dividers to fit unique bathroom layouts.
- Measure bathroom space precisely to ensure DIY organizers fit perfectly, taking into account wall materials, pipe clearance, and stud locations.
Maximize Bathroom Real Estate
You'll get the most out of your bathroom's limited space by optimizing storage areas, like under-sink cabinets and behind-mirror shelves.
Consider incorporating adjustable shelves customizable storage to accommodate items of various sizes.
Don't forget to employ vertical areas, such as the walls and ceiling, to create additional storage and display space.
Optimize Storage Space
Cluttered countertops and cramped cabinets can quickly turn a serene bathroom oasis into a chaotic nightmare. To reclaim your bathroom's tranquility, you need to optimize storage space. By incorporating space-saving solutions, you can free up precious real estate and create a more organized, peaceful environment.
For instance, implementing a one in, one out policy can help maintain a cleared space and reduce clutter. By doing so, you can identify clutter challenges and sort items into categories, making it easier to organize and access them.
Innovative designs can help you make the most of your bathroom's layout. Consider installing a wall-mounted shelf or cabinet above your sink to store toiletries, towels, and other essentials. You can also make use of the space behind your bathroom door by attaching a storage rack or hooks for hanging items like robes, towels, or bags.
When selecting storage solutions, think vertically and horizontally. Look for slim, compact designs that can fit snugly into tight spaces. By doing so, you'll be able to store more while taking up less space.
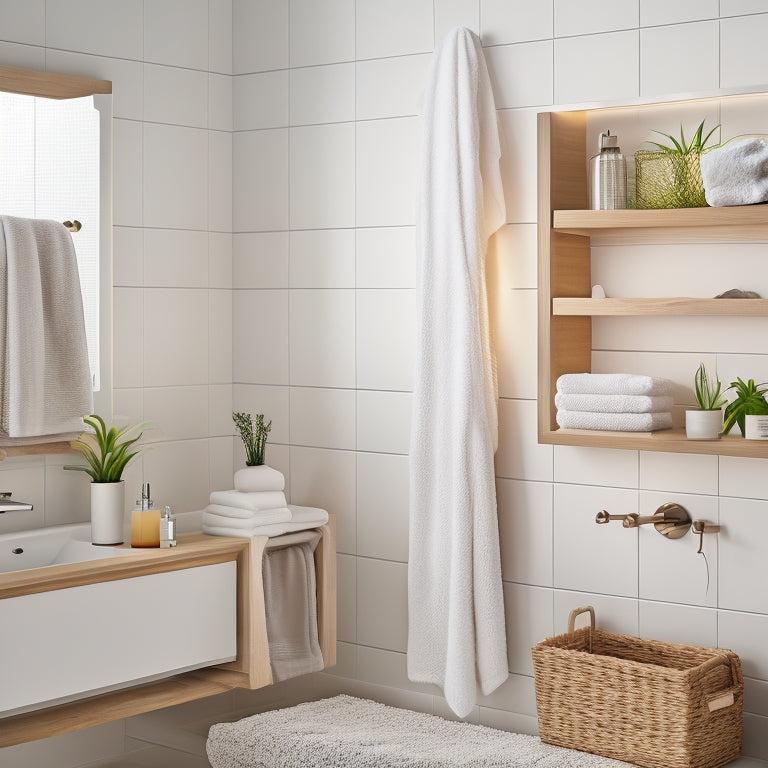
Utilize Vertical Areas
Maximizing bathroom real estate is all about thinking outside the box - or in this case, the bathroom walls. When you're working with a small bathroom, every inch counts, and that's where vertical solutions come in.
You're probably thinking, "How can I fit everything I need in this tiny space?" The answer lies in utilizing your bathroom's vertical areas. By installing shelving, hooks, or a pegboard on your walls, you're creating additional storage without taking up significant floor space.
For instance, using clear storage bins can help promote a stress-free environment by simplifying daily routines and maintaining order. Additionally, incorporating adjustable shelf dividers and custom cabinet inserts can alter cabinet interiors into functional spaces designed to specific needs.
Think creatively about the types of items you can store on your walls. Towels, toilet paper, and even decorative items can be easily stashed away on a wall-mounted shelf or in a recessed cabinet.
Consider installing a pegboard near the shower to hang loofahs, razors, and other shower essentials. And don't forget about the space above your toilet - a decorative shelf or cabinet can be the perfect spot for storing extra toilet paper, cleaning supplies, or even a few favorite books.
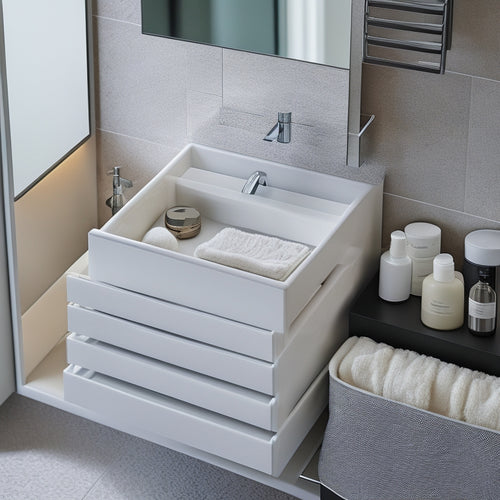
Saves Counter Space Instantly
You can clear cluttered countertops fast by installing a DIY organizer that corrals toiletries, makeup, and skincare products.
By reclaiming precious space easily, you'll create a more serene and functional bathroom environment. Incorporating open shelving benefits and utilizing storage savers like woven baskets can also enhance the overall aesthetic.
With a few simple materials and some creativity, you can say goodbye to clutter and hello to a more organized you.
Clear Cluttered Countertops Fast
A clutter-free countertop is within reach, and it's easier than you think. By implementing clutter reduction strategies and efficient organization tips, you can instantly clear the clutter and free up precious space.
Employ space optimization techniques to maximize storage potential and consider repurposing everyday items, like jars or baskets, for stylish storage solutions. Start by sorting items into categories, such as skincare, haircare, and oral care. Then, designate a specific zone for each category, ensuring that frequently used items are easily accessible.
Next, apply the "one in, one out" rule to prevent clutter from building up again. Remove expired or unused items, and consider donating gently used products to charity.
Invest in multi-functional storage solutions, like stackable baskets or a tiered shelf, to maximize vertical space and keep countertops clear.
Reclaim Valuable Space Easily
Behind the mirror, above the sink, or beneath the cabinets, lies untapped real estate waiting to be employed. By reclaiming this precious space, you can say goodbye to cluttered countertops and hello to a more organized, stress-free bathroom.
With a little creativity and some DIY know-how, you can change these often-overlooked areas into functional and stylish storage solutions. You can install shelves, hooks, or baskets to store everything from towels and toiletries to decorative accents and personal care items.
Not only will this free up counter space, but it'll also add an extra layer of aesthetic appeal to your bathroom. By incorporating functional design elements, such as recessed shelves or decorative trim, you can create a cohesive look that's both beautiful and practical.
The best part? You don't have to be an expert carpenter or designer to achieve this look. With a few simple tools and some inspiration, you can create a bathroom that's both functional and fabulous.
Adjustable Shelf Dividers
You'll find adjustable shelf dividers come in various shelf size options to fit your unique bathroom layout, ensuring you can maximize storage without sacrificing style.
To further customize your organizer, consider divider customization ideas like removable baskets, stackable bins, or even repurposed mason jars.
Shelf Size Options
Several shelf size options are available for your DIY bathroom organizer, each designed to cater to your unique storage needs. You can choose from a range of sizes to fit your bathroom's dimensions and the items you want to store.
For instance, narrow shelves are perfect for small bathrooms or for storing slim items like toothbrushes and toothpaste. Wider shelves, on the other hand, can hold larger items like towels and toiletries.
When selecting a shelf size, consider the shelf materials and designs that will work best for you. Glass shelves, for example, provide a sleek and modern look, while wooden shelves offer a warm and cozy feel.
You can also opt for adjustable shelves that can be customized to fit your changing storage needs. Additionally, some shelf designs come with built-in features like hooks or baskets to maximize storage capacity.
Divider Customization Ideas
To take your DIY bathroom organizer to the next level, consider incorporating adjustable shelf dividers that can be customized to fit your unique storage needs. With adjustable dividers, you can create separate compartments for different items, keeping your bathroom organized and clutter-free.
When it comes to customizing your dividers, you have a range of options to choose from. Here are a few ideas to get you started:
| Divider Materials | Aesthetic Designs | Benefits |
|---|---|---|
| Wood | Rustic, natural | Adds warmth and coziness |
| Metal | Industrial, modern | Provides durability and strength |
| Acrylic | Sleek, minimalist | Offers transparency and ease of cleaning |
You can also mix and match different materials and designs to create a unique look that reflects your personal style. For example, you could pair wooden dividers with metal accents for a rustic-industrial look. Whatever you choose, adjustable shelf dividers are a great way to add a touch of personality to your DIY bathroom organizer.
Measure Your Bathroom Space
You'll want to take precise measurements of your bathroom space to guarantee your DIY organizers fit perfectly.
Record the length, width, and any obstructions, like plumbing or electrical outlets, to get an accurate sense of the area you're working with.
Bathroom Dimensions Matter
Measurements are key to creating a functional and efficient bathroom space. You'll want to take precise measurements of your bathroom layout to guarantee your DIY organizer fits perfectly and maximizes storage.
Start by measuring the width, length, and any obstructions, such as plumbing fixtures or electrical outlets. Don't forget to measure the distance between studs, as this will impact the type of wall anchors you'll need.
Consider the wall material, too. Is it drywall, tile, or something else? This will affect the type of screws or anchors you'll need to use.
Take note of any windows, mirrors, or other features that might impact your organizer's design. By taking accurate measurements, you'll avoid costly mistakes and guarantee your DIY project turns out exactly as you envisioned.
With these measurements in hand, you'll be able to create a custom organizer that fits your bathroom's unique needs and frees up precious space.
Wall Space Availability
Space is a precious commodity in any bathroom, and optimizing wall space is essential to creating a functional and clutter-free environment.
Before you can start planning your DIY wall-mounted bathroom organizers, you need to assess your wall space availability. Take out your tape measure and record the dimensions of each wall, including any obstructions like windows, doors, or plumbing fixtures.
Consider the type of walls you have - drywall, tile, or concrete - as this will affect the installation methods you can use. For example, you may need specialized anchors for tile or concrete walls.
Identify any areas with limited clearance, such as around a pedestal sink or toilet, and plan your organizers accordingly. Don't forget to measure the space between studs, as this will impact the type of shelving and hardware you can use.
With accurate measurements, you'll be able to choose the right organizers and installation methods for your bathroom, ensuring a successful and stress-free DIY project.
Customizable to Fit Pipes
When designing your DIY bathroom organizer, you'll need to take into account pipe clearance to guarantee a seamless installation.
You'll want to measure the distance between the pipes and the wall to determine the ideal width for your organizer.
Pipe Clearance Considerations
You'll need to take into account the pipe clearance when designing your DIY bathroom organizer to guarantee a seamless fit. Failing to do so can result in a bulky or impractical installation that hinders plumbing access.
Start by measuring the distance between the wall and the pipes, taking note of any pipe insulation that may affect the clearance. Consider the type of pipes you're working with, as some may require more clearance than others.
When designing your organizer, make certain that the shelves, baskets, or hooks won't obstruct the pipes or compromise plumbing access. You may need to adjust the layout or add spacers to maintain a safe clearance.
Additionally, consider the material and thickness of the pipes, as well as any valves or fittings that may protrude from the wall. By carefully planning your DIY bathroom organizer with pipe clearance in mind, you'll achieve a functional and stylish storage solution that doesn't compromise your bathroom's plumbing system.
Frequently Asked Questions
Can I Install DIY Organizers in a Rental Bathroom?
You can install DIY organizers in a rental bathroom, but be mindful of temporary solutions that won't damage walls or violate rental restrictions; consider removable adhesives, command strips, or 3M hooks to guarantee a stress-free installation.
Are Wall-Mounted Organizers Compatible With Tile Walls?
When you're trying to hang an image on a tile wall, you know the drill - it's like trying to get a cat to take a bath. But, you can successfully install wall-mounted organizers on tile walls by choosing the right adhesive options and considering the tile's material and moisture levels.
How Do I Clean the DIY Bathroom Organizers?
To keep your organizers in top shape, you'll need gentle cleaning materials like microfiber cloths and mild detergents. Follow these maintenance tips: wipe down surfaces regularly, avoid harsh chemicals, and dry thoroughly to prevent water spots.
Can I Use DIY Organizers for Storing Heavy Bathroom Items?
When it comes to storing heavy bathroom items, don't weigh yourself down with doubt - you can use DIY organizers, but be mindful of their weight capacity and choose materials that can hold their own, like sturdy woods or metal.
Are DIY Bathroom Organizers Suitable for Small Bathrooms?
You'll find that DIY bathroom organizers are perfect for small bathrooms, offering space-saving solutions that optimize your limited area while adding aesthetic appeal, giving you the freedom to create a clutter-free oasis that reflects your personal style.
Explore More
With your new DIY wall-mounted bathroom organizer, you've changed a cluttered space into a serene oasis. Like an expert puzzle solver, you've maximized every inch of real estate, freeing up counter space and banishing clutter to the periphery. Now, every morning, you can face the day with a clear mind and a clear countertop – a true luxury in the most sacred of spaces.
Related Posts
-
Space-Optimized Drawer Systems for Bathrooms
Space-optimized drawer systems can totally revolutionize your bathroom's storage. By utilizing vertical space and inn...
-
Contemporary Slimline Storage for Modern Bathrooms
As you envision your modern bathroom, consider the innovative potential of contemporary slimline storage. By cleverly...
-
Unleash Your Creativity: Cricut Projects Galore
Ignite your creativity with a Cricut machine, where beginners can start with fundamental projects like vinyl decals a...


