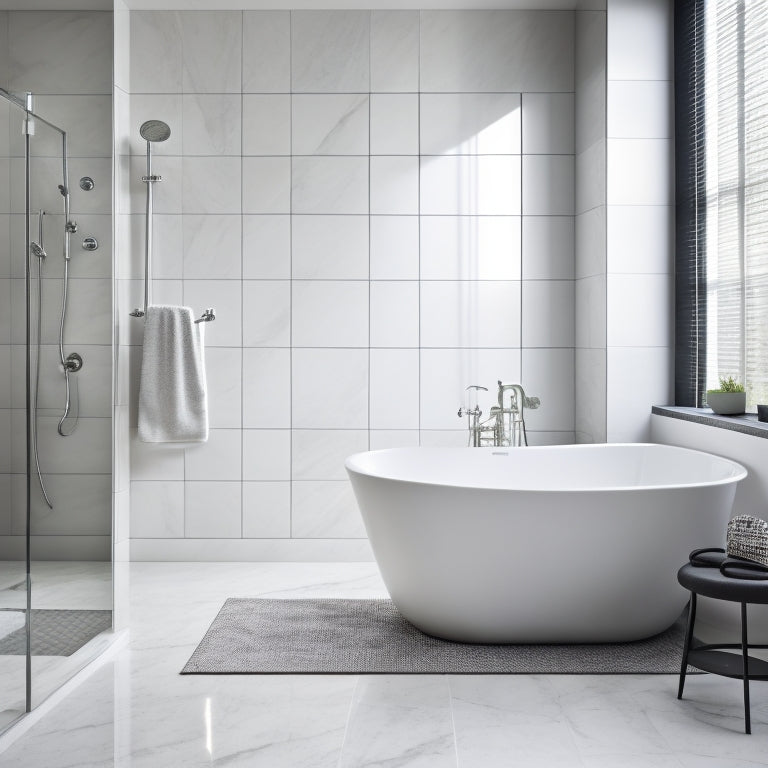
How to Install a Free Standing Tub and Shower
Share
To successfully install a free-standing tub and shower, you'll need to start by preparing the installation site, clearing away debris and old fixtures, and inspecting the subfloor for cracks and unevenness. Next, measure and mark the area, taking care to record the tub's footprint, shower dimensions, and drain location. Install the shower pan, ensuring it's level and securely fastened to the floor, then set the free-standing tub in place, using shims to maintain a level surface. Connect the water supply lines, taking care to identify shut-off valves and check water pressure. From here, you'll be ready to move on to installing shower walls and doors, adding flooring and finishing touches, and finalizing the plumbing and testing - and that's just the beginning of your path to a beautifully installed free-standing tub and shower.
Key Takeaways
- Prepare the installation site by clearing debris, inspecting the subfloor, and applying a waterproofing membrane to ensure a secure and leak-free installation.
- Measure and mark the area accurately to ensure proper fit and alignment of the tub and shower, considering drain placement and obstructions.
- Install the shower pan, ensuring a level and clean subfloor, and follow manufacturer's instructions for a secure and watertight installation.
- Position the free-standing tub in the designated location, ensuring it is level, plumb, and centered, and adjust with shims if necessary.
- Connect water supply lines securely to tub and shower fixtures, and hook up drain lines ensuring proper venting and slope to prevent leaks and water damage.
Prepare the Installation Site
Every inch of the installation site must be thoroughly prepared to guarantee a smooth and successful installation of your free standing tub and shower.
You'll want to clear the area of any debris, old flooring, or existing fixtures that might get in the way. Next, inspect the subfloor for any cracks or unevenness, and make the necessary repairs to ascertain a level surface. This is essential for proper drain placement, as you'll want to confirm the water flows freely and doesn't accumulate around the tub.
Now it's time to focus on waterproofing techniques. Apply a layer of waterproofing membrane to the entire area, making certain to cover every inch of the installation site.
Don't skip this step, as it'll save you from costly repairs down the line. With the membrane in place, you can start thinking about the layout of your tub and shower.
Take note of the drain placement and plan accordingly, making sure everything is aligned and functioning as it should. By following these steps, you'll be well on your way to a successful installation.
Measure and Mark the Area
Three essential measurements dictate the success of your free-standing tub and shower installation: the tub's footprint, the shower's dimensions, and the drain's location.
Take precise measurements to guarantee your tub design and shower styles fit seamlessly in the allocated space. Measure the length, width, and any obstructions (like plumbing fixtures) in the area. Record these measurements to reference later.
Next, identify the center point of the tub and mark it on the floor using a chalk line or tape. This will help you position the tub correctly during installation.
Measure the shower area, considering the dimensions of the showerhead, handles, and any other fixtures. Contemplate the shower style you've chosen - will it be a walk-in, corner, or alcove shower? Record these measurements as well.
Install the Shower Pan
You'll need to prepare the shower pan by ensuring the subfloor is level and clean, and applying a layer of waterproofing membrane to the area.
Next, you'll install the shower pan, which typically involves setting it into place and securing it with the manufacturer's recommended fasteners.
Make sure to follow the manufacturer's instructions for specific installation requirements, as these can vary depending on the type of pan you're using.
Shower Pan Preparation
The shower area, an essential component of your free-standing tub and shower installation, requires a sturdy foundation to guarantee a leak-free and safe bathing experience.
You're about to create a watertight haven, and it all starts with proper shower pan preparation. Begin by inspecting the subfloor for any damage or unevenness, addressing these issues before moving forward.
Next, verify the drain installation location is marked and centered, considering the shower pan's dimensions.
Now, it's time to apply a layer of waterproofing membrane to the entire shower area, following the manufacturer's instructions for ideal coverage.
Don't skimp on this vital step, as it's your first line of defense against water damage.
Once the membrane is dry, you're ready to move on to the next phase of shower pan preparation.
Shower Pan Installation
With the shower area's foundation properly prepared, your focus now shifts to installing the shower pan, an essential component that requires precise placement and secure fastening. This is where the magic happens, and your shower starts taking shape.
To guarantee a successful installation, follow these essential steps:
-
Drain placement: Position the drain according to the manufacturer's instructions, making sure it's centered and level. You don't want any water pooling in the shower, do you?
-
Apply adhesive: Use a suitable adhesive to bond the shower pan to the floor, following the manufacturer's instructions. This is vital for a watertight seal.
-
Place the pan: Carefully position the shower pan, making sure it's even and securely fastened to the floor. You may need to use shims or adjust the pan slightly to achieve a perfect fit.
-
Seal the edges: Use waterproof materials to seal the edges of the shower pan, preventing any water from seeping behind the pan.
-
Test and inspect: Once installed, test the shower pan for leaks and inspect the installation for any defects or weaknesses. Better safe than sorry!
Set the Free Standing Tub
Precision takes center stage as you carefully position the free-standing tub in its designated location, making sure of a level and plumb setup that will ultimately dictate the success of your entire project.
You don't want your tub to resemble the Leaning Tower of Pisa, so take your time and get it right.
Next, inspect the tub materials for any damage or defects. Check for scratches, dents, or cracks that could compromise the structural integrity of the tub. If you find any issues, now's the time to address them before proceeding with the installation.
Gather your installation tools, including a level, tape measure, and shims. Use the level to make certain the tub is perfectly horizontal and vertical.
If necessary, use shims to adjust the tub's position and maintain a level surface. Double-check your measurements to confirm the tub is centered and aligned with the surrounding fixtures.
With the tub properly set, you're ready to move on to the next step – connecting the water supply lines.
Connect Water Supply Lines
You'll need to prepare the water lines by identifying the shut-off valves that control the hot and cold water supply lines to the tub.
Typically, these valves are located near the water supply lines, so make sure you can access them easily.
Now, you'll connect the supply lines to the tub's faucet using one of two methods: direct connection or flexible hose connection.
Water Line Preparation
Since the water supply lines are typically located near the floor, start by identifying the shut-off valves that control the hot and cold water supply lines feeding the tub and shower.
You'll want to make certain you can shut off the water supply to the entire bathroom, not just the tub and shower, to avoid any unexpected surprises.
To prepare the water lines, follow these essential steps:
-
Check the water pressure in your home to verify it's within the recommended range for your tub and shower fixtures. You don't want to risk damaging those fancy new faucets!
-
Inspect the pipes for any signs of damage, corrosion, or leaks. You'll be amazed at how a little pipe insulation can go a long way in preventing future issues.
-
Mark the locations of the shut-off valves, hot and cold water supply lines, and any other relevant plumbing features. You'll thank yourself later when you're trying to troubleshoot an issue.
-
Take photos of the existing plumbing setup for reference. Trust us, you'll appreciate having a visual record of how everything was connected before you started tearing things apart.
-
Finally, consider upgrading any old or corroded pipes to guarantee a safe and efficient water supply to your new tub and shower.
Shut-Off Valve Location
Turn your attention to locating the shut-off valves, an essential step in connecting the water supply lines to your new free-standing tub and shower. You'll need to identify the type of shut-off valve required for your installation. There are three common types: ball valves, gate valves, and needle valves. Each has its own strengths and weaknesses, so choose wisely.
| Valve Type | Description | Tips |
|---|---|---|
| Ball Valve | Quick shut-off, durable | Use for main water supply lines |
| Gate Valve | Gradual shut-off, high flow rate | Ideal for irrigation systems |
| Needle Valve | Precise flow control, compact | Suitable for tight spaces |
When installing shut-off valves, remember to:
- Position them in an accessible location for easy maintenance
- Verify they're compatible with your piping material (e.g., copper, PEX, or PVC)
- Install them in a way that allows for easy replacement in the future
Pipe Connection Methods
With shut-off valves in place, connecting the water supply lines to your free-standing tub and shower becomes the next essential step.
You'll need to determine the pipe materials and connection types that suit your installation. Don't worry, it's not rocket science, but it does require some planning and attention to detail.
Here are some popular pipe connection methods to evaluate:
-
Soldering: A classic method that involves melting solder to join copper pipes. It's reliable, but requires some skill and patience.
-
Push-fit fittings: A modern alternative that uses flexible pipes and fittings that simply push onto each other. Easy to use, but may not be suitable for high-pressure systems.
-
PEX tubing: A flexible, plastic piping material that's resistant to freezing and corrosion. It's easy to install, but may require special tools.
-
Compression fittings: A method that uses fittings with a ferrule and nut to secure pipes. It's reliable, but can be tricky to get right.
-
Glue and primer: A method used for PVC and CPVC pipes, which requires applying glue and primer to the pipes and fittings before assembly. It's simple, but the glue can be messy.
Choose the method that best suits your skills and the specific requirements of your installation.
Remember to always follow local plumbing codes and regulations.
Install Shower Walls and Door
You're now ready to enclose your shower area with walls and a door, a critical step in creating a functional and aesthetically pleasing space.
First, decide on your wall material choices, considering factors like durability, water resistance, and style. Popular options include glass, acrylic, and natural stone.
Next, measure the area carefully to guarantee a snug fit, factoring in any obstructions or irregularities.
When it comes to shower door options, you've got a range of choices, from sliding doors to hinged doors, and even frameless or semi-frameless designs.
Consider the overall aesthetic you're aiming for, as well as factors like ease of cleaning and functionality. For example, a sliding door might be a good choice for a smaller space, while a hinged door could work well in a larger area.
Once you've chosen your walls and door, it's time to install them.
Start by preparing the area, making certain it's level and clean.
Then, follow the manufacturer's instructions to install the walls, being careful to secure them properly.
Add Flooring and Finishing Touches
As the shower walls and door are now securely in place, attention shifts to the floor, where a sturdy and water-resistant surface is essential.
You've got several flooring options to choose from, including ceramic or porcelain tile, natural stone, or even luxury vinyl tile (LVT). Each has its pros and cons, so pick the one that best fits your style and budget.
Before installing your chosen flooring, make certain the subfloor is level, clean, and dry. Then, follow the manufacturer's instructions for installation. Don't forget to add a waterproof membrane to prevent water damage.
Next, focus on adding the finishing touches:
- Install shower caddies or shelves to keep toiletries within reach
- Add a shower curtain or door to contain water spray
- Choose finishing materials like caulk, grout, and silicone sealants that complement your flooring and shower walls
- Consider adding a heated floor or LED lighting for extra luxury
- Finally, seal the entire area with a waterproof coating to guarantee a long-lasting, leak-free shower
Finalize Plumbing and Testing
Now that the shower area is fully prepared, it's time to finalize the plumbing connections and test the entire system. You've made it this far, and the finish line is in sight!
Make certain to follow local plumbing codes to avoid any costly rework or, worse, a nasty surprise during your first shower.
Connect the water supply lines to the tub and shower fixtures, confirming they're securely fastened and leak-free.
Next, hook up the drain lines, double-checking that they're properly vented and sloped.
Don't forget to test the water pressure to verify it's within the recommended range for your fixtures. You don't want a weak showerhead or, conversely, a pressure that's strong enough to blast you out of the tub!
Turn on the water supply and inspect every connection for leaks.
Run some water through the system to clear any air pockets, then test the shower and tub to confirm they're functioning as expected.
If everything checks out, you can breathe a sigh of relief – you've successfully installed your free-standing tub and shower!
Frequently Asked Questions
Can I Install a Freestanding Tub in a Small Bathroom?
You can squeeze a freestanding tub into a small bathroom, but don't get too tub-thirsty - consider the layout and realistically assess tub size, ensuring a comfortable fit that won't leave you feeling claustrophobic or like you're bathing in a sardine can.
Do I Need a Professional to Install the Shower and Tub?
Are you a DIY rockstar or a plumbing newbie? Honestly, unless you're comfortable with complex installation tips and meeting plumbing requirements, it's wise to hire a pro to guarantee a stress-free, leak-free experience.
Are Freestanding Tubs Compatible With All Types of Flooring?
You're wondering if freestanding tubs are compatible with all types of flooring? Well, it depends on the tub's materials and the flooring's weight capacity. For instance, acrylic or fiberglass tubs are lighter, but stone or metal ones are heavier, so you'll need to check your flooring's specs before installation.
Can I Use a Freestanding Tub With a Rainfall Showerhead?
Imagine a spa-like oasis, and yes, you can create it! You'll love that freestanding tub benefits include flexibility, so go ahead and pair it with rainfall showerhead options like ceiling-mounted or wall-mounted fixtures for a luxurious experience.
Are Freestanding Tubs and Showers More Expensive Than Traditional Ones?
You're wondering if freestanding tubs and showers break the bank? Well, yes, they often do, thanks to higher freestanding tub costs and specialty installation materials, but don't worry, the luxurious result is worth the extra bucks!
Conclusion
With the final fixtures in place, your oasis is now ready to bloom. The free-standing tub and shower, once mere components, have evolved into a serene retreat. As you step into this tranquil space, the gentle flow of water and soothing ambiance envelop you, washing away the fatigue of the day. Your hard work has given birth to a haven, where every moment is a rejuvenating escape.
Related Posts
-

Innovative Hidden Storage for Modern Bathrooms
You're investing in a modern bathroom that's a serene oasis, and ample hidden storage is essential to maintaining tha...
-

Contemporary Mirrored Bathroom Cabinets for Homeowners
As you reimagine your bathroom, consider a contemporary mirrored cabinet that echoes your unique style, from sleek mo...
-

Lightware Academy Revolutionizes Pro AV E-Learning
Lightware Academy is revolutionizing Pro AV e-learning with its all-encompassing online platform, offering certified ...


