How to Install Bathroom Countertops and Sinks: A Step-by-Step Guide
Share
You'll start by preparing your bathroom space, clearing clutter and removing old fixtures, then inspecting for water damage or rot. Next, take precise measurements for your countertops, accounting for sink and faucet installations. Choose your countertop material, such as solid surface, granite, or laminate, and cut it using specialized tools. Install the countertop material, ensuring a secure and even fit, then mount your sink and faucet, verifying compatibility and following manufacturer's instructions. Finally, seal and caulk edges, and add fixtures and trim - but that's just the beginning of achieving a flawless finish.
Key Takeaways
- Clear the bathroom space of clutter, old fixtures, and debris to ensure a smooth installation process.
- Measure countertops accurately, accounting for sink, faucet, and decorative edges to ensure a precise fit.
- Prepare the surface by cleaning and drying, then apply adhesive to the back of the countertop and cabinet for secure installation.
- Mount the sink and faucet, ensuring compatibility and proper alignment, and connect water supply lines to shut-off valves.
- Seal and caulk edges with the appropriate sealant, applying a smooth, even bead to ensure a watertight seal.
Preparing the Bathroom Space
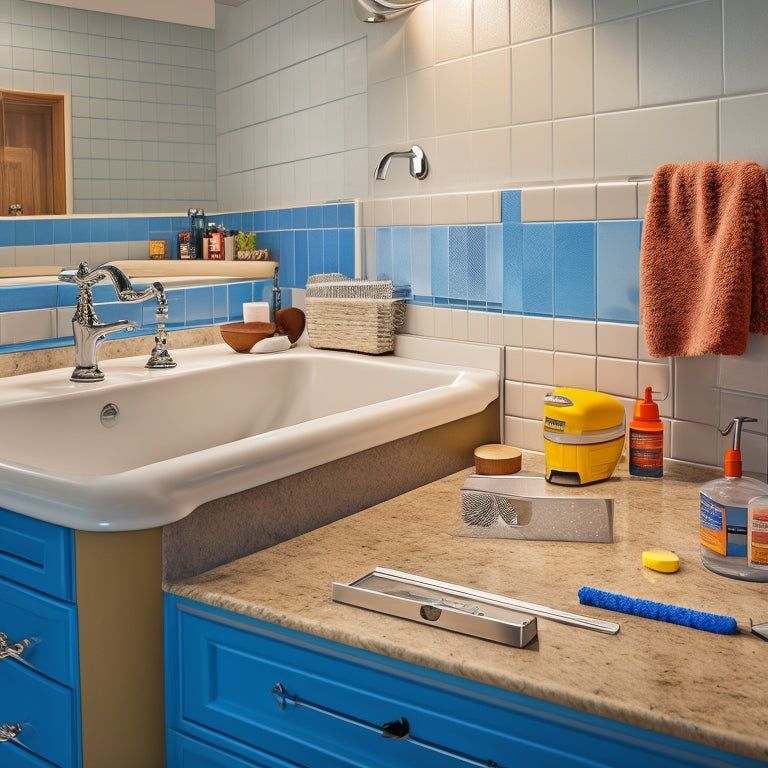
Preparing the bathroom space is a vital first step in installing bathroom countertops and sinks. You'll want to clear the area of any clutter, old fixtures, and debris to guarantee a smooth installation process.
Start by removing any existing countertops, sinks, and faucets, taking care not to damage the surrounding walls or flooring. Next, inspect the area for any signs of water damage or rot, addressing these issues before proceeding.
Now it's time to think about aesthetics. Choosing materials and selecting colors that complement your bathroom's style and décor is important.
Consider the overall look you want to achieve, from modern and sleek to traditional and refined. Will you opt for durable granite, sleek quartz, or budget-friendly laminate? What color palette will you choose to tie the whole look together?
Measuring and Cutting Countertops
With countertops in mind, take precise measurements of your bathroom space to guarantee a seamless fit. You'll need a tape measure, calculator, and a pencil to get started. Record the length, width, and any obstructions, like plumbing fixtures or electrical outlets.
Don't forget to account for the sink and faucet, as well as any decorative edges or cutouts.
Next, decide on the countertop style that suits your bathroom's aesthetic. Will it be a sleek, modern solid surface or a classic granite? This will impact your measurement and cutting process. For example, solid surface countertops often require more precise measurements due to their uniform thickness.
Cutting countertops requires specialized tools, such as a circular saw or a jigsaw, depending on the material. You may also need a router for decorative edges or a hole saw for sink and faucet installations.
Make sure you have the necessary tools and safety gear before proceeding. With accurate measurements and the right tools, you'll be ready to cut your countertops like a pro.
Installing Countertop Materials
Now that you've accurately measured and cut your countertops, it's time to install the material.
You'll need to prepare the surface by cleaning and drying the area thoroughly. Apply a thin layer of adhesive, such as silicone or epoxy, to the back of the countertop material and the cabinet top. Align the countertop material with the cabinet, ensuring it's centered and even. Use clamps or weights to secure the material in place while the adhesive sets.
For laminate or solid surface countertop materials, use a specialized adhesive and follow the manufacturer's installation techniques.
Natural stone countertops, like granite or marble, require a two-part epoxy adhesive and a more intricate installation process. Always follow the manufacturer's instructions for specific installation requirements.
Once the adhesive has set, remove the clamps or weights and inspect the countertop material for any air bubbles or unevenness.
Use a razor blade or utility knife to remove any excess adhesive that has squeezed out beyond the edges. Your countertop material is now securely in place, ready for the next step in the installation process.
Mounting the Sink and Faucet
Behind the gleaming surface of your new countertop, an essential component awaits installation: the sink and faucet.
It's time to bring these two together in perfect harmony. Before you start, verify you've chosen the right sink type (undermount, topmount, or apron-front) and faucet options (single-handle, two-handle, or touchless) to fit your bathroom style and needs.
Here's what you'll need to do:
- Measure the sink's mounting holes and faucet's installation requirements to verify a secure fit
- Apply a thin layer of silicone adhesive to the sink's underside and press it firmly onto the countertop
- Align the faucet with the sink's mounting holes and secure it with the provided hardware
- Connect the faucet's water supply lines to the shut-off valves, making sure not to overtighten
- Turn on the water supply and check for leaks around the sink and faucet connections
Sealing and Caulking Edges
Seal the deal on a professional-looking installation by guaranteeing a watertight seal around the edges of your new countertop and sink. This essential step will prevent water damage and guarantee a long-lasting installation.
Choose the right sealant for the job by considering the type of countertop and sink material, as well as the level of moisture exposure. Here's a breakdown of common sealant types and their uses:
| Sealant Type | Suitable For | Moisture Resistance |
|---|---|---|
| Silicone | Glass, ceramic, natural stone | High |
| Acrylic | Laminate, solid surface, wood | Medium |
| Polyurethane | Concrete, metal, PVC | High |
| Epoxy | High-traffic areas, commercial applications | Extreme |
When applying sealant, use a caulking technique that guarantees a smooth, even bead. Hold the caulk gun at a 45-degree angle, and apply gentle pressure while moving in a continuous motion. Wipe off excess sealant with a damp cloth, and let it cure according to the manufacturer's instructions.
Final Touches and Inspection
With the edges of your countertop and sink properly sealed, you're ready to put the finishing touches on your installation.
Now it's time to add those design flourishes that'll make your bathroom countertop and sink combo truly shine.
-
Install any decorative trim or molding to conceal gaps between the countertop and wall
-
Add fixtures like faucets, drains, and pop-up stoppers, making certain they're securely fastened
-
Connect the water supply lines and test the sink to verify there are no leaks
-
Apply a bead of silicone caulk around the sink's rim to create a watertight seal
-
Take a step back and admire your handiwork, making any necessary adjustments to confirm a flawless finish
Frequently Asked Questions
Can I Install Bathroom Countertops and Sinks Without Professional Help?
You're wondering if you can ditch the pros and tackle DIY installation? With the right countertop materials and some sweat equity, you can, but be prepared for a challenge that'll test your patience and carpentry skills!
What Type of Sink Is Best for a Small Bathroom?
"Cut to the chase" - when it comes to small bathrooms, you're wise to opt for space-saving pedestal sinks or sleek wall-mounted sinks, which create the illusion of more room while keeping your bathroom's footprint tiny.
Can I Use a Bathroom Countertop Material for Outdoor Use?
You're wondering if your favorite bathroom countertop material can withstand the great outdoors? Check its outdoor durability and material suitability first; not all countertops are created equal, and some may fade, crack, or disintegrate under harsh weather conditions.
How Do I Clean and Maintain Bathroom Countertops and Sinks?
Remember when your grandma's countertops sparkled like her personality? You can achieve that too! Create a maintenance routine with daily cleaning tips like wiping down surfaces and weekly deep cleans to keep your bathroom countertops and sinks shining like new.
Are Bathroom Countertops and Sinks Covered Under Warranty?
You're wondering if your bathroom countertops and sinks are covered under warranty? Typically, warranty coverage varies by manufacturer and sink materials, but you can expect 1-5 year warranties for solid surface sinks and 10-20 years for quartz and granite.
Conclusion
You've survived the grueling process of installing bathroom countertops and sinks! Congratulations, you've earned the right to gaze upon your handiwork and bask in the glory of a job well done. But let's be real, the real challenge lies ahead – keeping those countertops sparkling and those sinks clog-free. The battle may be won, but the war is far from over. Now, go forth and conquer the daily grind of bathroom maintenance!
Related Posts
-

Vintage Metal Bathroom Storage for Industrial Look
If you're aiming for that chic industrial look in your bathroom, vintage metal storage is the perfect choice. These p...
-

Stylish and Practical Shower Caddy Designs
When it comes to stylish and practical shower caddy designs, you've got plenty of options that effortlessly blend fun...
-

Effortlessly Organize Your Bathroom With Free Labels
Effortlessly organize your bathroom with free labels by prioritizing style, functionality, and clutter-free living. C...


