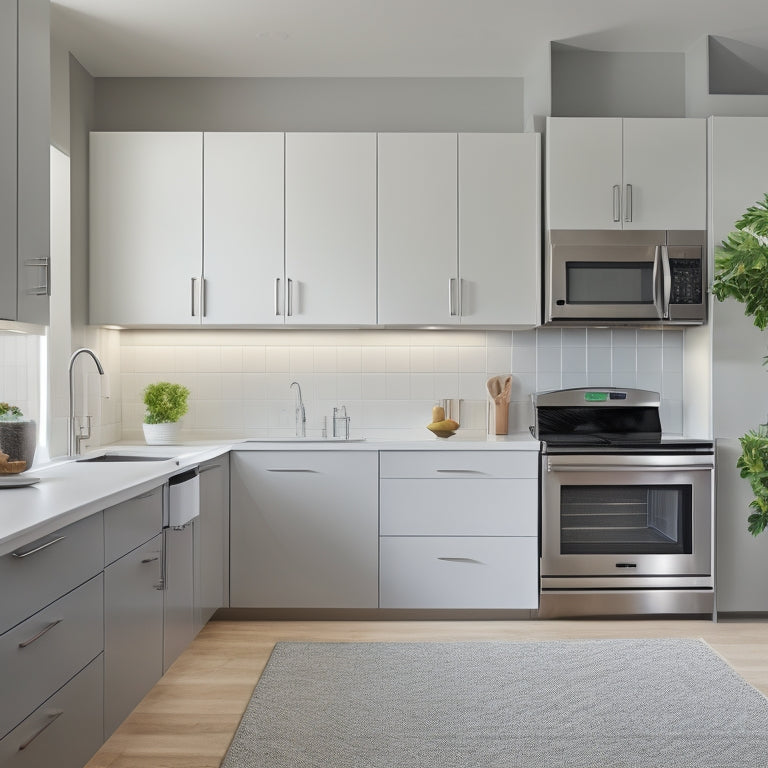
Successful Wall-Mounted Cabinet Installation in 10 Tips
You're about to install wall-mounted cabinets, and it's vital to get it right. Start by evaluating your wall type, measuring accurately, and preparing the surface for a secure fit. Choose the right mounting hardware and screws for your wall material, and consider the weight capacity of your cabinet. Plan for electrical outlets, mark drill holes correctly, and install cabinets in the right order. Use a level to guarantee accuracy, and test and adjust your cabinets for a polished finish. By following these essential tips, you'll be well on your way to a successful installation - and there's more to learn to secure a flawless finish.
Key Takeaways
- Assess the wall type and material to determine the appropriate installation tools and methods for a secure cabinet mount.
- Measure distances between wall studs and cabinet mounting points accurately to ensure proper alignment and weight distribution.
- Choose the right mounting hardware and screws based on the wall type, and consider the weight capacity of the cabinet and its contents.
- Plan for electrical outlets and lighting from the start, and confirm adequate spacing between outlets to prevent overheating.
- Verify cabinet alignment and levelness during installation, and make final adjustments for a polished finish.
Choose the Right Wall Type
Your wall-mounted cabinet's stability and security rely heavily on the type of wall it's attached to. You can't just slap it on any old wall and expect it to stay put. The type of wall material you're working with will determine the installation tools you'll need and the overall success of the project.
If you've got a sturdy brick or concrete wall, you're in luck! These walls can hold a lot of weight, and you can use heavy-duty anchors to secure your cabinet.
On the other hand, if you've got a flimsy drywall or plaster wall, you'll need to take extra precautions to avoid damaging the wall or the cabinet. In this case, you'll want to use lighter anchors or even consider consulting a professional.
Take a closer look at your wall material before you start drilling. Is it hollow or solid? Are there any wires or pipes behind it that you need to avoid?
Knowing your wall's strengths and weaknesses will help you choose the right installation tools and guarantee a successful cabinet installation. Don't skip this step – your cabinet (and your wall) will thank you!
Measure Twice, Drill Once
Before you start drilling holes in your wall, take a step back and double-check your measurements. It's easy to get excited about installing your wall-mounted cabinet, but a simple mistake can lead to a big headache.
Take out your trusty tape measure and verify the distance between the wall studs, the cabinet's mounting points, and the location of any pipes or wires. Don't rely on your memory or a quick glance – actually measure twice to guarantee accuracy.
When you're confident in your measurements, it's time to select the right tool for the job. A level is essential for guaranteeing your cabinet is straight, and a drill with a sturdy bit will make quick work of those pesky wall anchors.
Consider investing in a laser level for extra precision. Finally, review your installation techniques to avoid common mistakes, like drilling at an angle or not using the correct type of anchor for your wall type.
With careful measurement and the right tools, you'll be well on your way to a successful installation.
Select Proper Mounting Hardware
When selecting proper mounting hardware for your wall-mounted cabinet, you'll need to evaluate the type of wall you're working with, as different materials require specific types of screws or anchors.
You'll also need to choose the right mounting screw options, factoring in elements like screw length and thread type.
Wall Type Considerations
The wall you're about to drill into holds the key to a successful cabinet installation, as different wall types require specific mounting hardware to guarantee a sturdy hold. You'll need to determine your wall type to select the right hardware.
For drywall, use drywall anchors to distribute the weight of your cabinet. If you're dealing with masonry walls, you'll need specialized anchors or screws designed for concrete or brick.
Consider the stud spacing in your wall, as this will affect the installation depth of your mounting hardware. Take into account the wall materials, wall texture, and surface finish, as these can impact the type of hardware you choose.
Don't forget to factor in wall insulation and any wall reinforcements, such as plywood or paneling, that may be behind the surface.
Ultimately, the weight of your cabinet will dictate the type of mounting hardware you need. Make certain to choose hardware that can support the weight of your cabinet, plus any additional items you plan to store inside.
Mounting Screw Options
Selecting the right mounting screws is vital to guaranteeing your cabinet stays securely fastened to the wall. You don't want your beautiful cabinet crashing to the floor, do you?
When choosing screw types, consider the wall material. For drywall, use coarse-thread screws with a bugle head to securely grip the drywall. For wood studs, opt for fine-thread screws with a countersink head to create a flush surface. And for metal studs, use self-drilling screws with a hex washer head for extra grip.
Screw lengths are also significant. Measure the thickness of your wall and the cabinet's mounting bracket to determine the correct screw length. A good rule of thumb is to add 1/4 inch to the total thickness to guarantee the screw doesn't bottom out.
Don't forget to check the screw's thread type and material to guarantee compatibility with your wall anchors. With the right screw, you'll be confident your cabinet will stay put.
Weight Capacity Checks
Your cabinet's weight capacity is essential to ensuring it remains securely fastened to the wall. You don't want your cabinet crashing down on you (or worse, your prized possessions) because you didn't choose the right mounting hardware. To avoid this, you need to check the weight capacity of your cabinet and select mounting hardware that can support it.
Here are a few things to evaluate when checking the weight capacity of your cabinet:
-
Cabinet materials: The type of materials used to build your cabinet affects its weight. For example, a cabinet made of solid wood will be heavier than one made of engineered wood or medium-density fiberboard (MDF).
-
Weight distribution: Assess how the weight of the cabinet will be distributed once it's mounted. Will it be evenly distributed, or will there be more weight on one side?
-
Additional weight: Think about any additional weight you'll be adding to the cabinet, such as heavy dishes, cookbooks, or appliances.
- Mounting hardware ratings: Make sure the mounting hardware you choose is rated to support the weight of your cabinet, plus any additional weight you plan to add.
Plan for Electrical Outlets
Cabinets with built-in outlets or lighting require careful planning to secure safe and functional installation.
You'll need to contemplate electrical planning from the get-go to avoid a hair-raising experience (pun intended).
When deciding on outlet placement, think about the type of devices you'll be plugging in.
Will you need USB outlets for charging your phone or tablet?
Do you have appliances that require dedicated 20-amp outlets?
Consider the layout of your cabinet's interior and where you'll place your devices to guarantee convenient access to power.
You'll also want to confirm that outlets are spaced far enough apart to prevent overheating.
Measure twice, cut once – or in this case, drill once.
Double-check your measurements to verify that outlets are placed correctly and that you're not drilling into any studs or wires.
You might also want to think about hiring a licensed electrician if you're not comfortable with electrical work.
Remember, safety should always be your top priority.
With careful planning, you'll be well on your way to a successful wall-mounted cabinet installation.
Consider Load Capacity Carefully
Three key factors determine the load capacity of your wall-mounted cabinet: the type of wall it's being mounted on, the weight of the cabinet itself, and the weight of its contents.
You don't want your cabinet to come crashing down, so it's vital to take load capacity into account carefully.
When choosing a wall-mounted cabinet, keep the following in mind:
-
Cabinet materials: Lighter materials like MDF or plywood can reduce the overall weight, but may not be as durable as heavier materials like solid wood.
-
Load distribution: Make certain the weight of the contents is evenly distributed to avoid putting too much pressure on one spot.
-
Wall type: Drywall can hold less weight than concrete or brick walls, so choose the right anchors and screws for your wall type.
- Weight limits: Check the manufacturer's weight limits for the cabinet and verify you're not exceeding them.
Prepare the Wall Surface
You'll need to prepare the wall surface before mounting your cabinet.
Start by cleaning the wall area to remove dirt, grime, or old adhesive that might interfere with the installation.
Next, inspect the wall for any damage, and locate the wall studs to guarantee a secure installation.
Clean the Wall Area
Clean the Wall Area (Prepare the Wall Surface)
You're about to put a cabinet on your wall, but first, let's get real – walls can be gross! Before you start drilling, give your wall a nice scrub to guarantee a successful installation. You don't want dirt, grime, or old adhesives messing with your cabinet's adhesion.
Grab your favorite cleaning products and get to work! Here's what to focus on:
-
Dust and dirt: Use a soft-bristled brush or a damp cloth to wipe away any loose particles. This is especially important if you have a textured wall.
-
Grease and grime: Mix a solution of mild soap and water, and use it to tackle any stubborn stains.
-
Old adhesives: Use a gentle adhesive remover to dissolve and wipe away any leftover residue.
- Wall imperfections: If your wall has any rough spots or bumps, use a light sandpaper to smooth them out.
Check for Wall Damage
Before mounting your cabinet, inspect the wall for any damage or weaknesses that could compromise the installation. You don't want your beautiful new cabinet to end up on the floor because of a faulty wall. Take a closer look for cracks, holes, or water damage that could affect the structural integrity of the wall.
| Damage Type | Description | Action |
|---|---|---|
| Cracks | Hairline cracks or deep fissures | Fill with spackling compound and sand smooth |
| Holes | Small or large holes from previous fixtures | Fill with joint compound and sand smooth |
| Water Damage | Discoloration, warping, or soft spots | Perform moisture assessment and repair or replace affected area |
| Loose Paint | Flaking or peeling paint | Scrape off loose paint and sand smooth |
| Uneven Surface | Bumpy or wavy surface | Sand to smooth out surface |
If you find any damage, perform the necessary wall repair before moving forward with the installation. It's better to take the time to fix these issues now than to risk having your cabinet fall off the wall later. Remember, a solid wall is a happy wall – and a happy wall is one that can hold your cabinet securely.
Inspect Wall Studs
Since you've confirmed the wall is damage-free, it's time to prepare the wall surface by inspecting the wall studs. This step is vital, as it'll help you find the perfect spot to hang your wall-mounted cabinet. You don't want it to fall off, right?
To inspect the wall studs, you'll need to do some stud finding. Here's how:
-
Use a stud finder: This handy tool will help you detect the studs behind the drywall. You can find stud finders at any hardware store.
-
Knock gently: Knock on the wall gently with your knuckles. If it sounds hollow, it's likely a stud. If it sounds solid, it's probably a stud.
-
Check for electrical outlets: Outlets are usually attached to studs, so if you find one, you've found a stud.
- Measure stud spacing: Most studs are spaced 16 inches on center, but this can vary. Measure the distance between studs to verify you're installing your cabinet correctly.
Now that you've inspected the wall studs, you're ready to move on to the next step. Remember, taking the time to do this correctly will save you from a world of trouble later on.
Use a Level for Accuracy
From the get-go, ensuring your wall-mounted cabinet is perfectly level is essential, as even the slightest deviation can throw off the entire installation. You don't want your cabinet to look like it's leaning in for a whispered secret, do you? Level importance cannot be overstated, as it affects the overall aesthetic and functionality of your installation.
To achieve accuracy, you'll need to master some leveling techniques. Here are a few:
| Leveling Technique | Description |
|---|---|
| Bubble Level | Uses a small bubble to indicate when the surface is level |
| Laser Level | Projects a level line or dot onto the wall |
| Digital Level | Provides precise digital readings of the level |
When using a level, make sure to hold it steady and take your time. It's better to take multiple readings than to rush and end up with a wonky installation. Remember, a level cabinet is a happy cabinet!
Mark Drill Holes Correctly
You've taken the time to confirm your wall-mounted cabinet is level; now it's time to mark drill holes correctly. This vital step guarantees your cabinet installation goes smoothly and securely.
To avoid any mishaps, follow these essential marking techniques:
-
Choose the right drill bit: Select a drill bit that's specifically designed for your wall type (e.g., wood, drywall, or concrete). This will help you avoid damaging the wall or the cabinet.
-
Use a pencil, not a pen: A pencil mark is easier to erase if you make a mistake, whereas ink can leave permanent marks on your wall.
-
Mark in small increments: Divide the distance between the wall studs into smaller sections to guarantee accurate measurements.
- Double-check your marks: Verify your marks against your cabinet's installation instructions to avoid any mistakes.
Install Cabinets in Order
Now that you've accurately marked the drill holes, it's time to focus on installing your wall-mounted cabinets in the correct order. You don't want to be that person who installs the cabinets upside down or in the wrong spot (been there, done that, got the t-shirt). A well-planned installation sequence is key to achieving perfect cabinet alignment.
| Step | Action |
|---|---|
| 1 | Install the top cabinet first to create a reference point for the rest |
| 2 | Install the middle cabinets, working from top to bottom |
| 3 | Install the bottom cabinet last, ensuring it's level and secure |
Test and Adjust Cabinets
Your newly installed wall-mounted cabinets are taking shape, but it's vital to test and adjust them to guarantee a flawless finish.
This step is important, as it's easier to make adjustments now than after the project is complete.
To guarantee everything is perfect, follow these steps:
- Check cabinet alignment: Verify that all cabinets are level, plumb, and aligned with each other.
Even the slightest misalignment can be noticeable and affect the overall appearance.
- Make door adjustments: Adjust the doors to verify they're properly aligned, evenly spaced, and open smoothly.
You don't want any sticky doors or uneven gaps between them.
- Inspect the shelves: Verify that shelves are level, secure, and can hold the intended weight.
You don't want any sagging or collapsing shelves.
- Test the hardware: Check that all handles, knobs, and hinges are securely attached and functioning smoothly.
You don't want any loose or squeaky parts.
Frequently Asked Questions
Can I Install Cabinets on a Plaster Wall Without Extra Support?
You can install cabinets on a plaster wall without extra support, but don't be reckless! Use plaster wall anchors to secure the weight, ensuring even cabinet weight distribution; otherwise, you'll be left with a crumbled mess and a cabinet on the floor!
How Do I Handle Wall-Mounted Cabinets With Uneven Floor Levels?
You're dealing with wonky floors, huh? Don't sweat it! To handle wall-mounted cabinets on uneven floor levels, you'll need to conquer leveling techniques and cabinet shimming; think laser levels, spirit levels, and strategically placed shims to get everything straight and secure.
Do I Need to Hire a Professional for Complex Cabinet Installations?
You're wondering if you need a pro for complex cabinet installation? If you're not comfy with precise measurements, heavy lifting, or dealing with tricky wall types, don't risk it - hire a professional for a stress-free, error-free install.
Are There Any Specific Cabinet Installation Requirements for Rental Properties?
You're not alone in renting; 37% of Americans do! When installing cabinets in a rental, you'll need to check local rental regulations regarding cabinet weight and make certain it's securely fastened to avoid damage or liability issues.
Can I Use Wall-Mounted Cabinets in Areas With High Humidity or Moisture?
You're wondering if wall-mounted cabinets can handle humid or moist areas? Yes, you can, but you'll need to use moisture-resistant materials and implement humidity control measures to prevent damage and guarantee a successful installation that'll last.
Conclusion
You've finally made it to the end of this cabinet installation expedition! Congratulations, you've managed to avoid the most common mistakes that would've left your walls looking like a hot mess. But don't get too comfortable, those cabinets still need regular checks to guarantee they don't come crashing down. Remember, a successful installation is just the beginning - maintenance is key to keeping your wall-mounted cabinets looking fabulous for years to come!
Related Posts
-
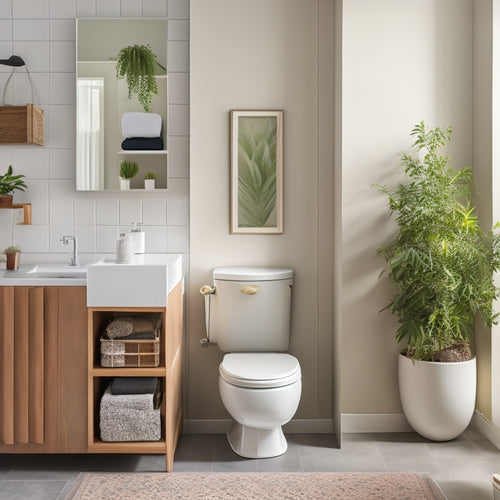
Over-The-Toilet Storage for Modern Homes
Over-the-toilet storage is a smart solution for modern homes, maximizing vertical space and enhancing organization. Y...
-
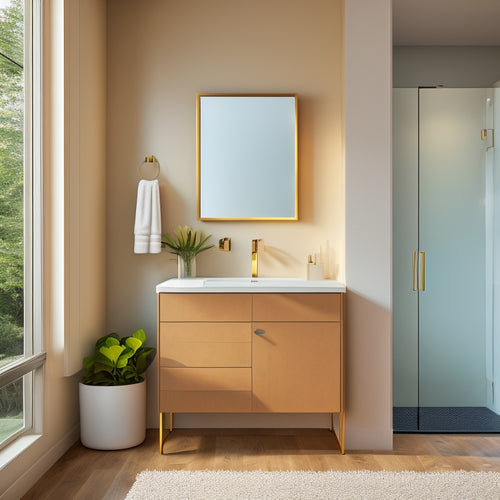
Efficient Bathroom Cabinet Solutions With Drawers
You'll be amazed at how cleverly designed bathroom cabinets with drawers can alter your morning routine, providing up...
-
Bathroom Planner Workbook Review: A Home Project Manager
The Bathroom Planner Workbook is a game-changer for homeowners seeking a stress-free bathroom remodel. This all-encom...


