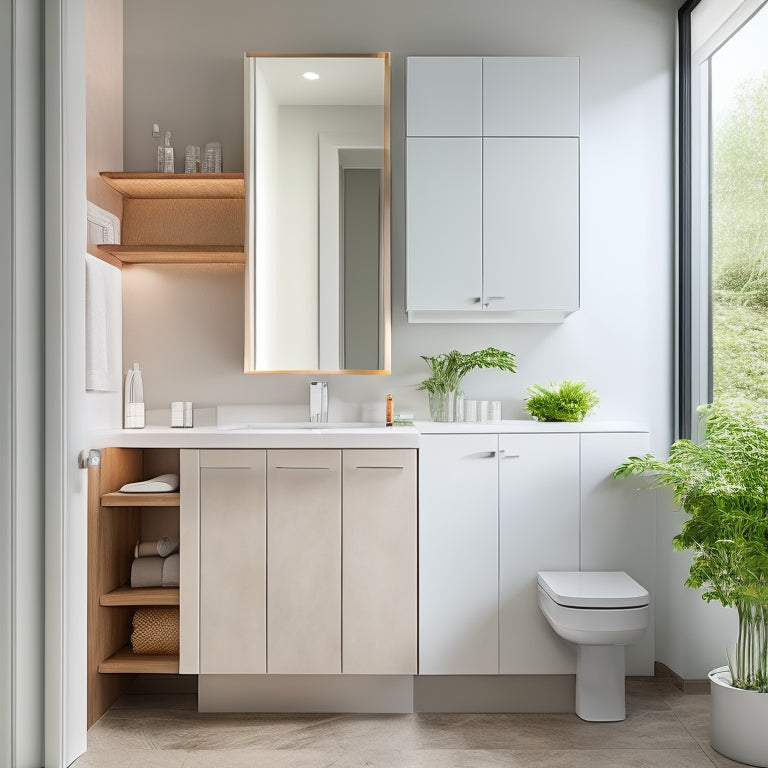
Wall Mount Bathroom Cupboard Installation Made Easy
You'll get your wall mount bathroom cupboard installation off to a great start by clearing the area, protecting your floors and surfaces, and evaluating your bathroom layout to maximize storage space. Next, choose a sturdy wall mount that fits your style, and select a cupboard that snugly fits your available space. Take accurate measurements, mark the wall carefully, and prepare for drilling by checking your wall type and selecting the right anchors or screws. With the right tools and a little planning, you'll be ready to tackle the installation process with confidence - and uncover how the little details can make all the difference.
Key Takeaways
- Clear the bathroom area of clutter and obstructions, and cover floors and surfaces with drop cloths or old sheets to prevent damage.
- Choose a sturdy wall mount and cupboard that fits the bathroom style, with dimensions that maximize storage space and accommodate plumbing fixtures.
- Take precise measurements of the wall space, including width, height, and distance from fixtures, to ensure accurate installation and avoid mistakes.
- Select the correct drill bits and anchors for the wall type, and drill safely with a level and stud finder to secure the wall mount bracket.
- Conduct a final inspection to ensure the cupboard is level, securely fastened, and aesthetically balanced in the bathroom space.
Preparing the Bathroom for Installation
Before you begin installing your wall mount bathroom cupboard, take a few minutes to prepare the bathroom. Clear the area around the installation site of any clutter, towels, or bathroom accessories that might get in the way. This will give you a clean slate to work with and prevent any damage to your belongings.
Next, cover your bathroom floor and any surrounding surfaces with drop cloths or old sheets to protect them from dust and debris. Remove any outlet covers and switch plates to prevent damage from power tools. If you have a pedestal sink or other obstructions, consider temporarily relocating them to create more space.
Good bathroom organization and storage solutions start with a well-planned installation. Take this opportunity to assess your bathroom's layout and think about how you want to maximize your storage space.
Consider the items you need to store and how you can optimize your cupboard's design to meet those needs. By taking the time to prepare your bathroom, you'll guarantee a smooth and successful installation.
Choosing the Right Wall Mount
Now that your bathroom is prepared for installation, you're ready to focus on selecting the right wall mount for your bathroom cupboard. This is an essential step, as the wall mount will be supporting the weight of your cupboard and its contents.
You'll want to choose a wall mount that's sturdy, reliable, and suitable for your bathroom's unique conditions. Material types are a key consideration. You'll need to decide between glass, metal, or wood, each with its own strengths and weaknesses.
Glass wall mounts are sleek and modern, but may not be suitable for high-moisture areas. Metal wall mounts are durable and easy to clean, but can be noisy. Wood wall mounts add a touch of warmth, but may require more maintenance.
Style options are also important. Do you prefer a minimalist aesthetic or a more ornate design? Consider the style of your bathroom and the overall look you're trying to achieve.
Will a wall mount with decorative trim fit in, or will a simple, clean-lined design work better? By assessing these factors, you'll find the perfect wall mount for your bathroom cupboard.
Measuring the Bathroom Space
You need to measure your bathroom space accurately to confirm a proper fit for your wall mount bathroom cupboard.
Take note of the bathroom's overall dimensions, as well as the space around fixtures like the sink, toilet, and shower.
You'll also need to record the exact measurements of the wall where the cupboard will be mounted to assure a precise fit.
Bathroom Dimensions Matter
Across from the sink, between the toilet and shower, your wall mount bathroom cupboard will occupy a specific footprint, making it vital to accurately measure the bathroom space.
You don't want to end up with a cupboard that's too small or too large for the area, ruining your bathroom style and compromising your storage solutions.
To get it right, grab your tape measure and take note of the following:
- The width of the wall: Confirm you have enough space for the cupboard and any surrounding decorative elements.
- The distance from the floor to the ceiling: This will help you determine the maximum height of your wall mount bathroom cupboard.
- The location of any electrical outlets or plumbing fixtures: You'll need to plan around these to avoid any installation headaches.
- The space available around the toilet and shower: Leave enough room for comfortable movement and to accommodate any nearby fixtures.
- The angle of any adjacent walls: This will affect the placement and installation of your cupboard.
Space Around Fixtures
Measuring the space around fixtures is essential to guarantee a seamless installation of your wall mount bathroom cupboard. You don't want your new cupboard to clash with existing fixtures, creating a bathroom that looks like a puzzle gone wrong. Ascertain you've got enough fixture clearance by measuring the distance between the wall and any obstructions, such as the sink, toilet, or shower. This will help you determine the ideal placement for your cupboard.
Next, consider the aesthetic balance of your bathroom. You want your cupboard to complement the existing fixtures, not stick out like a sore thumb. Measure the space between the fixtures and the wall to determine the perfect spot for your cupboard.
Don't forget to take into account any electrical outlets or plumbing fixtures that may be hidden behind the wall. By measuring the space around fixtures, you'll be able to install your wall mount bathroom cupboard with confidence, guaranteeing a beautiful and functional bathroom that's the envy of all your friends.
Wall Measurement Accuracy
Accurately measuring the bathroom space is essential to a successful wall mount bathroom cupboard installation. You can't just eyeball it and hope for the best, or you'll end up with a wonky cupboard that's more likely to collect dust bunnies than store your favorite toiletries.
To get it right, you'll need to break out your trusty measurement tools, including a tape measure, level, and pencil. Here's what to do:
-
Take precise measurements of the wall space, including the width, height, and any obstructions like plumbing or electrical outlets.
-
Use leveling techniques to guarantee your measurements are straight and true.
-
Record your measurements carefully, and double-check them to avoid mistakes.
-
Consider the size and shape of your wall mount bathroom cupboard, and plan its placement accordingly.
-
Don't forget to measure the distance between the floor and any nearby fixtures, like the sink or toilet, to guarantee a comfortable and functional layout.
Selecting the Ideal Cupboard Size
Selecting the Ideal Cupboard Size
Pick a wall mount bathroom cupboard that fits snugly into the available space by taking stock of your bathroom's dimensions. You'll want to take into account the width, height, and depth of the area where you plan to install the cupboard. This will guarantee you choose a cupboard that complements the space and meets your storage needs.
| Ideal Cupboard Dimensions | Cupboard Storage Options |
|---|---|
| 24" - 36" wide, 24" - 48" tall | Shelves, drawers, or a combination of both |
| 18" - 24" deep | Adjustable shelves, fixed shelves, or baskets |
| Custom sizes available | Custom storage solutions, such as medicine cabinets or linen storage |
When selecting your ideal cupboard size, remember to take into account the location of plumbing fixtures, electrical outlets, and any other obstacles that may impact installation. Don't forget to think about your storage needs – do you need a cupboard with shelves, drawers, or a combination of both? By taking the time to choose the right size and storage options, you'll end up with a functional and stylish wall mount bathroom cupboard that meets your needs.
Gathering Essential Installation Tools
Before you begin installing your wall mount bathroom cupboard, make sure you have all the necessary tools within arm's reach to avoid mid-project interruptions.
You don't want to be stuck halfway through the installation, scrambling to find the right tool.
Here's a list of essential tools you'll need to get the job done:
- Drill with screwdriver and drill bits (don't forget the wall anchors!)
- Level (to make certain your cupboard is straight and level - no wonky shelves!)
- Pencil and marker (for marking drill holes and cupboard placement)
- Tape measure (for double-checking those measurements)
- Safety glasses and a dust mask (safety precautions are no joke - protect those peepers and lungs!)
Marking the Wall for Drilling
You've gathered all the necessary tools, so now it's time to prepare the wall for drilling. It's vital to guarantee accurate wall alignment to avoid any costly mistakes.
Start by holding the cupboard against the wall, taking note of the desired position. Use a spirit level to guarantee the cupboard is perfectly horizontal, and a pencil to mark the spot where the screw will go. Make level markings on the wall, about 1-2 inches apart, to guide your drilling. These markings will help you maintain a straight line, guaranteeing your cupboard is installed perfectly level.
Next, use a ruler or straightedge to draw a faint line along the wall, connecting the marks. This line will serve as a reference point for drilling.
Take your time, and double-check your markings to avoid any errors. Remember, measuring twice and drilling once is always better than the alternative!
With your wall properly marked, you're ready to move on to the next step – drilling into the wall safely.
Drilling Into the Wall Safely
You'll need to prepare the wall properly before drilling to avoid damaging it or the surrounding area.
Choosing the right drill bit is also vital, as it can affect the accuracy and safety of the installation.
Wall Preparation Tips
When drilling into your bathroom wall to install your wall mount bathroom cupboard, it's essential to take necessary precautions to avoid damaging pipes, wires, or other hidden obstacles. You don't want to end up with a flooded bathroom or a short-circuited electrical system!
Before you start drilling, make certain you've prepared your wall properly. Here's what you need to do:
-
Check the type of wall you have: drywall, plaster, or tile. This will determine the type of anchor or screw you need to use.
-
Identify any areas with moisture resistance, such as around the shower or bathtub, and take extra precautions to guarantee your screws or anchors are suitable for these areas.
-
Turn off the power to the bathroom at the circuit breaker or fuse box to avoid electrical shock.
-
Use a stud finder to locate the wall studs and avoid drilling into them.
-
Clear the area around the drilling site of any clutter or obstructions to guarantee a safe and efficient drilling process.
Drill Bit Selection Guide
With your wall properly prepared, it's time to focus on selecting the right drill bit for the job. You don't want to be stuck with a drill bit that's as useful as a rubber screwdriver.
When it comes to drill bit types, you've got two main options: twist bits and masonry bits. Twist bits are perfect for drilling into drywall, wood, or metal, while masonry bits are designed for concrete, brick, or block.
Now, let's talk about drill bit materials. You've got your standard high-speed steel (HSS) bits, which are great for most drilling tasks.
Then there are tungsten carbide-tipped (TCT) bits, which are perfect for drilling into harder materials like concrete or brick. And if you're feeling fancy, you can opt for diamond-coated bits, which are ideal for drilling into tile or glass.
Hitting the Stud
One of the most critical steps in wall mount bathroom cupboard installation is drilling into the wall safely, and that means hitting the stud. You don't want your new cabinet crashing to the floor because you didn't find the stud.
To avoid this disaster, you'll need a trusty stud finder. This handy tool helps you locate the wooden beams behind the drywall, guaranteeing your screws have something solid to grip.
Here's what you need to do:
- Hold the stud finder flat against the wall and move it slowly in a horizontal direction.
- When the device beeps or lights up, you've found a stud.
- Mark the spot with a pencil, then repeat the process to find the next stud.
- Typically, studs are spaced 16 inches on center, but this can vary depending on the age and type of construction.
- Double-check your measurements to verify accurate stud spacing.
Installing the Wall Mount Bracket
Your wall-mounted bathroom cupboard's success hinges on a secure bracket installation. This is where you'll attach the bracket to the wall, so don't skimp on the details.
You've got two main bracket types to choose from: fixed and adjustable. Fixed brackets provide a sturdy hold, while adjustable ones offer flexibility in case your walls are wonky.
When selecting a bracket, verify it's designed for your cupboard's weight and size. Read the manufacturer's instructions, and take note of any specific installation requirements.
Now, onto the installation tips! Hold the bracket against the wall, using a level to verify it's straight. Mark the screw holes, then drill pilot holes to avoid damaging the wall.
Screw the bracket into place, making sure it's secure and even. Don't overtighten, as this can damage the wall or bracket. Finally, double-check the bracket's levelness and adjust as needed.
With a solid bracket installation, you're one step closer to a beautiful, wall-mounted bathroom cupboard.
Hanging the Bathroom Cupboard
Securely fastening the bathroom cupboard to the wall mount bracket is the final hurdle in achieving a stylish, wall-mounted bathroom storage solution.
Now, it's time to put all your design considerations and style options into practice.
To hang the cupboard, follow these essential steps:
- Hold the cupboard against the wall bracket, ensuring it's level and plumb.
- Locate the screw holes on the back of the cupboard and align them with the wall bracket's screw holes.
- Insert the screws and tighten them firmly, but avoid overtightening, which can damage the wall or the cupboard.
- Double-check the cupboard's levelness and make any necessary adjustments.
- Once the cupboard is securely fastened, test its stability by gently tugging on it.
Final Touches and Adjustments
You're almost done with the installation - now it's time to tighten any loose ends and make certain everything is secure.
Next, conduct a final check inspection to verify that the cupboard is level, plumb, and properly fastened to the wall.
This attention to detail will assure a safe and functional bathroom storage solution.
Tightening Loose Ends
The final stretch of the wall mount bathroom cupboard installation is within reach, and it's time to tackle those last-minute details.
You've made it this far, and now it's time to tie up any loose ends. This is your chance to guarantee everything is perfect before you step back and admire your handiwork.
Here's a quick checklist to help you tighten those loose ends:
- Double-check that all screws, hinges, and handles are securely fastened.
- Make sure the cupboard doors align properly and open smoothly.
- Inspect the cupboard's surface for any scratches or marks and touch them up if necessary.
- Verify that all shelves are level and securely attached to the wall.
- Take a step back and evaluate the design aesthetics – does everything look balanced and visually appealing?
Final Check Inspection
Your wall mount bathroom cupboard installation is nearly complete, with every component carefully fitted into place.
Now it's time for the final check inspection, where you verify everything is perfect and functional. Think of it as quality assurance – you're confirming that your hard work has paid off.
Start by visually inspecting the cupboard, checking for any misalignments or gaps. Make certain all doors and drawers open and close smoothly, and that the handles are securely attached.
Perform functionality testing by filling the shelves and drawers with items to simulate real-world usage. This will help you identify any potential issues with the weight capacity or stability of the cupboard.
Check the leveling and plumbness of the installation, verifying it's perfectly straight and even.
Finally, inspect the surrounding area for any debris or mess left behind during the installation process.
Frequently Asked Questions
Can I Install a Wall Mount Bathroom Cupboard on a Plasterboard Wall?
You can install a wall mount bathroom cupboard on a plasterboard wall, but you'll need plasterboard anchors to secure it; just verify the anchors can handle the cupboard's weight capacity, or you'll be left with a messy, crumbling mess!
How Do I Clean Behind the Installed Bathroom Cupboard?
Get down to brass tacks - cleaning behind your installed bathroom cupboard is key! Grab your trusty cleaning supplies and follow these maintenance tips: use a slim vacuum or duster to reach tight spaces, and wipe down surfaces with a damp cloth to keep it spick and span.
Are Wall Mount Bathroom Cupboards Suitable for High-Humidity Areas?
You're wondering if wall-mount bathroom cupboards can handle high-humidity areas. Yes, they can! Look for humidity-resistant materials, and follow installation tips like sealing gaps and using waterproof glue to guarantee your cupboard stays dry and functional.
Can I Use a Wall Mount Bathroom Cupboard in a Wheelchair-Accessible Bathroom?
You're wondering if a wall mount bathroom cupboard fits in a wheelchair-accessible bathroom? Absolutely! Just make certain the cupboard's height is between 34-40 inches from the floor to meet wheelchair accessibility standards, making it a breeze for everyone to access.
Do Wall Mount Bathroom Cupboards Come With a Built-In Mirror Option?
Are you tired of cluttered countertops? You're in luck! Many wall mount bathroom cupboards come with a built-in mirror option, offering a sleek look. When choosing, consider your mirror selection and follow installation tips to guarantee a seamless reflection of your style.
Conclusion
As you step back to admire your handiwork, you realize that the perfectly installed wall mount bathroom cupboard is more than just a functional addition - it's a demonstration of your ability to change a space. Coincidentally, the sense of accomplishment you feel is mirrored in the reflection staring back at you, a reflection that's now gazing into a bathroom that's not only more organized but also more beautiful.
Related Posts
-
Contemporary Mirrored Bathroom Cabinets for Homeowners
As you reimagine your bathroom, consider a contemporary mirrored cabinet that echoes your unique style, from sleek mo...
-
Contractor's Cost-Saving Tile Strategies and Designs
When tackling a tile project, I've learned that smart design decisions can lead to significant savings. By prioritizi...
-
Revamp Your Bathroom Storage: Declutter and Organize
You're tired of the cluttered countertops, messy drawers, and chaotic cabinets stealing your bathroom's serenity. It'...


