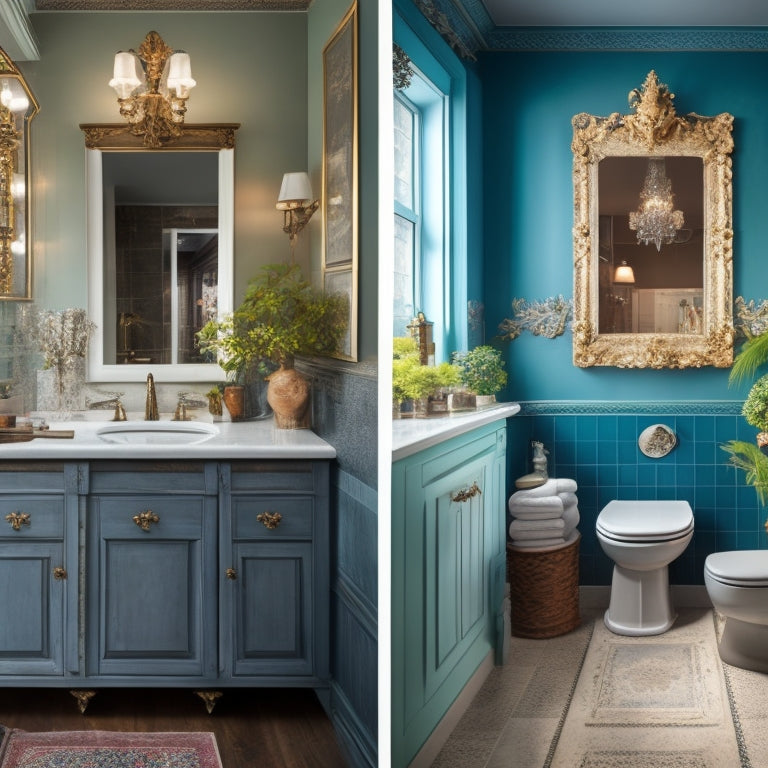
Build Your Bathroom Vanity in 10 Easy Steps
Get started on building your dream bathroom vanity by preparing the workspace, clearing clutter and protecting surfaces. Next, take precise measurements of the area, marking the space for the new vanity. Then, choose your vanity top material and cut it to fit, ensuring a level surface. Assemble the vanity base, installing shelves and securing components. Move on to installing the sink and faucet, followed by countertops, cabinets, and plumbing fixtures. Finally, add the finishing touches with mirrors and lighting, and conduct a quality inspection. With these steps, you'll be well on your way to creating a bathroom oasis that reflects your personal style, and with the right guidance, you'll be able to bring your vision to life.
Key Takeaways
- Prepare the bathroom workspace by clearing clutter, protecting floors, and organizing tools and materials for safety and efficiency.
- Measure the bathroom area and vanity space precisely, accounting for obstructions, to avoid errors and ensure a proper fit.
- Choose the right vanity top material, such as marble, quartz, or laminate, considering maintenance, cost, and design inspiration.
- Construct the vanity base frame using 2x4 lumber, ensuring it's square and level, and attach shelf boards for adequate storage space.
- Install the vanity top, sink, and faucet, following manufacturer instructions and ensuring proper plumbing connections to prevent leaks.
Prepare the Bathroom Workspace
Clear the bathroom of any clutter, towels, and toiletries to create a safe and efficient workspace. You don't want to trip over a hair dryer or slip on a soap dish while wielding power tools.
Cover the floor and any surrounding surfaces with drop cloths or plastic sheets to protect them from dust and debris. Move any furniture away from the area, and consider setting up a temporary workstation or table to hold your tools and materials.
Next, organize your tools and materials in a logical and accessible way. Designate a specific area for tool storage, like a portable toolbox or a bucket with dividers.
Keep frequently used items, like your tape measure and level, in easy reach. Consider investing in a pegboard or hooks to hang items like your drill and saw.
Good workspace organization will save you time and frustration in the long run. By creating a well-organized workspace, you'll be able to focus on the task at hand – building your dream bathroom vanity.
Measure and Mark the Area
Measure and Mark the Area
You've got your bathroom workspace prepped and ready to go - now it's time to get down to business! This step is all about precision, so grab your trusty tape measure and a pencil. Measure the entire bathroom area, taking note of any obstructions like plumbing fixtures, electrical outlets, or windows.
Don't forget to measure the space where your new vanity will sit, including the width, depth, and any clearance requirements. As you measure, think about your space planning and design inspiration. Where do you want the sink to be? How much counter space do you need?
Take your time and make sure to double-check your measurements - you don't want any surprises down the line. Mark the area where your vanity will go, using a pencil to draw a rough outline. This will give you a visual of your design and help you plan the rest of your project.
With your measurements and markings in place, you're one step closer to building the bathroom vanity of your dreams!
Cut the Vanity Top
You'll need to choose a vanity top material that suits your style and budget, whether it's granite, marble, or a more affordable option like laminate or solid surface.
Before making the cut, double-check your measurements to guarantee an exact fit, as mistakes can be costly and time-consuming to fix.
With your measurements in hand, it's time to select the right cutting tool for the job, such as a circular saw or a jigsaw, and make precise cuts to achieve a professional-looking result.
Vanity Top Materials
With the vanity cabinet in place, attention turns to the vanity top, an essential component that demands careful consideration of material selection. You're spoiled for choice, but let's break it down.
Marble and granite are luxurious options, but they're high maintenance. Quartz countertop options offer durability and low maintenance, but can be pricey. If you're eco-friendly, investigate sustainable materials like recycled glass or bamboo. On a budget? Laminate finishes can mimic the look of natural stone at a fraction of the cost.
When selecting your material, consider installation tips like ensuring a level surface and using the right adhesive.
Post-installation, maintenance advice includes sealing natural stone, cleaning quartz regularly, and avoiding harsh chemicals on laminate.
Measure Twice Exactly
Now that you've selected your vanity top material, it's time to guarantee a precise fit. You don't want to end up with a top that's too big or too small for your bathroom vanity. To avoid this, you need to take accurate measurements.
Begin by gathering your tool selection, including a tape measure, carpenter's square, and calculator. Take precise measurements of the vanity cabinet, including the width, length, and any obstructions like plumbing fixtures or electrical outlets. Record these measurements carefully, and double-check them to avoid errors.
When taking measurements, use tried-and-true techniques like measuring from the wall to the center of any obstructions, and from the floor to the top of the vanity cabinet.
Don't forget to account for any overhang or lips on the vanity top. With accurate measurements in hand, you can confidently cut your vanity top to fit your bathroom like a glove.
Cutting Edge Tools
Two essential tools will help you achieve a precise cut: a circular saw and a jigsaw.
These smart tools will make quick work of your vanity top, ensuring a professional-looking finish.
When using your circular saw, set the blade to the correct depth and angle, and make slow, deliberate passes through the material. This will help prevent splintering and give you a clean cut.
For curved cuts or intricate designs, break out your jigsaw. Its versatility and precision will make it your go-to tool for these tasks.
Assemble the Vanity Base
You'll start building your vanity base by constructing the frame using 2x4 lumber, ensuring it's square and level.
Next, attach the shelf boards to the frame, spacing them evenly to accommodate your storage needs.
Make sure to use wood screws and wood glue to secure the components, following the manufacturer's instructions for assembly.
Vanity Base Construction
The vanity base construction process begins with preparing the floor for the installation.
You'll need to make sure the floor is level, clean, and dry. Check for any unevenness and fill in gaps with a self-leveling compound.
Once the floor is ready, it's time to choose your vanity base materials. You can opt for stock or custom designs made from solid wood, MDF, or engineered wood.
Consider the style you're aiming for – modern, traditional, or a mix – to select the right materials and design. For example, a modern look might call for a sleek, low-profile base, while a traditional style might require ornate carvings and raised panels.
When selecting vanity base styles, think about the overall aesthetic you want to achieve.
Will it be wall-mounted or floor-standing? Do you want a single-sink or double-sink configuration? Answering these questions will help you narrow down your options and guarantee your vanity base construction goes smoothly.
With your materials and design in hand, you're ready to start building.
Base Assembly Essentials
With your materials and design in hand, it's time to start building the vanity base. You've selected your materials, now it's time to assemble them into a sturdy base. Remember, a strong base is essential to a functional and long-lasting vanity.
Begin by constructing the frame using 2x4s or 2x6s, depending on your design. Use joinery techniques such as mortise and tenon or dado joints to create a solid structure. Verify your corners are square and your frame is level.
Next, attach the side panels and shelves, if your design includes them. Choose a material that complements your vanity top and style, such as MDF, plywood, or solid wood.
Apply wood glue and use screws or nails to secure the panels. Confirm to align them properly to avoid gaps or uneven surfaces.
Install the Sink and Faucet
Frequently, the most challenging part of building a bathroom vanity is installing the sink and faucet, as it requires precision and attention to detail. But don't worry, with the right guidance, you'll be a pro in no time!
When choosing your sink, consider the space and style you're aiming for. You've got options like undermount, topmount, or vessel sinks. Each has its pros and cons, so weigh them carefully.
| Sink Options | Faucet Styles |
|---|---|
| Undermount | Single-handle |
| Topmount | Centerset |
| Vessel | Widespread |
| Wall-mount | Touchless |
| Pedestal | Two-handle |
Now, let's get to the installation. First, attach the faucet to the sink according to the manufacturer's instructions. Then, secure the sink to the vanity top using the provided hardware. Make sure everything is level and plumb before tightening those screws. Finally, connect the water supply lines to the faucet, and you're done!
Add the Mirrors and Lighting
Most bathroom vanities require at least one mirror, and often benefit from additional lighting to create a bright, welcoming space.
You've got a few options when it comes to mirror types, from simple, frameless glass to ornate, decorative mirrors with intricate carvings. Reflect on your personal style and the overall aesthetic of your bathroom when making your selection.
When it comes to lighting, there are several styles to choose from, including:
- Overhead lighting: Install a central light fixture above the mirror to provide overall illumination.
- Task lighting: Add sconces or under-cabinet lights to provide focused lighting for grooming and other tasks.
- Ambient lighting: Use LED strips or other subtle lighting sources to create a relaxing, spa-like atmosphere.
Remember to reflect on the type of lighting you need, as well as the color temperature and brightness, to create a space that's both functional and inviting.
Install the Countertops
You've got several countertop options to choose from, each with its own set of benefits and drawbacks. From durable granite to stylish quartz, the right countertop material can enhance your bathroom vanity's aesthetic and functionality.
Once you've selected your preferred material, it's time to prep for installation. Measure your vanity's surface area to guarantee a precise fit. Clean and dry the surface to prevent any adhesives from failing.
If you're working with a solid surface countertop, apply a bead of silicone adhesive along the edges. For laminate or stone countertops, use a two-part epoxy adhesive. Follow the manufacturer's instructions for application and drying times.
When applying the countertop, start at the center and work your way outward to prevent air bubbles. Use a level to make certain the surface is even and a rubber mallet to tap it into place.
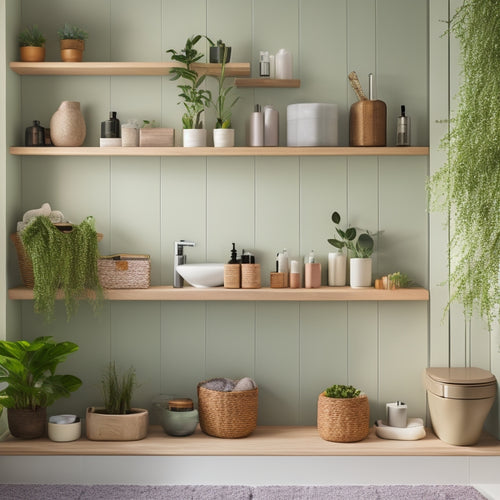
Add the Cabinets and Shelves
With your new countertop in place, it's time to add the cabinets and shelves that will provide essential storage and functionality to your bathroom vanity.
This is where you get to decide on the style and functionality that fits your needs.
You'll need to choose from various cabinet styles, such as modern, traditional, or shaker, depending on the aesthetic you're going for.
When it comes to shelf materials, you can opt for glass, wood, or metal, each with its own unique benefits.
Here are three things to take into account when adding cabinets and shelves:
- Measure twice, install once: Double-check your measurements to guarantee a seamless installation process.
- Choose the right hardware: Pick hinges, knobs, and handles that complement your cabinet style and are easy to use.
- Plan for adjustable shelves: Think about adding adjustable shelves to accommodate different sizes of toiletries and storage containers.
Install the Plumbing Fixtures
Now that your cabinets and shelves are in place, it's time to focus on the plumbing fixtures that will bring functionality to your bathroom vanity. This is where the magic happens, and your DIY project starts to feel like a real bathroom.
You'll need to gather your plumbing materials, including pipes, fittings, and valves. Take a deep breath and get ready to get your hands dirty.
Start by installing the faucet, making sure it's centered and secure. Next, move on to the sink drains and pop-up assembly. Don't forget to attach the water supply lines to the faucet - it's easy to overlook this step, but trust us, you won't want to!
When choosing your fixture types, consider low-flow options to save water and reduce your environmental impact. You might also want to think about touchless or sensor-activated faucets for a sleek, high-tech look.
Whatever you choose, make sure it's compatible with your sink and vanity style. With a little patience and attention to detail, you'll be washing your hands in no time!
Final Touches and Inspection
From the cabinet's interior to the sink's edge, every detail counts in this final stage of your bathroom vanity project.
You've worked hard to get to this point, and now it's time to add the finishing touches.
Start by ensuring all screws, handles, and knobs are securely in place. Then, perform a quality inspection to identify any imperfections or areas that need adjustment.
Here are three key areas to focus on:
-
Caulk and sealants: Inspect the joints and seams for any gaps or cracks, and apply caulk or sealants as needed to create a watertight seal.
-
Hardware alignment: Double-check that all hardware, such as drawer pulls and door handles, are properly aligned and securely attached.
-
Final cleaning: Give your vanity a thorough cleaning to remove any dust, dirt, or debris that may have accumulated during the construction process.
Frequently Asked Questions
Can I Use Reclaimed Wood for My Bathroom Vanity?
You can totally use reclaimed wood for your bathroom vanity, but first, you'll need to treat it right with wood treatment techniques to bring out its natural beauty and reap the reclaimed wood benefits, like unique character and eco-friendliness.
How Do I Ensure the Vanity Is Level on Uneven Floors?
Did you know 75% of homeowners have uneven floors? You're not alone! To guarantee your vanity is level, use leveling techniques like shims or foam wedges, and consider adjustable legs for a stress-free installation that'll leave you feeling flush with success!
Are There Specific Types of Paint for Bathroom Vanities?
You'll want to choose paints specifically designed for bathroom vanities, offering moisture resistance and durable finishes like epoxy, acrylic, or polyurethane, to guarantee your creation withstands humidity and daily wear, while looking fabulous, not frazzled!
Can I Install a Bathroom Vanity Without a Plumber?
You're a DIY rockstar, but don't get too cocky - installing a bathroom vanity without a plumber requires careful planning and DIY plumbing know-how; make certain you understand local codes and regulations to avoid a flooded mess!
Are There Any Specific Electrical Considerations for Lighting?
When you're planning bathroom lighting, you'll want to contemplate placement carefully to avoid harsh shadows and guarantee electrical safety - don't risk zapping yourself, okay?
Conclusion
You've maneuvered the twists and turns of building your bathroom vanity, and now you've reached the finish line. Your creation stands tall, like a masterpiece in a newly renovated gallery. The sink and faucet shine like polished jewels, while the cabinets and shelves provide a sense of organized harmony. As you step back to admire your handiwork, the plumbing fixtures hum in the background, a orchestration of functionality. Your bathroom vanity is now a reflection of your skill and creativity, a true work of art.
Related Posts
-

Innovative Hidden Storage for Modern Bathrooms
You're investing in a modern bathroom that's a serene oasis, and ample hidden storage is essential to maintaining tha...
-
Wall-Mounted Shelves for Bathroom Organization
Wall-mounted shelves can completely alter your bathroom into an organized oasis. By maximizing vertical space, you cr...
-
Revamp Your Coffee Station With Free Print
Revamp your coffee station with a combination of functional organization and stylish decor. Start by optimizing your ...


