
How to Install a Bathroom Shelf in Wall
To install a bathroom shelf in a wall, start by preparing the wall surface by cleaning and filling any cracks or holes. Choose a shelf type that suits your bathroom's aesthetic and durability needs. Measure the wall space, noting any obstacles, and record the measurements to guarantee accurate placement. Mark the wall for drilling, using a level and pencil, and then drill pilot holes safely. From there, install the shelf brackets, attach the shelf, and add decorative trim if desired. Once complete, perform a final check to confirm the shelf is secure, level, and properly aligned - and that's just the beginning of your expedition to a perfectly installed bathroom shelf.
Key Takeaways
- Prepare the wall by cleaning, inspecting for cracks, and filling holes to ensure a smooth surface for shelf installation.
- Choose a shelf type that fits your bathroom aesthetic, considering material durability against moisture and cleaning products.
- Measure the wall space accurately, noting obstacles and ideal shelf height, to ensure proper placement and avoid mistakes.
- Drill pilot holes safely using the correct drill bit and techniques to avoid wall damage and ensure secure anchor placement.
- Install shelf brackets and attach the shelf, ensuring level alignment, secure screwing, and weight capacity compliance for stability.
Preparing the Wall for Installation
Before you begin installing your bathroom shelf, make certain the wall is ready for it. You don't want your new shelf to fall off the wall, do you? That'd be a real mess! So, let's get started with wall preparation.
Clean the wall surface thoroughly with a damp cloth to remove any dirt, grime, or soap scum. You'd be surprised what kind of gunk can accumulate on your walls!
Make sure to wipe it clean, especially around the area where you'll be installing the shelf.
Next, inspect the wall for any cracks or holes. If you find any, fill them with spackling compound and sand it smooth.
You want a smooth surface for your shelf to adhere to.
Choosing the Right Shelf Type
You'll need to select a shelf style that fits your bathroom's aesthetic, considering options like floating, wall-mounted, or recessed shelves.
When choosing a shelf material, you'll want to factor in durability against moisture, humidity, and cleaning products, as well as its resistance to scratches and fading.
Shelf Style Options
Frequently, homeowners overlook the significance of selecting the right shelf style for their bathroom, which can greatly impact the overall aesthetic and functionality of the space. You're about to make an important decision, so don't rush it! Shelf style options are abundant, and it's vital to take into account your bathroom's unique needs and your personal taste.
You've probably noticed the current shelf design trends, which often feature clean lines, minimal ornamentation, and an emphasis on functionality. Floating shelf styles are particularly popular, as they create the illusion of more space and add a touch of modernity to your bathroom.
However, you may prefer a more traditional look, with ornate carvings or decorative trim. Perhaps you're aiming for a rustic, country vibe or a sleek, industrial feel. Whatever your style, it's important to choose a shelf that complements your bathroom's existing fixtures and décor.
Take your time, and don't be afraid to examine different options. You can browse online, visit showrooms, or even create a Pinterest board to get a sense of what works for you.
Material Durability Factors
When it comes to selecting the right shelf type for your bathroom, durability is an essential factor to evaluate, especially given the humid environment and potential exposure to water.
You don't want your shelf to turn into a soggy, warped mess after a few months. To guarantee your shelf withstands the test of time, consider the shelf materials and their durability ratings.
Glass shelves, for instance, are highly resistant to water and humidity, making them an excellent choice for bathrooms. They also boast high durability ratings, often ranging from 8 to 10 out of 10.
Stainless steel shelves are another durable option, with ratings between 7 to 9 out of 10. They're also resistant to corrosion and easy to clean.
On the other hand, wood and MDF shelves may not be the best options for bathrooms, as they're more prone to water damage and have lower durability ratings (typically 4 to 6 out of 10).
If you do choose a wood or MDF shelf, make certain to apply a waterproof coating to protect it from moisture.
Measuring the Wall Space
Measuring the Wall Space
You're about to get up close and personal with your bathroom wall. Take out that trusty tape measure and get ready to assess the wall's stability. You want to guarantee that your shelf won't come crashing down the moment you hang your favorite toilet paper holder.
Start by measuring the width of the wall where you plan to install the shelf. Make note of any electrical outlets, plumbing, or other obstacles that might affect the shelf's placement.
Next, determine the ideal shelf height. Consider the average height of the users and the type of items you'll be storing. Generally, a shelf between 30 and 40 inches from the floor is a good starting point.
But hey, you do you – just make certain it's not too high or too low for your bathroom habits.
Remember to check the wall's stability by gently tapping on it with your knuckles. If it sounds hollow, you might need to consult with a pro or consider a different location.
You don't want your shelf to end up like a failed soufflé – a sad, flat mess.
Marking the Wall for Drilling
You'll now use your wall measurement checklist to identify the exact spots where you'll drill into the wall.
Refer to your drill bit selection guide to guarantee you're using the correct bit type and size for your shelf's screws.
Next, you'll employ accurate marking techniques, such as using a level and a pencil, to precisely mark the wall where you'll drill.
Wall Measurement Checklist
Before marking the wall for drilling, make sure you've gathered essential information by completing a wall measurement checklist. This vital step guarantees your shelf is installed at the perfect height and securely fastened with the right wall anchors.
To complete your checklist, measure and record the following:
| Measurement | Description | Value |
|---|---|---|
| Shelf Height | Distance from floor to shelf bottom | |
| Wall Thickness | Distance from wall surface to stud | |
| Anchor Spacing | Distance between wall anchors |
Double-check your measurements to avoid costly mistakes. Remember, it's better to be safe than sorry (or in this case, better to be precise than patching up holes).
Once you've gathered these essential measurements, you'll be ready to mark the wall for drilling. With your checklist complete, you'll have the confidence to move forward with the installation process, knowing your shelf will be securely fastened and perfectly positioned.
Drill Bit Selection Guide
Selecting the right drill bit is essential for creating clean, precise holes that accommodate your wall anchors securely.
You don't want to end up with a mess on your hands or, worse, a shelf that won't stay put.
When it comes to drill bits, you've got options. Here are the essentials to take into account:
- Twist bits: General-purpose bits for drilling into wood, metal, and plastic.
- Masonry bits: Tough guys for drilling into concrete, brick, or block.
- Tile bits: Specialized bits for drilling into ceramic or porcelain tile without cracking it (fingers crossed!).
- Step bits: Versatile bits that can drill multiple hole sizes with a single bit.
- Cobalt bits: High-speed bits for drilling into hard metals like stainless steel.
Accurate Marking Techniques
With the right drill bit in hand, now it's time to focus on marking the wall accurately for drilling. This is where precision meets patience, so take a deep breath and get ready to channel your inner perfectionist.
To guarantee accurate marking, gather your trusty marking tools, such as a level, a pencil, and a straightedge or ruler. Use the level to confirm your wall is straight (no wonky walls allowed!).
Next, hold the straightedge or ruler against the wall, aligning it with the spot where you want to drill. Gently press the pencil against the wall, creating a faint mark.
For added accuracy, employ alignment techniques like creating a "V" or an "X" at the mark. This will help you visualize the drill bit's path and prevent any wobbles.
Double-check your mark, taking a step back to admire your handiwork. If it's on point, you're ready to drill. If not, well, it's back to the drawing board (or wall, in this case).
Drilling Pilot Holes Safely
Frequently, DIYers rush into drilling pilot holes without proper preparation, leading to mistakes and potentially damaging their bathroom walls.
Don't be that DIYer! Take a deep breath, and let's get it right. Drilling pilot holes safely is vital for a successful bathroom shelf installation.
To avoid drilling disasters, follow these essential tips:
- Choose the right drill bit: Select a bit that's specifically designed for your wall type (drywall, tile, or plaster).
- Wear safety goggles: Protect those peepers from debris and dust.
- Mark the spot: Double-check your marks from the previous step to guarantee accuracy.
- Hold the drill steady: Keep your hand firm and steady to avoid wobbling.
- Drill slowly and smoothly: Apply gentle, consistent pressure to avoid splitting the wall or creating uneven holes.
Installing the Shelf Brackets
You've successfully drilled pilot holes, and now it's time to secure the shelf brackets. This is where the magic happens, and your shelf starts taking shape.
First, take the bracket type suitable for your shelf weight and insert the screw into the pilot hole. Make sure it's aligned properly to avoid any wobbles or unevenness.
Gently screw the bracket into the wall, ensuring it's snug but not overtightened. You don't want to damage the wall or the bracket.
Take a step back and admire your handiwork – you've got one bracket securely in place!
Now, repeat the process for the second bracket, making sure it's level and even with the first one.
Attaching the Shelf to Brackets
Now that both shelf brackets are securely in place, it's time to attach the shelf itself. Make certain the shelf is level and aligned with the brackets using shelf alignment techniques such as a spirit level or a laser level.
Place the shelf onto the brackets, confirming it's centered and evenly spaced. Before tightening the screws, double-check the shelf's position and make any necessary adjustments. Once you're satisfied, tighten the screws firmly but avoid overtightening, which can damage the shelf or brackets.
Some important things to keep in mind when attaching the shelf to brackets:
- Always check the bracket weight limits to verify they can support the weight of the shelf and its intended contents.
- Use screws specifically designed for the type of shelf and bracket material you're working with.
- Avoid overloading the shelf, as this can cause it to collapse or the brackets to fail.
- Use a drill with a screwdriver bit to drive the screws, rather than a manual screwdriver.
- If you're unsure about any part of the process, consider consulting a professional or the manufacturer's instructions.
Adding Decorative Trim (Optional)
With the shelf securely attached to the brackets, you can proceed to add a decorative trim to conceal any visible edges or screws, giving your bathroom shelf a finished look. This step is optional, but trust us, it's worth the extra effort – it's like adding a cherry on top of your bathroom shelf sundae!
Choose a trim style that complements your bathroom's décor. You can opt for a simple, clean-lined trim or a more ornate, decorative one. Consider the color coordination, too. You can match the trim to the shelf, the wall, or even the bathroom's fixtures.
Measure the length of the shelf and cut the trim to size using a miter saw or a coping saw. Apply a thin layer of adhesive to the back of the trim and press it firmly onto the shelf, ensuring it's aligned with the edges. Hold the trim in place for a few seconds to secure the bond.
Repeat this process for the remaining edges, and voilà! Your bathroom shelf now has a polished, professional look.
Final Check and Touch-Ups
Take a step back and inspect your handiwork to verify everything is in order.
Double-check that the shelf is level, securely fastened to the wall, and can hold the intended weight. You don't want your fancy new shelf to come crashing down the moment you put a few toiletries on it.
Here's a final checklist to confirm a job well done:
- Verify the shelf weight doesn't exceed the recommended capacity to avoid any accidents.
- Confirm the wall alignment is accurate, and the shelf is perfectly horizontal.
- Check for any gaps between the shelf and the wall, and fill them with caulk or spackling compound to create a seamless look.
- Make sure all screws, nails, or adhesive are hidden from view to maintain a clean aesthetic.
- Take a step back and admire your handiwork – you've earned it!
With these final checks in place, you can rest easy your bathroom shelf is installed correctly and safely.
Now, go ahead and start decorating – you've got a brand new shelf to fill!
Frequently Asked Questions
Can I Install a Bathroom Shelf in a Shower or Bathtub Area?
You're wondering if you can install a bathroom shelf in a shower or bathtub area? Yes, you can! Opt for water-resistant shower shelf options and durable bathtub shelf materials, like glass or stainless steel, to guarantee a safe and stylish addition to your wet zone.
How Do I Clean the Shelf to Prevent Water Spots and Mildew?
To prevent water spots and mildew, you'll clean your shelf regularly! Choose gentle cleaning solutions suitable for your shelf materials (glass, metal, or wood). Mix with water, spray, and wipe clean with a microfiber cloth - voila, sparkling shelf, no mildew in sight!
Are Bathroom Shelves Suitable for Holding Heavy Decorative Items?
You're wondering if your fancy decorative items will come crashing down, aren't you? Check the shelf's weight capacity and materials; if it's sturdy and made of durable stuff like solid wood or metal, it can likely handle the weight, but always double-check!
Can I Paint or Stain the Shelf to Match My Bathroom's Color Scheme?
You can totally customize your shelf's look by painting or staining it to match your bathroom's style. Check the shelf materials first, though - some may require special prep or have limited color options, so don't get too creative just yet!
Do I Need to Hire a Professional for This Installation Project?
Are you a DIY rockstar or a hammer-wielding hazard? If you're comfortable with basic tools needed and can follow installation tips, you can tackle this project solo, but if not, it's better to call in the pros to avoid a wall-based catastrophe!
Conclusion
Now that you've successfully installed your bathroom shelf, take a step back to admire your handiwork, much like a Renaissance artisan contemplating their latest masterpiece. Verify all screws are tightened and the shelf is level. Double-check that the shelf can support the intended weight. Finally, add your decorative touches and revel in the fruits of your labor - a sleek, modern bathroom shelf that's both functional and aesthetically pleasing.
Related Posts
-
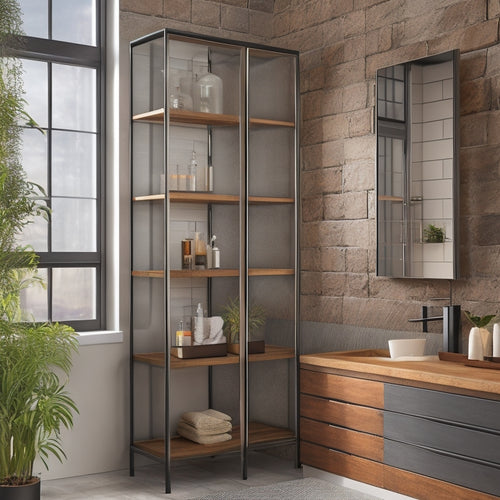
Tall Industrial Bathroom Cabinet for Narrow Spaces
A tall industrial bathroom cabinet is your solution for narrow spaces, combining style with practicality. It reaches ...
-
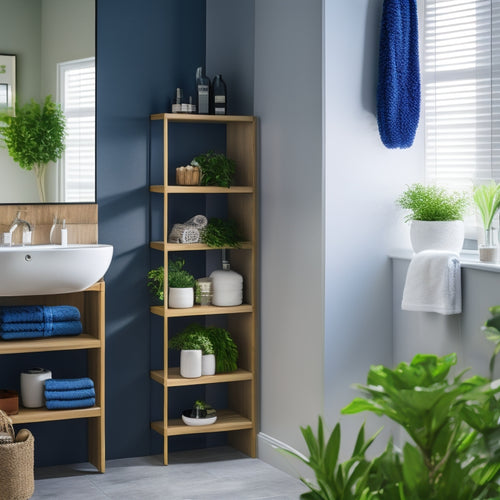
Waterproof Corner Storage Solutions for Bathrooms
Waterproof corner storage solutions are perfect for maximizing space in your bathroom. These stylish options employ u...
-
Revamp Your Bathroom Storage: Declutter and Organize
You're tired of the cluttered countertops, messy drawers, and chaotic cabinets stealing your bathroom's serenity. It'...


